33
OHA148
7. Disconnect taillight from wiring harness and cut any
cable ties holding harness to upper frame. Note loca-
tions of cable ties for assembly and move harness out
of the way.
8. To remove upper frame, remove upper bolts holding
rear shocks to frame. Remove four cap screws hold-
ing rear upper frame to lower frame and four (two on
right, two on left side) bolts holding front upper
frame to frame. Remove upper frame.
NOTE: Muffler can remain attached to upper
frame when removing frame.
OHA116
OHA117
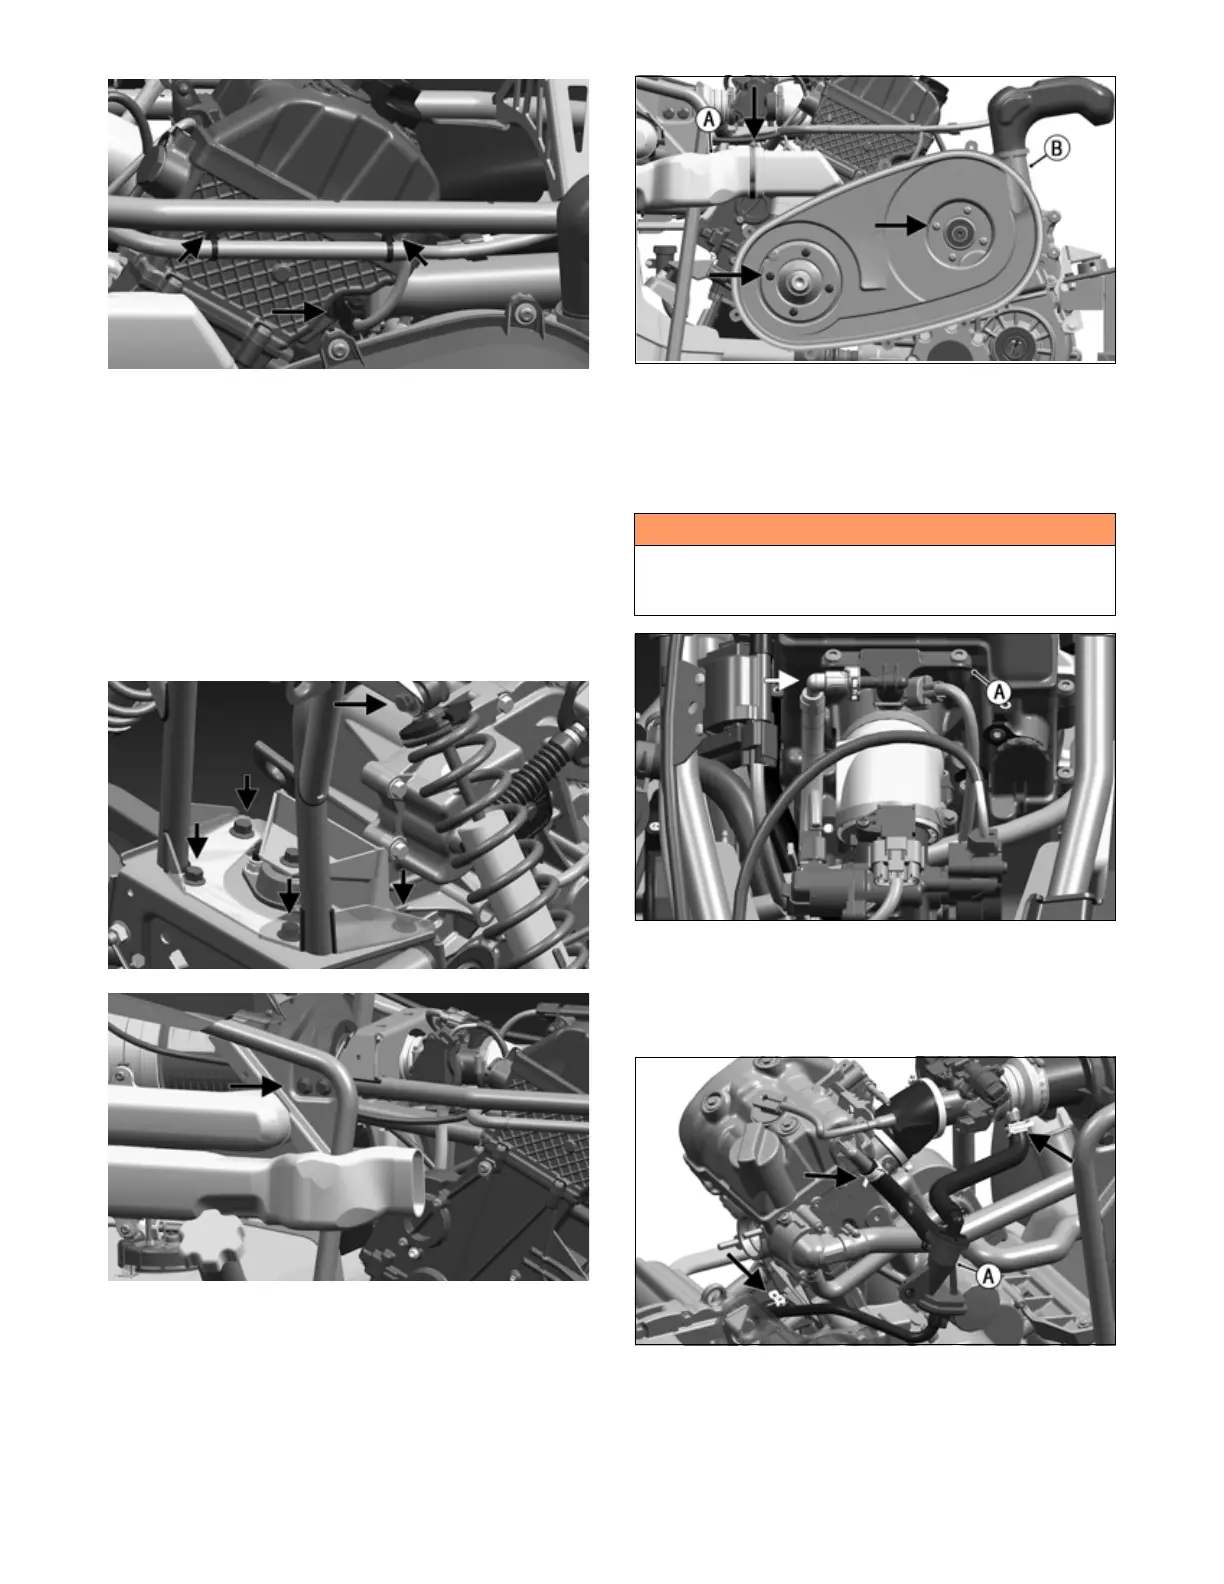
9. Remove clutch cover and clutch (see Removing
Drive and Driven Clutch sub-section in
Engine/Transmission section).
10. Remove clamp holding the clutch air inlet duct to air
intake duct (A) and remove intake duct. Remove
eight screws holding inner clutch cover and remove
inner clutch assembly (B).
OHA136
11. Remove the nut securing the starter motor cable to
the motor.
12. Slowly disconnect the gasline hose connector from
the fuel rail (A).
OHA076
13. Remove hose clamp securing each of the two crank-
case vent hoses to engine, then remove hose clamp
securing vent return hose to manifold intake and
remove cyclone assembly (A).
OHA137
14. Remove the two screws securing the air filter hous-
ing, located in the glove box.
15. Remove engine side clamp holding manifold intake
(A), then slide intake assembly forward until mani-
fold intake is disengaged from engine.
! WARNING
Gasoline may be under pressure. Place an absorbent
towel under the connector to absorb any gasoline spray
when disconnecting.