43
LYC029A
2. From the top of cylinder head, install valve seal (D).
Then install lower spring retainer (E) and the valve
spring (A).
NOTE: It is advisable to use a valve stem seal pro-
tective sleeve for a 5.5 mm valve shaft when installing
the valve seal (D).
3. Place a spring cup (C) over the valve spring; then
using the valve spring compressor, compress the
valve spring and install the valve keepers (B).
LYC028
LYC027
CYLINDER HEAD ASSEMBLY
NOTE: If the cylinder head cannot be trued, the
cam bridge and cylinder head must be replaced as an
assembly.
Cleaning/Inspecting Cylinder Head
1. Using a non-metallic carbon removal tool, remove
any carbon buildup from the combustion chamber
being careful not to nick, scrape, or damage the com-
bustion chamber or the sealing surface.
2. Inspect the spark plug hole for any damaged threads.
3. Place the cylinder head on the Surface Plate covered
with #400 grit wet-or-dry sandpaper. Using light
pressure, move the cylinder head in a figure-eight
motion. Inspect the sealing surface for any indication
of high spots. A high spot can be noted by a bright
metallic finish. Correct any high spots before assem-
bly by continuing to move the cylinder head in a fig-
ure-eight motion until a uniform bright metallic
finish is attained.
LYC032
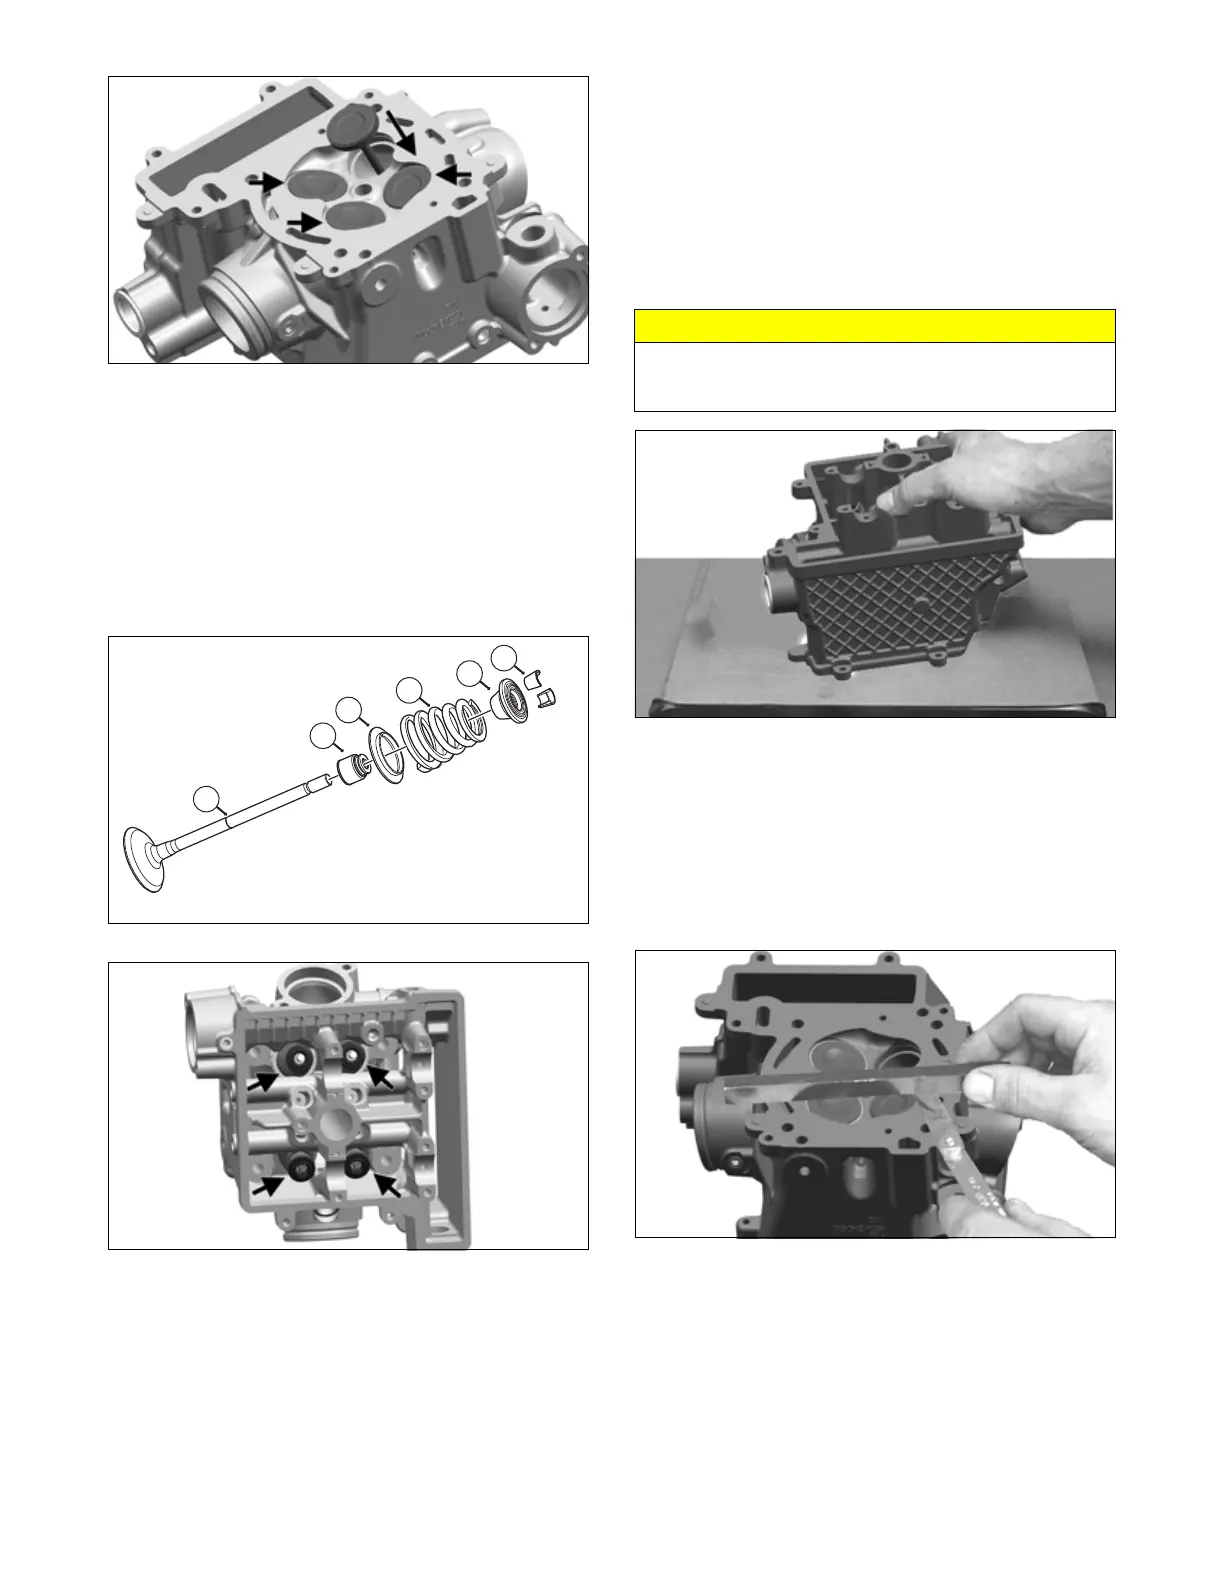
Measuring Cylinder Head Distortion
1. Remove any carbon buildup in the combustion
chamber.
2. Lay a straightedge across the cylinder head; then
using a feeler gauge, check the distortion factor
between the head and the straightedge.
3. Maximum distortion must not exceed specifications.
LYC031
Inspecting Cam Chain Guides and
Chain
1. Inspect chain guide rail (A) for cuts, tears, breaks, or
chips.
2. Inspect chain tensioner guide (B) for wear, cuts,
tears, breaks, or chips. Inspect threaded insert for
damage.
3. Inspect upper chain guide and sheet metal bracket
(C) for wear, cuts, breaks or chips.
CAUTION
Water or parts-cleaning solvent must be used in con-
junction with the wet-or-dry sandpaper or damage to
the sealing surface may result.