73
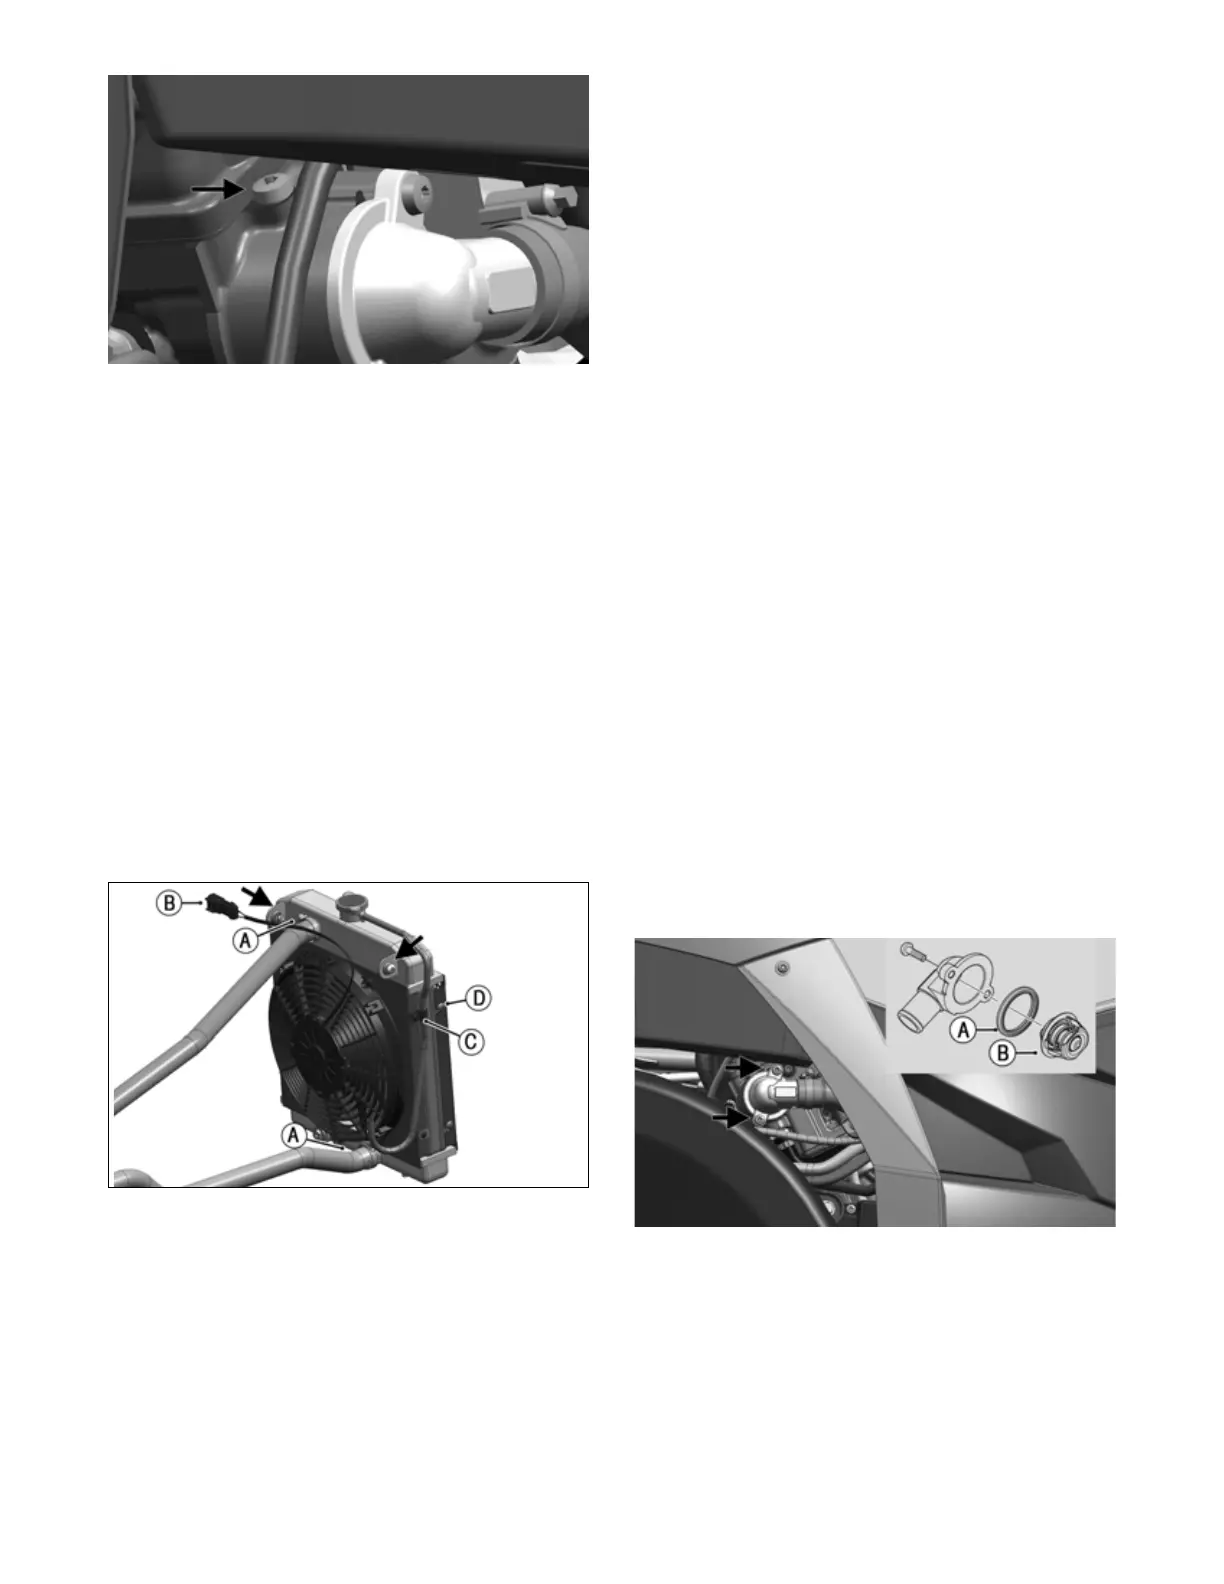
OHA122
RADIATOR
Removing
1. Drain the coolant at the engine.
2. Remove the front fascia. Remove the two cap screws
securing the upper bumper to the mounting tabs; then
loosen, but do not remove, the two cap screws secur-
ing the lower bumper to the frame. Rotate bumper
down out of the way (see Steering/Body/Controls
section).
3. Remove the upper and lower coolant hoses (A).
4. Remove the cap screws and nuts securing the radia-
tor to the frame.
5. Disconnect the fan wiring (B) from the main wiring
harness; then remove the radiator/fan assembly and
account for the grommets and collars.
6. Remove the four screws securing the fan/fan shroud
assembly (C) to the radiator. Detach the front screen
(D).
OHA081
Cleaning and Inspecting
1. Flush the radiator with water to remove any contami-
nants.
2. Inspect the radiator for leaks and damage.
3. Inspect all hoses for cracks and deterioration.
4. Inspect all fasteners and grommets for damage or
wear.
Installing
1. Position the fan/fan shroud assembly on the radiator;
then secure with existing hardware. Reattach front
screen.
2. Place the radiator with grommets and collars into
position on the frame; then install the cap screws and
nuts. Tighten to 12 ft-lb (16.3 N-m).
3. Install the upper and lower coolant hoses; then
secure with hose clamps.
4. Rotate front bumper up and install the two cap
screws to secure the upper bumper to the mounting
tabs. Tighten to 35 ft-lb (47.5 N-m).
5. Tighten the two cap screws securing the lower
bumper to the frame to 35 ft-lb (47.5 N-m).
6. Install the front fascia (see Steering/Body/Controls
section).
7. Fill the cooling system with the recommended
amount of antifreeze (see Periodic Mainte-
nance/Tune-up). Check for leakage.
NOTE: There is a bleed screw located on the ther-
mostat housing (see illustration OHA122 above) that
should be loosened up or removed when filling the
radiator from an empty state. This allows air to be
bled from the system.
8. Connect the fan wiring to the main wiring harness.
THERMOSTAT
Removing
1. Drain approximately one quart of coolant from the
cooling system.
2. Remove the two cap screws securing the thermostat
housing to the cylinder head. Account for an O-ring
(A) and a thermostat (B).
OHA082
Inspecting
1. Inspect the thermostat for corrosion or spring dam-
age.
2. Using the following procedure, inspect the thermo-
stat for proper operation:
A. Suspend the thermostat in a container filled with
water.
B. Heat the water and monitor the temperature with
a thermometer.