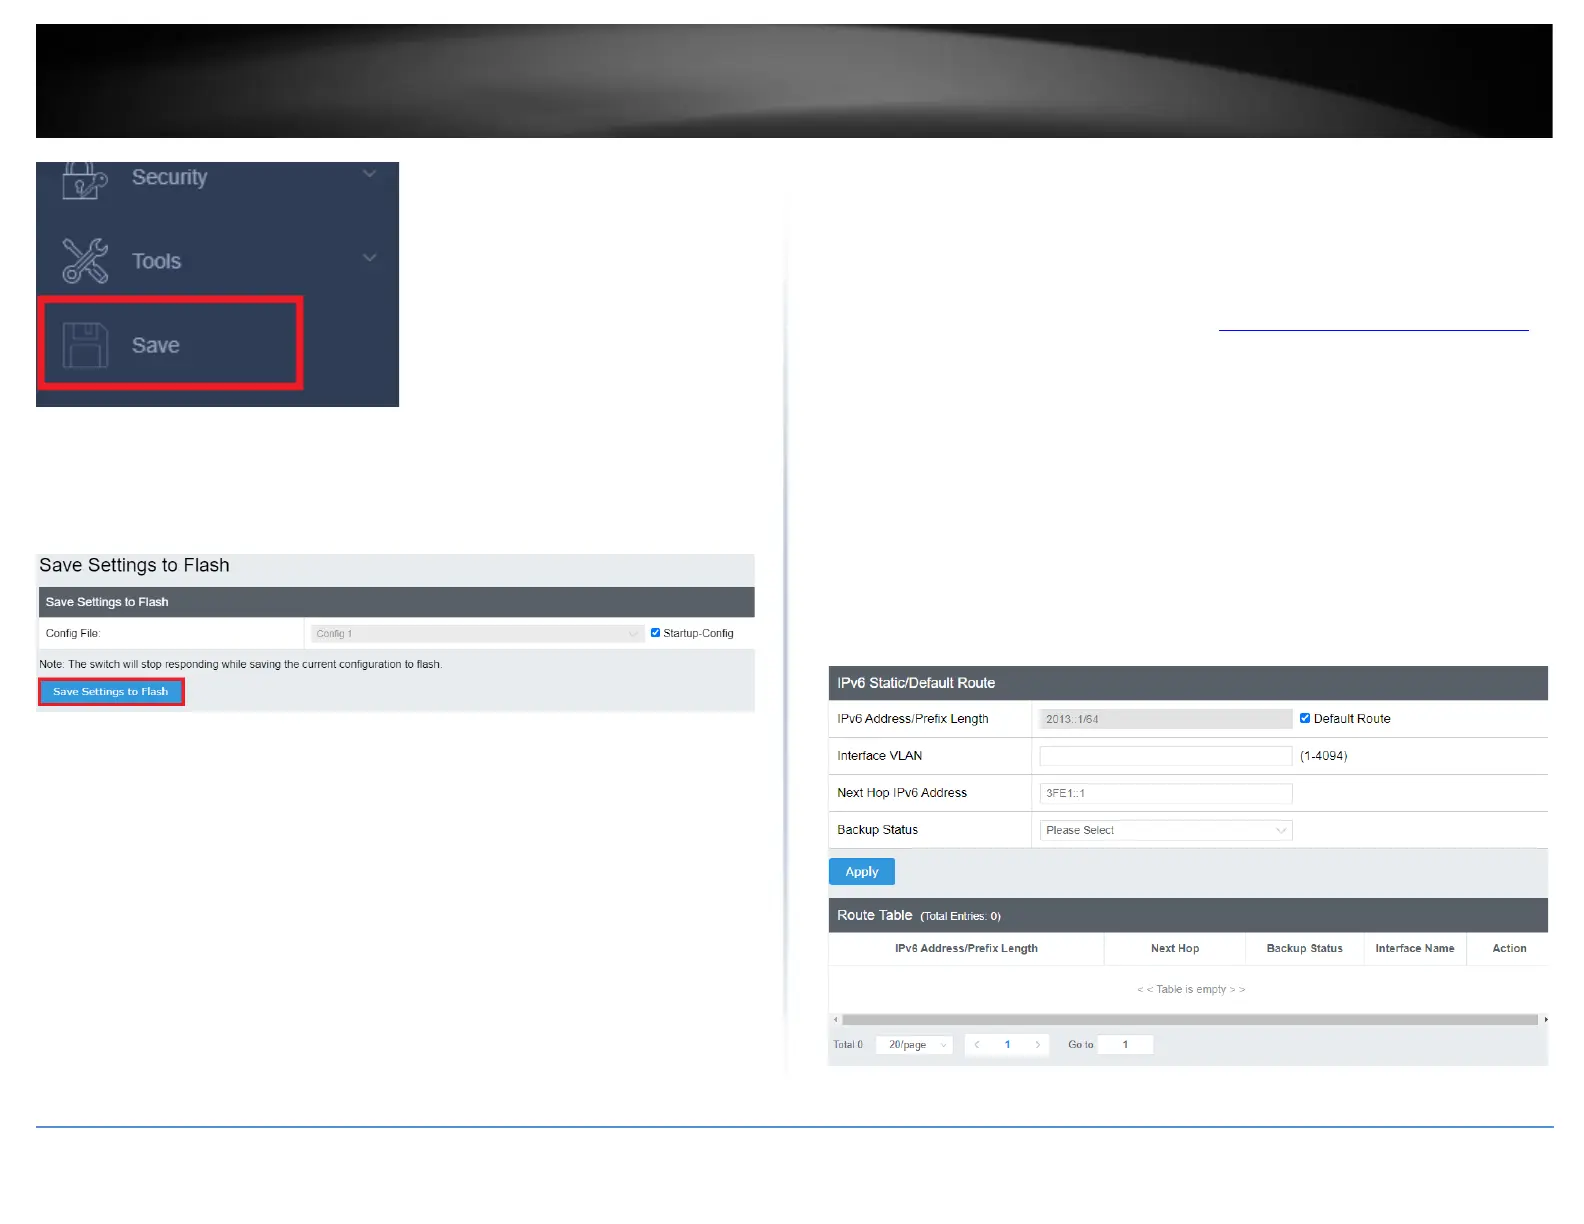
5. Select the Config you would like to save the settings to, then click Save Settings to
Flash.
Note: This step saves all configuration changes to the NV-RAM to ensure that if the
switch is rebooted or power cycled, the configuration changes will still be applied.
Configure IPv6 Routing Table
System > L3 Feature > IPv6 Static/Default Route
This section allows you to set your switch’s IPv6 routing table default, or specify a static
route.
1. Log into your switch management page (see “Access your switch management page”
on page 5).
2. Click on System, L3 Feature, and then IPv6 Static/Default Route.
3. Review the settings. When you have completed making changes, click Apply to save
the settings, click Delete to delete the routing table entry.
• Default Route: Check this box to apply this route as the default, uncheck the box
to specify the following:
o IPv6 Address/Prefix length: Enter the IP address for this routing entry.
• Interface VLAN: Specify the VLAN ID to apply this route to.
• Next Hop IPv6 Address: Enter the next hop for the routing entry.
• Backup Status: Specify if this routing entry is to be the Primary or Backup entry.
4. At the bottom of the left hand panel, click Save.