Troxler NTO 3–3
3. INST
LLATION
OVEN INSTALLATION
The oven requires no operator assembly. To install the oven, follow
the steps below:
CAUTION
Troxler has optimized the airflow in the oven to ensure
efficient combustion. Do not attach the exhaust duct
directly to a central exhaust unit. An increase in suction
due to external exhaust fans can affect the oven
performance.
1. Following the site selection guidelines on the previous page, set
the oven in place.
2. Using the adjustable feet, level the oven from front to back and
from side to side.
3. Remove all packaging material from the oven chamber,
including the pads under the rails.
4. Unpack the hearth plate and place it in the center of the oven
chamber resting on the two rails. Ensure that the hearth plate
does not touch the sides of the chamber.
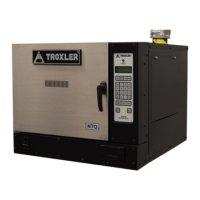
5. Position the circuit breaker/power switch, found in the lower
left of the oven front panel (see Figure 1–1) to the OFF (down)
position.
6. Connect the oven exhaust sy
stem as de
scribed in the following
section.
 Loading...