Maintenance and Service 6–15
To replace the EPROM, proceed as follows:
1. Switch the Classifier off and unplug the power cord.
2. Remove the cabinet cover by loosening the seven (7) screws on
the side panels securing the cover (the screws do not have to be
removed).
3. Remove the small bezel around the aerosol inlet on the front
panel. Pry the left-hand side up with a small flat-bladed
screwdriver and pull straight off the inlet tube.
4. Release the front panel door with the three captive screws on
the inside-left of the front panel.
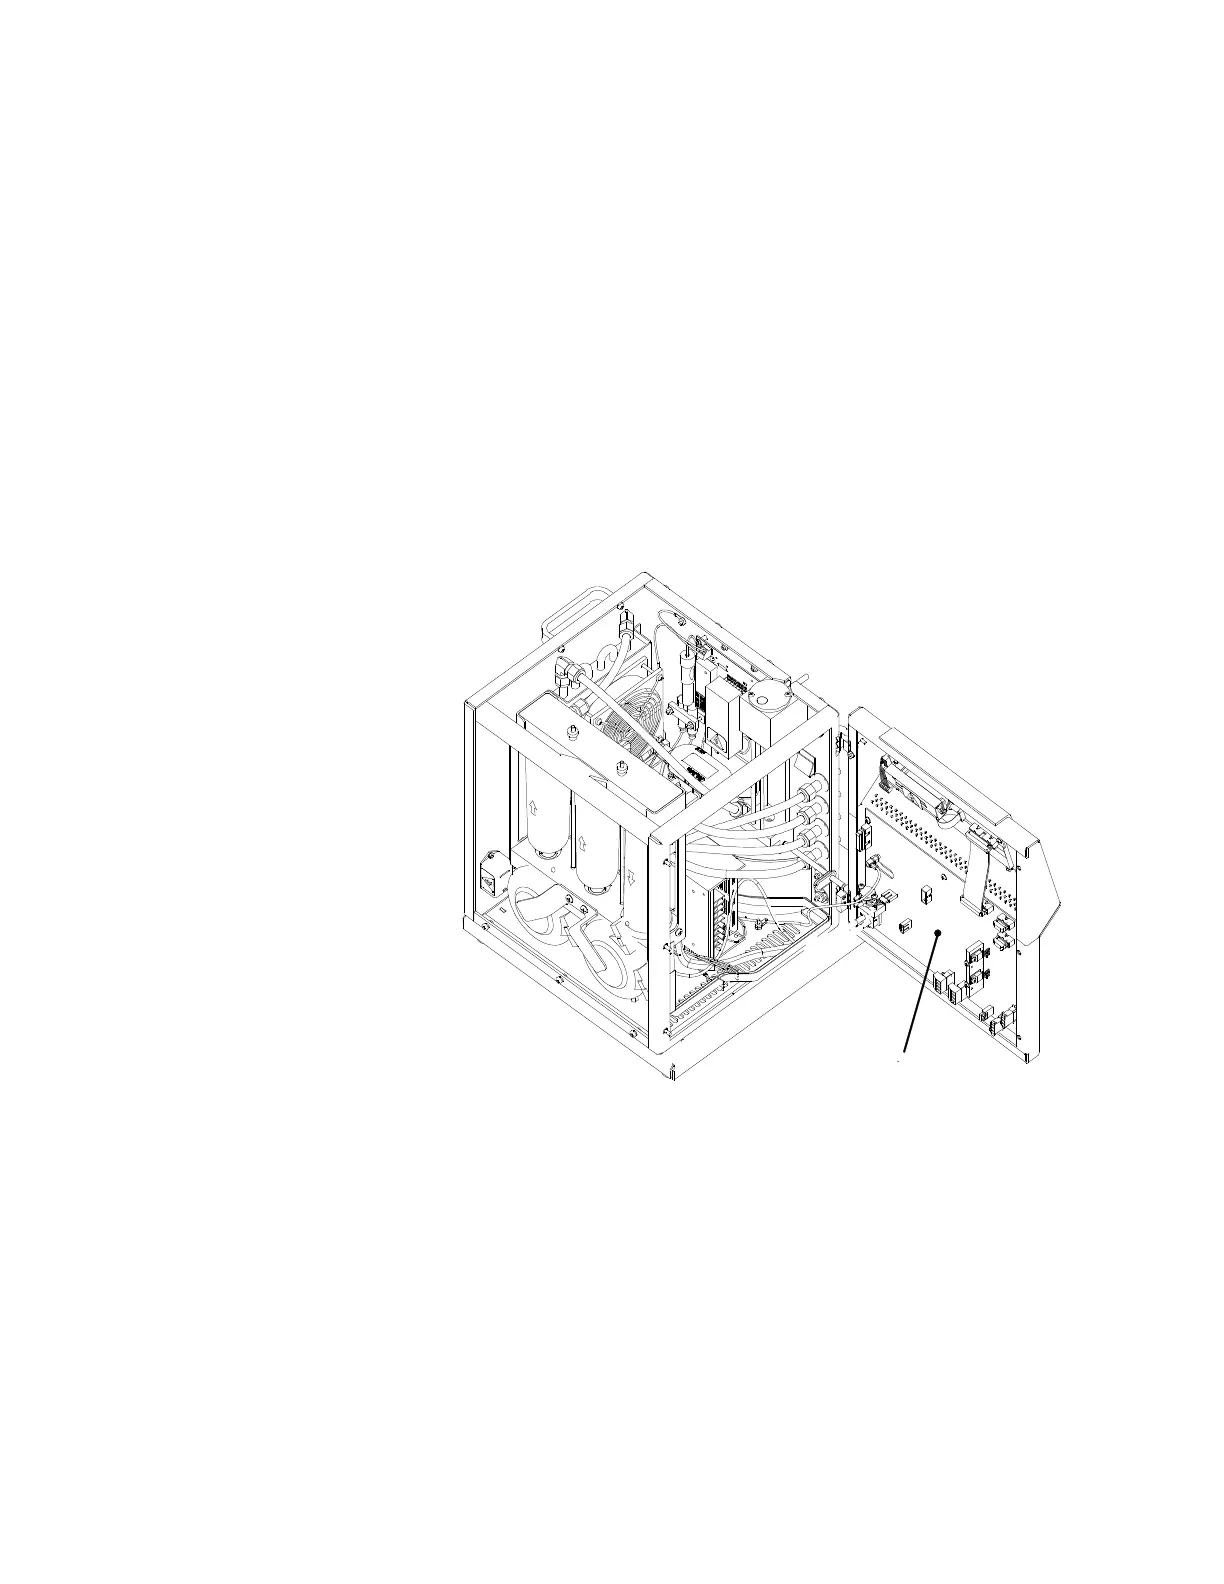
5. Swing the front panel open (only 90 degrees) to gain access to
the main pc-board as shown in Figure 6-9. Have someone else
support the door as you work on the pc-board.
Figure 6-9
Location of Main PC-Board
6. The Classifier uses a single EPROM chip. It should be labeled
with a seven-digit part number. It is important that it goes in
the correct socket with the correct orientation.
7. Locate the EPROM socket on the main pc-board attached to the
front panel of the instrument and refer to Figure 6-10.
8. Use the EPROM removal tool provided with the new EPROM
chips to remove the old chip.
9. Remove the new EPROM from its static protection bag.
 Loading...