3: Setting up the Edge via DMS
Display Setting
Display Setting
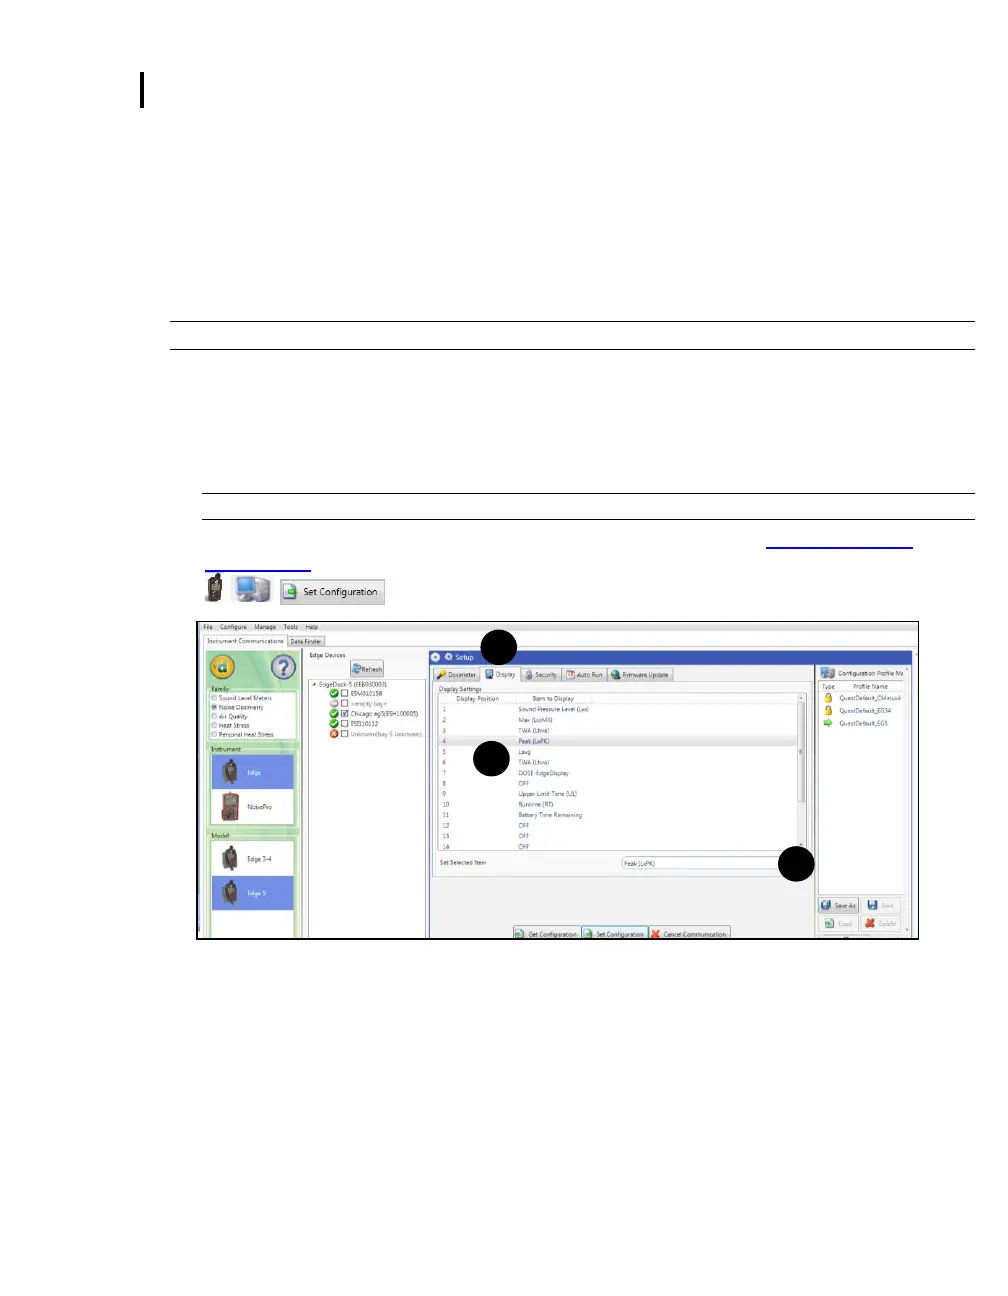
The display screen is used to customize the parameters which will appear on your Edge. It is organized by
two columns, the “Display position” and the “Item to Display” and includes a “Set selected Items”
selection/drop down box. The display position indicates the order of the parameter (or item) which will appear
on the display, while the “Item to display” designates the measurement or parameter. The example/figure
below displays the SPL, Max, Min, Lavg, TWA, Dose, UL, RT, and battery time remaining parameters to
appear on the display.
NOTE: There are up to 18 selectable parameters.
1. Click on the Display tab from the Edge’s Instrument Configuration panel (see ❶). To customize the
display, click on either the Display position (see ❶) or the Item to Display field (see ❷). The field
will be shaded in blue when selected.
2. Click on the drop down box of the Set Selected Item (see ❸) and select a parameter.
3. Repeat these steps as needed to select each position.
NOTE: “OFF” indicates that no item/parameter is selected.
4. To set the display features, save and send to the Edge (for more details see “Saving and Sending
Configurations”).
Figure 3-9: Edge display screen
 Loading...