6: Technical Support/
Customer Service
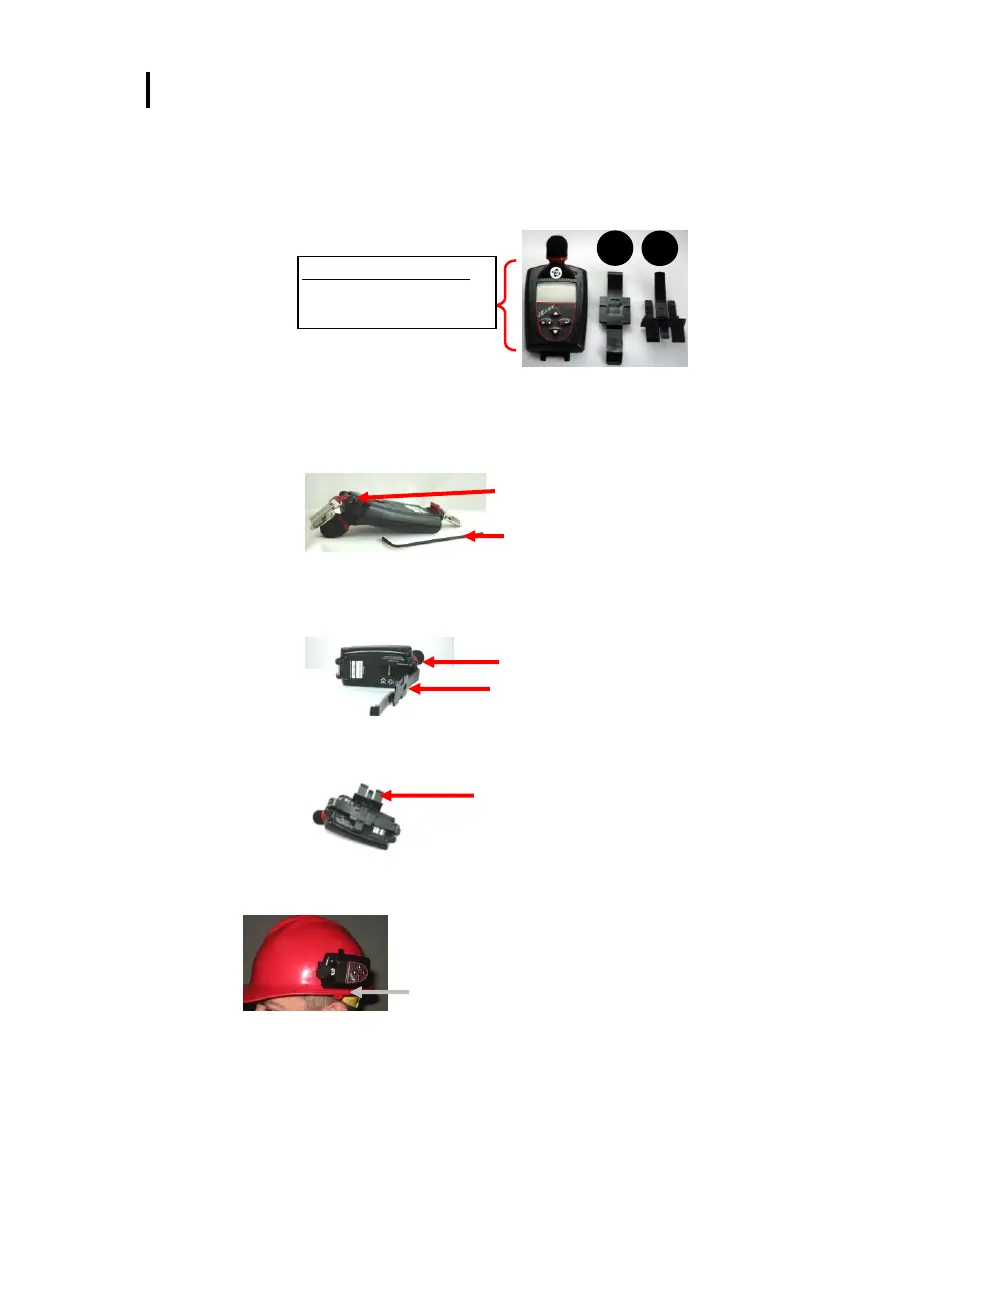
Attaching/Detaching
Hard Hat Attachment Kit
The following instructions explain how to assemble and attach the hard hat kit to a standard
hard hat.
1. Using a 3/32” hex wrench, twist the top shoulder bolt counterclockwise to loosen and
remove the bolt and the clip. Also, remove the bottom clip with the hex wrench. Once the
bottom clip is removed, place the shoulder bolt back into its place and tighten back up
with the hex wrench.
2. Place the epaulette mount (see “A” above) into the top bracket of the Edge. Then slide
the bolt into place and tighten with a hex wrench. Then, the epaulette mount snaps onto
the bottom shoulder bolt.
3. Slide the two prongs of the hard hat mount (see “B” above) underneath the epaulette
mount (see “A” above) until it clicks into place.
4. Taking the Edge with the assembled hard hat attachments, slide into the side of hard hat.
It will fit snuggly into the hard hat opening.
Hard hat mount attachment
(The two prongs slide into
the bottom cavity.)
Hard Hat Attachment kit
A. Epaulette mount
B. Hard hat mount
Slide the two-sided prongs into
the hard-hat opening.
 Loading...