UAV-1004234-001, AV-30-E Installation Manual 35
Rev H
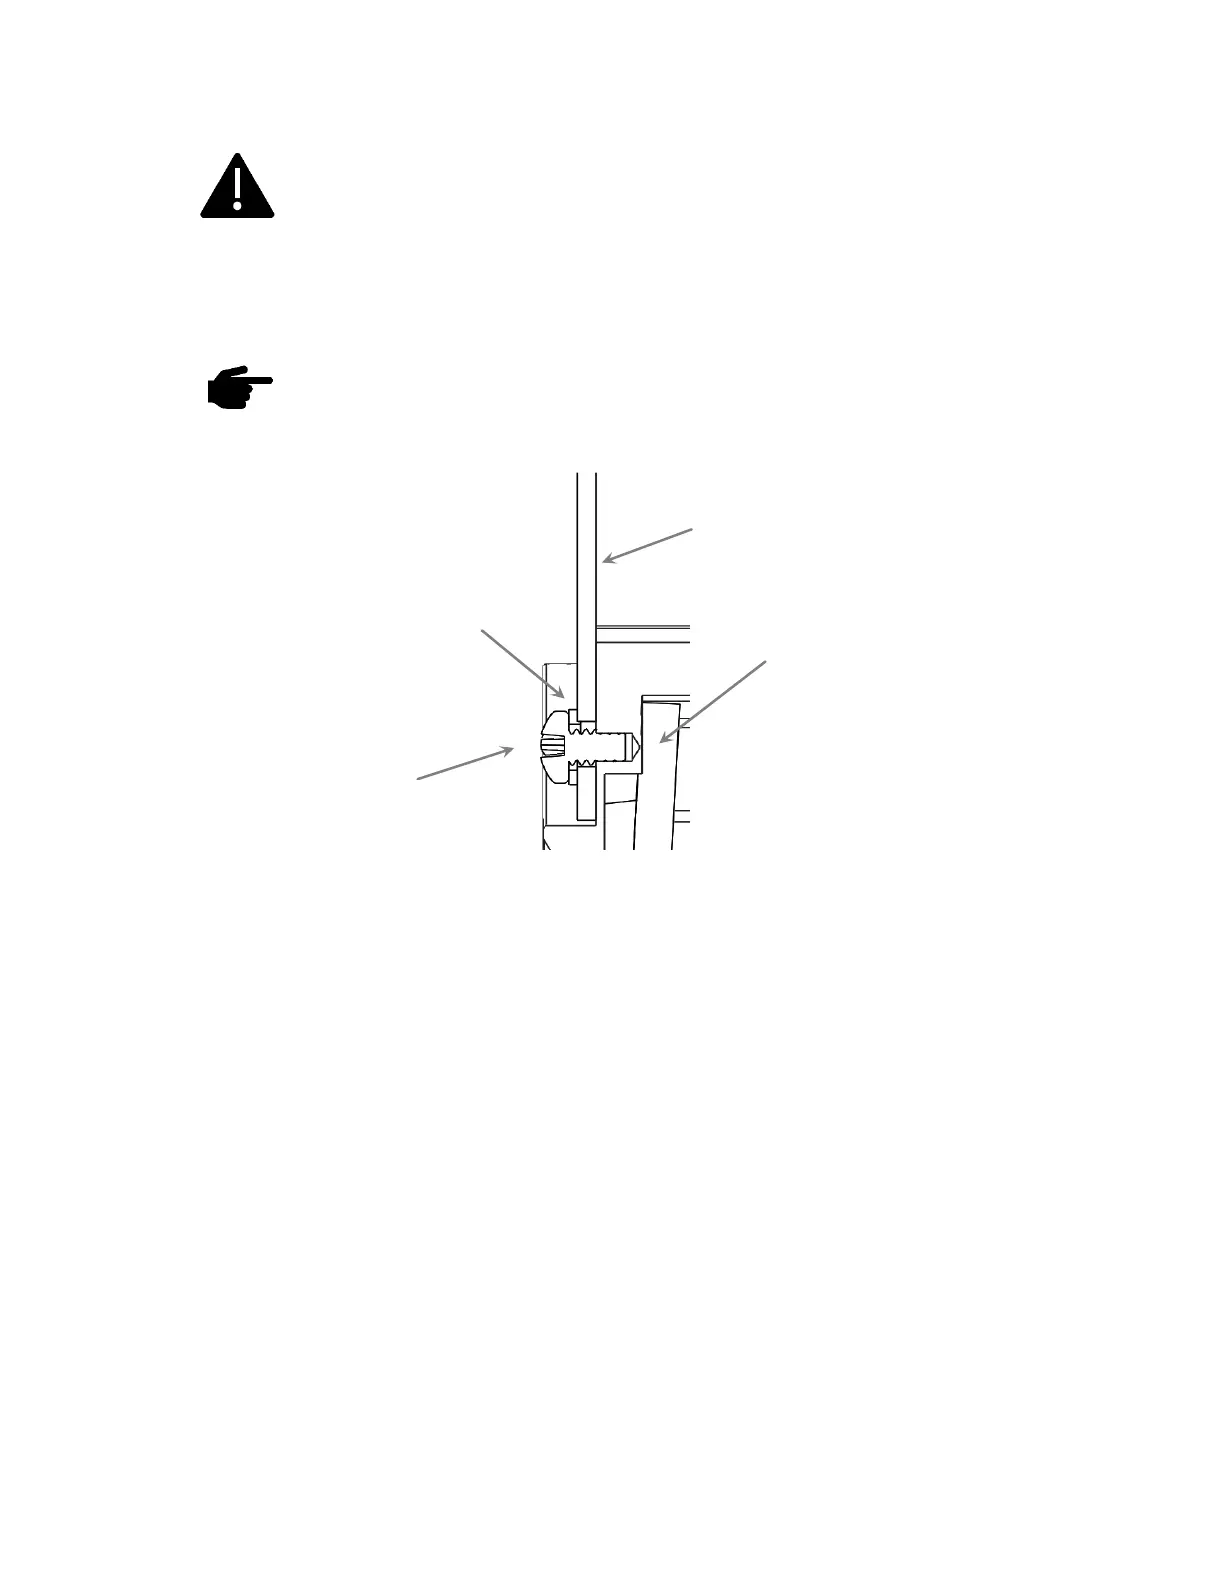
The four 6-32 Mounting screws must observe depth limits
given the internal component design. The mounting holes are
screw. Using screws that are too long can break the housing and
damage the components inside.
Torque screws to 6 (+/-1) inch-lbs. Do not over-torque or
damage may occur.
Figure 6 – Mounting Screw Depth Limits
Caution must be observed when mounting the AV-30. If too long a screw
is used, damage to the unit can occur, and the unit may not be securely
fastened to the panel. The installation kit contains multiple length screws
to assist in compensating for different instrument panel thicknesses. Due
to the short thread engagement, if you will be providing your own
screws, be sure to choose stainless steel instead of brass as typically
used for instrument mounting.
The objective when mounting the AV-30 is to achieve the greatest screw
engagement without exceeding the limits of the housing, causing damage.
Using screws that are too short could lead to stripped mounting holes.
Always use caution when tightening the mounting screws, if the screw feels
like it is bottoming out, STOP, and correct the screw thread engagement.