APX 525/625 Generator Revision C Service Adjustments
©
2005 Del Medical Imaging Corporation
7/5/2005 Page 157
kV Compensation Adjustments
Note: If this system is not equipped with a Bucky, the Exposure Enable Signal must
be jumpered. The Bucky must be selected for AEC operation.
For Wall Bucky: TB4 pin 2 to pin 4.
For Table Bucky: TB5 pin 2 to pin 4.
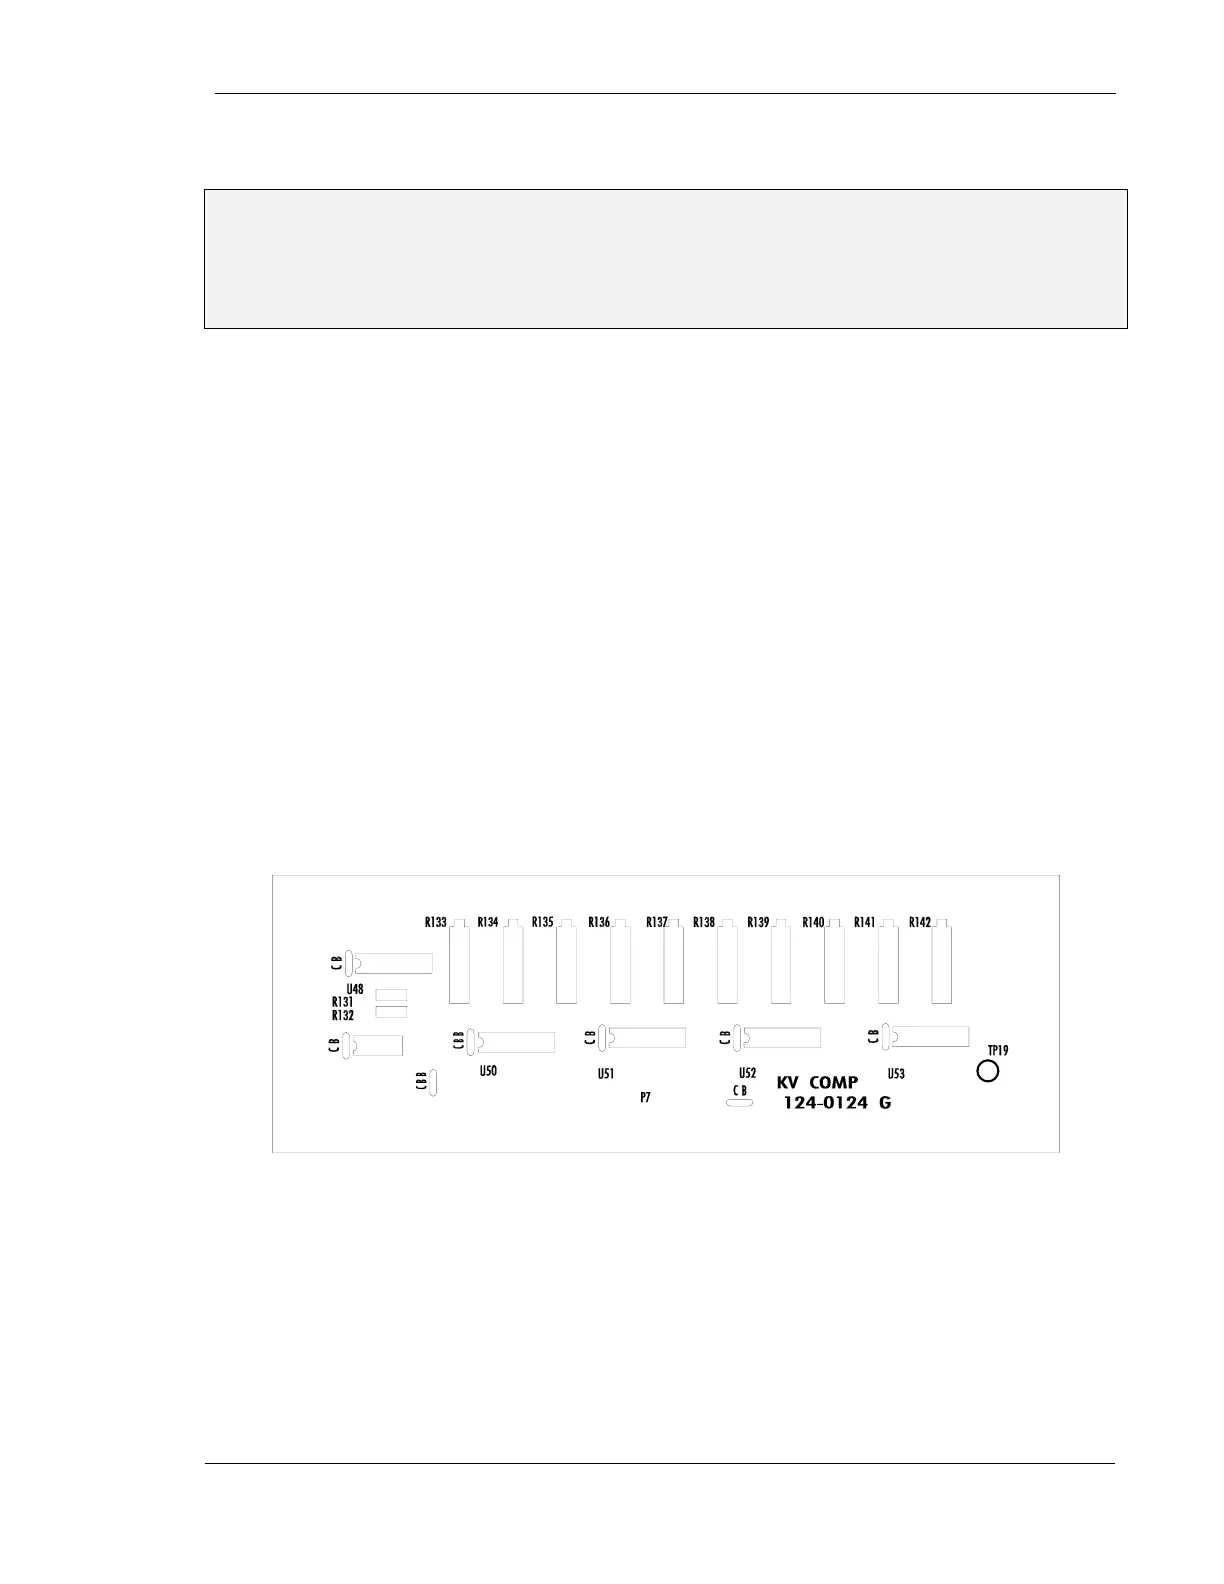
1. Verify the initial settings of the reference voltage. Connect the DC voltmeter
between TP9 and GND of the Main AEC Board. Select 72 kV "N" density. The
voltage should be 3.0 Volts when either Screen 1 or Screen 2 is selected. This
voltage may be adjusted using R137 for Screen 1 and R138 for Screen 2 (kV
Compensation PWB 124-0124)
2. Be sure an image receptor is selected, the screen selection you wish to calibrate
is selected, and density selection is N (normal)
3. If the Automatic Exposure Control is to be used with only one film/screen system,
both Screen 1 and Screen 2 should be calibrated at the same time to this single
speed system, using the same phantom thicknesses, generator settings, and
pots as listed in paragraph 10. To match the calibration of Screen 2 to that of
Screen 1, it is necessary only to match elapsed mAs during the exposure. No film
is required, but an empty cassette must be used. For example, film is used to
adjust R130, Screen 1 so that density at 72 kV is 1.2. Then an empty cassette is
used and R129 is adjusted so that the mAs of exposure at 72 kV with Screen 2
selected, is the same as the mAs recorded for the calibrated Screen 1. This mAs
matching is then repeated in turn as the other kV stations are calibrated
Figure 76 - kV Compensation Circuit Board
4. Set the Generator to 72 kV and 55 mAs. Insert 6 inches (15.24 cm) of water (or
plastic) in the field and collimate to within that water (or plastic). Insert
film/cassette into the cassette tray, select proper screen (step 2), and make an
exposure. It is important to record the elapsed mAs of this exposure. Develop the
film and measure the density at the center of the film. If the density is 1.2 +/- .05
go to step 10