1-3-25
2DA/2DB
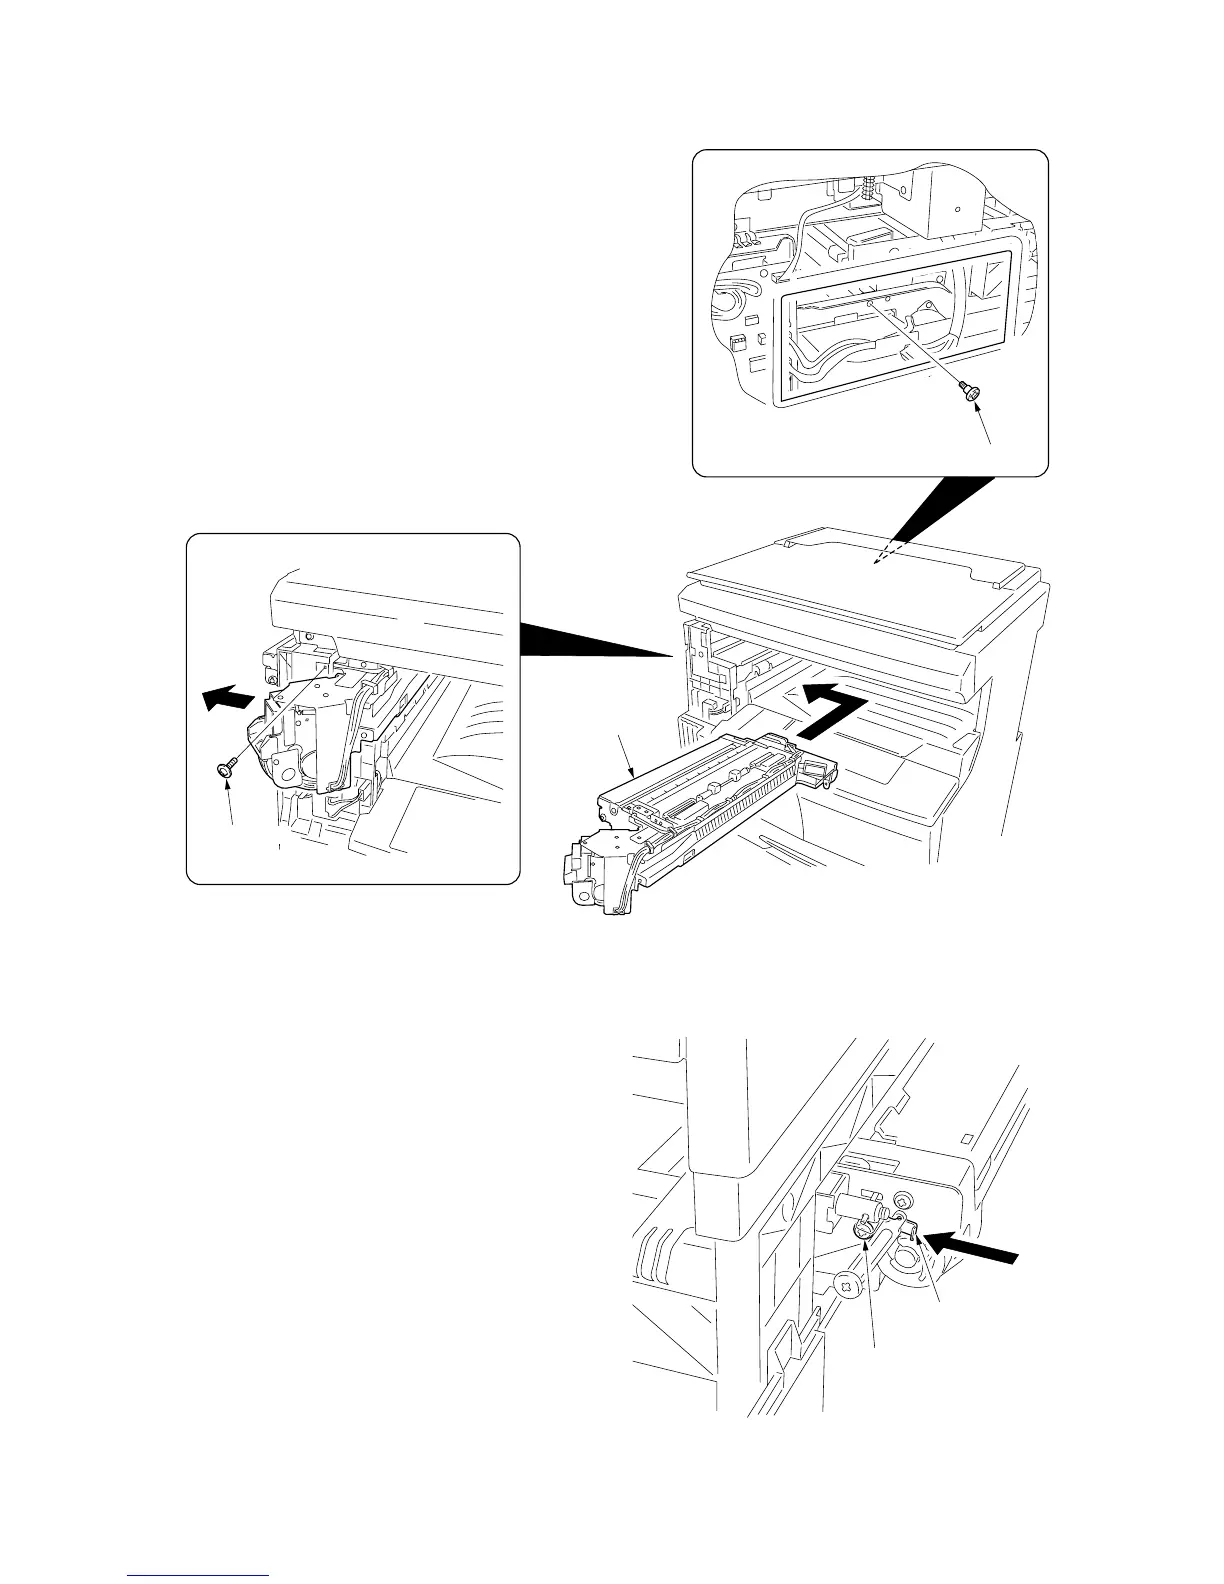
Attach the transfer unit.
9. Insert the transfer unit from the MFP front side and
slide it to the left to install to the ejection part.
10. Place the transfer unit closer to the ejection side and
then secure the front side using the TP bind screw
M3 × 06 and the rear side using the pin.
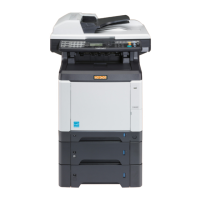
Release the lever securing fitting.
11. Loosen the screw located at the rear side of the
transfer unit and release the lever securing fitting in
the direction of an arrow, and then retighten the
screw.
Transfer unit
TP bind screw
M3 × 06
Pin
Screw
Lever
securing fitting
Figure 1-3-43
Figure 1-3-44