EasyManuals Logo

Utax CDC 1730 User Manual

Utax CDC 1730
436 pages
To Next Page IconTo Next Page
To Previous Page IconTo Previous Page
Page #185 background imageLoading...
Page #185 background image
Sending Functions
5-17
5
Adjusting Density
Use the procedure below to adjust the density when scanning the originals.
The table below shows the available settings.
The procedure for adjusting the density is explained below.
1 Press the Send key.
2 Place the originals on the platen.
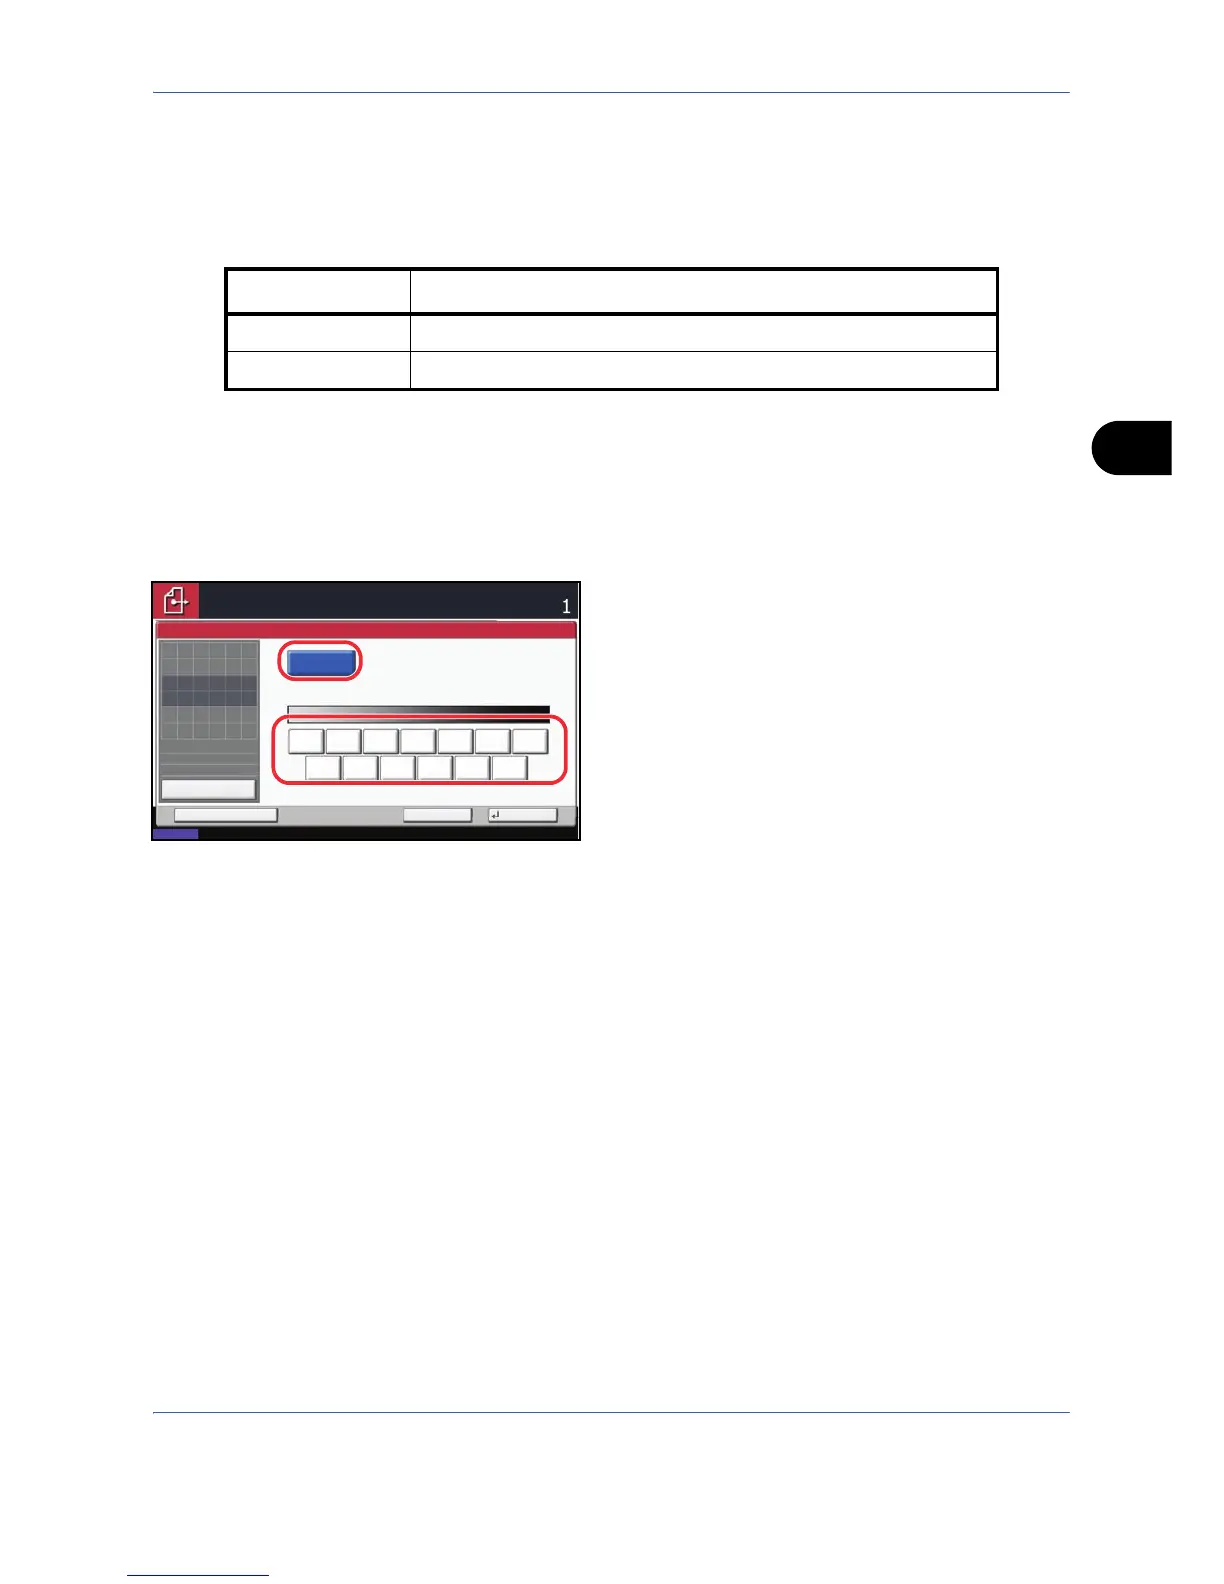
3 Press [Color/Image Quality] and then [Density].
4 When selecting manual density adjustment, press
[-3] to [+3] (Lighter - Darker) to adjust density.
When selecting auto density adjustment, press
[Auto].
5 Press [OK].
6 Specify the destination, and press the Start key to
start sending.
Item Detail
Manual Adjust density using 7 or 13 levels.
Auto Optimum density is selected according to the density of the original.
Darker
Density
Auto
NormalLighter
Cancel OKAdd Shortcut
Status
08/08/2009 10:10
Preview
Original
Zoom
Send
100%
---
:
:
:
---
Place original.
Place original.
Ready to send.
Destination
0+1+2+3
-1
-2-3
-2.5 -1.5 -0.5 +0.5 +1.5 +2.5

Table of Contents

Questions and Answers:

Question and Answer IconNeed help?

Do you have a question about the Utax CDC 1730 and is the answer not in the manual?

Utax CDC 1730 Specifications

General IconGeneral
BrandUtax
ModelCDC 1730
CategoryAll in One Printer
LanguageEnglish

Related product manuals