16 9
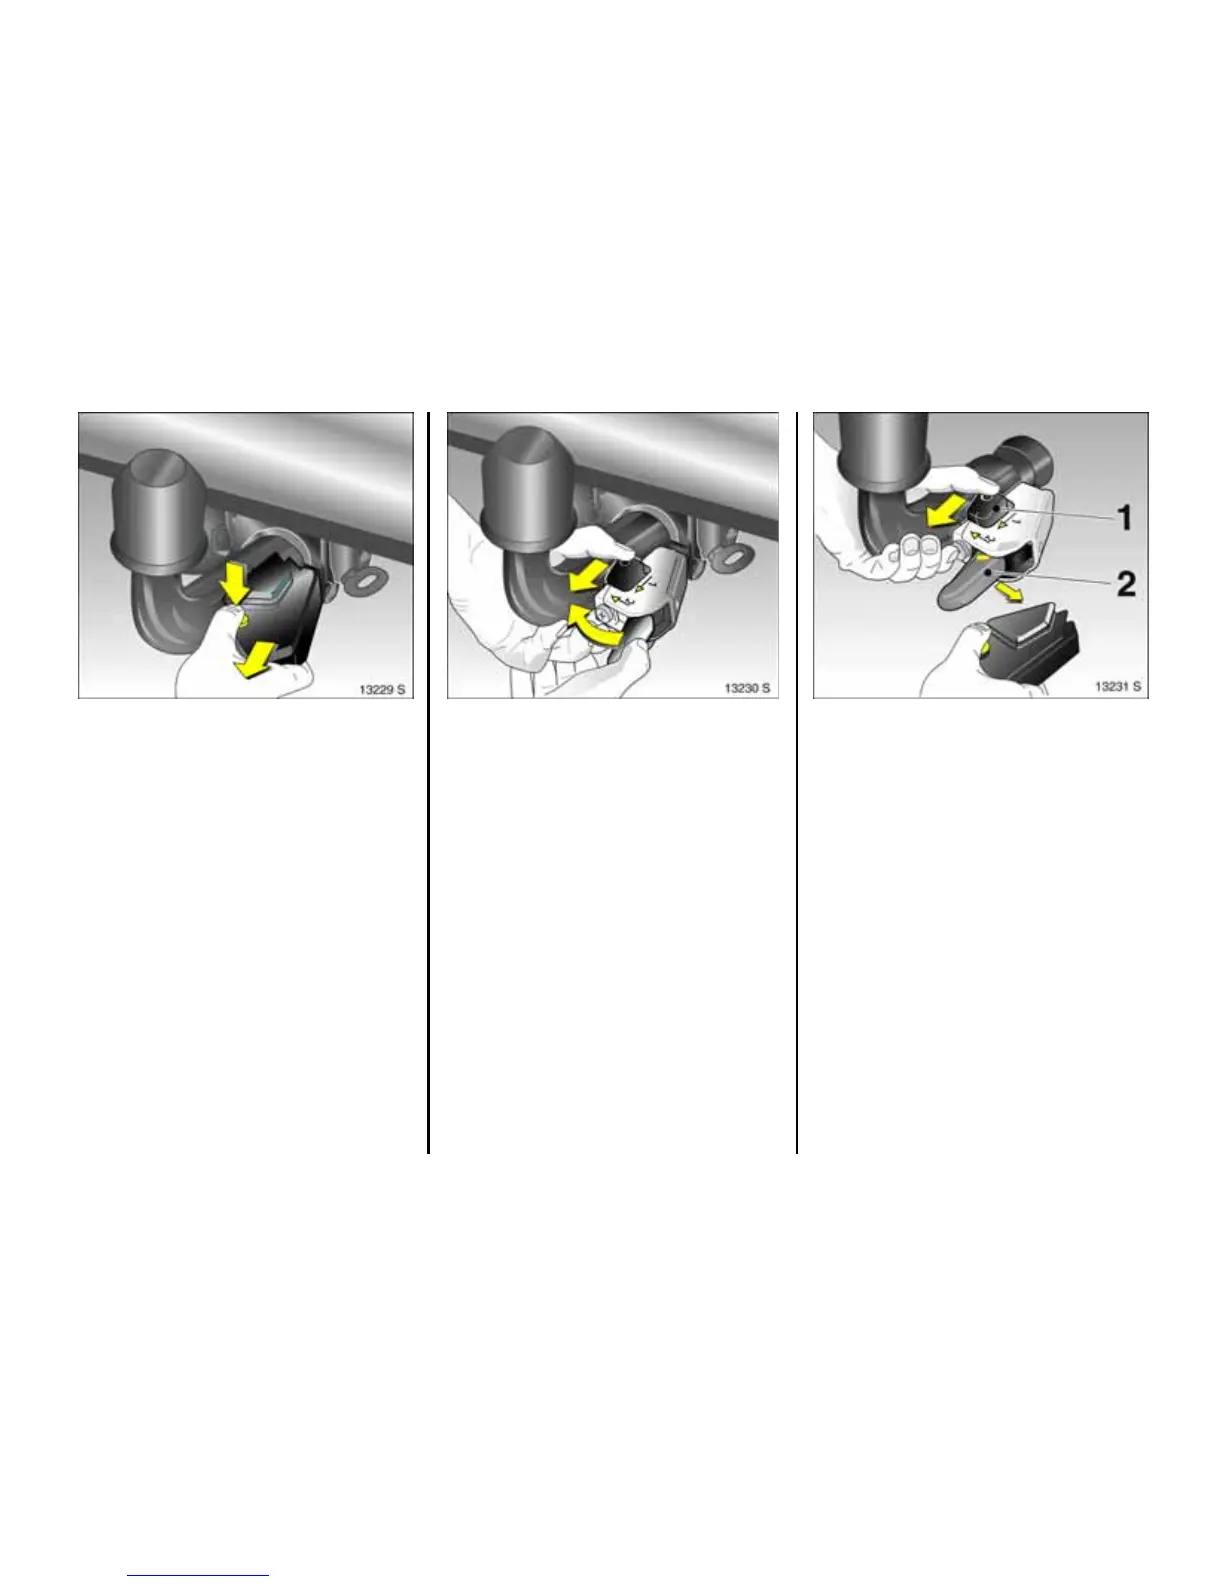
Dismounting the coupling b all ba r
Press red button and p ull protective cap
off.
Get hold of the top and bottom of the
retaining slider 1, pull bac k as far as
possible a nd hold. Push the release lever 2
to the left and pull the coupling ball ba r out
of the o pen in g.
Replace protective cap onto coupling ball
bar:
z Get hold of top and bottom of retaining
slider 1 and pull backward (relea se lever
2 jump s to the right),
z replace protectiv e ca p.
Insert lock into opening for coupling b all
bar: put cap on a t bottom first, then push
in from top.
Do not use steam-jet cleaners or other
high-pressure cleaners to clean the
coupling ball bar.
St owage of coup ling ba ll bar
Place the coupling ba ll bar in the b ag as
shown on page 166 in Fig. 11755 S and
attach next to the vehicle tools beneath the
spare whee l.
 Loading...