EasyManuals Logo

Visonic POWERMASTER 10 Installer's Guide

Visonic POWERMASTER 10
106 pages
To Next Page IconTo Next Page
To Previous Page IconTo Previous Page
Page #17 background imageLoading...
Page #17 background image
16 D-303222 PowerMaster-10 / PowerMaster-30 Installer's Guide
3
4
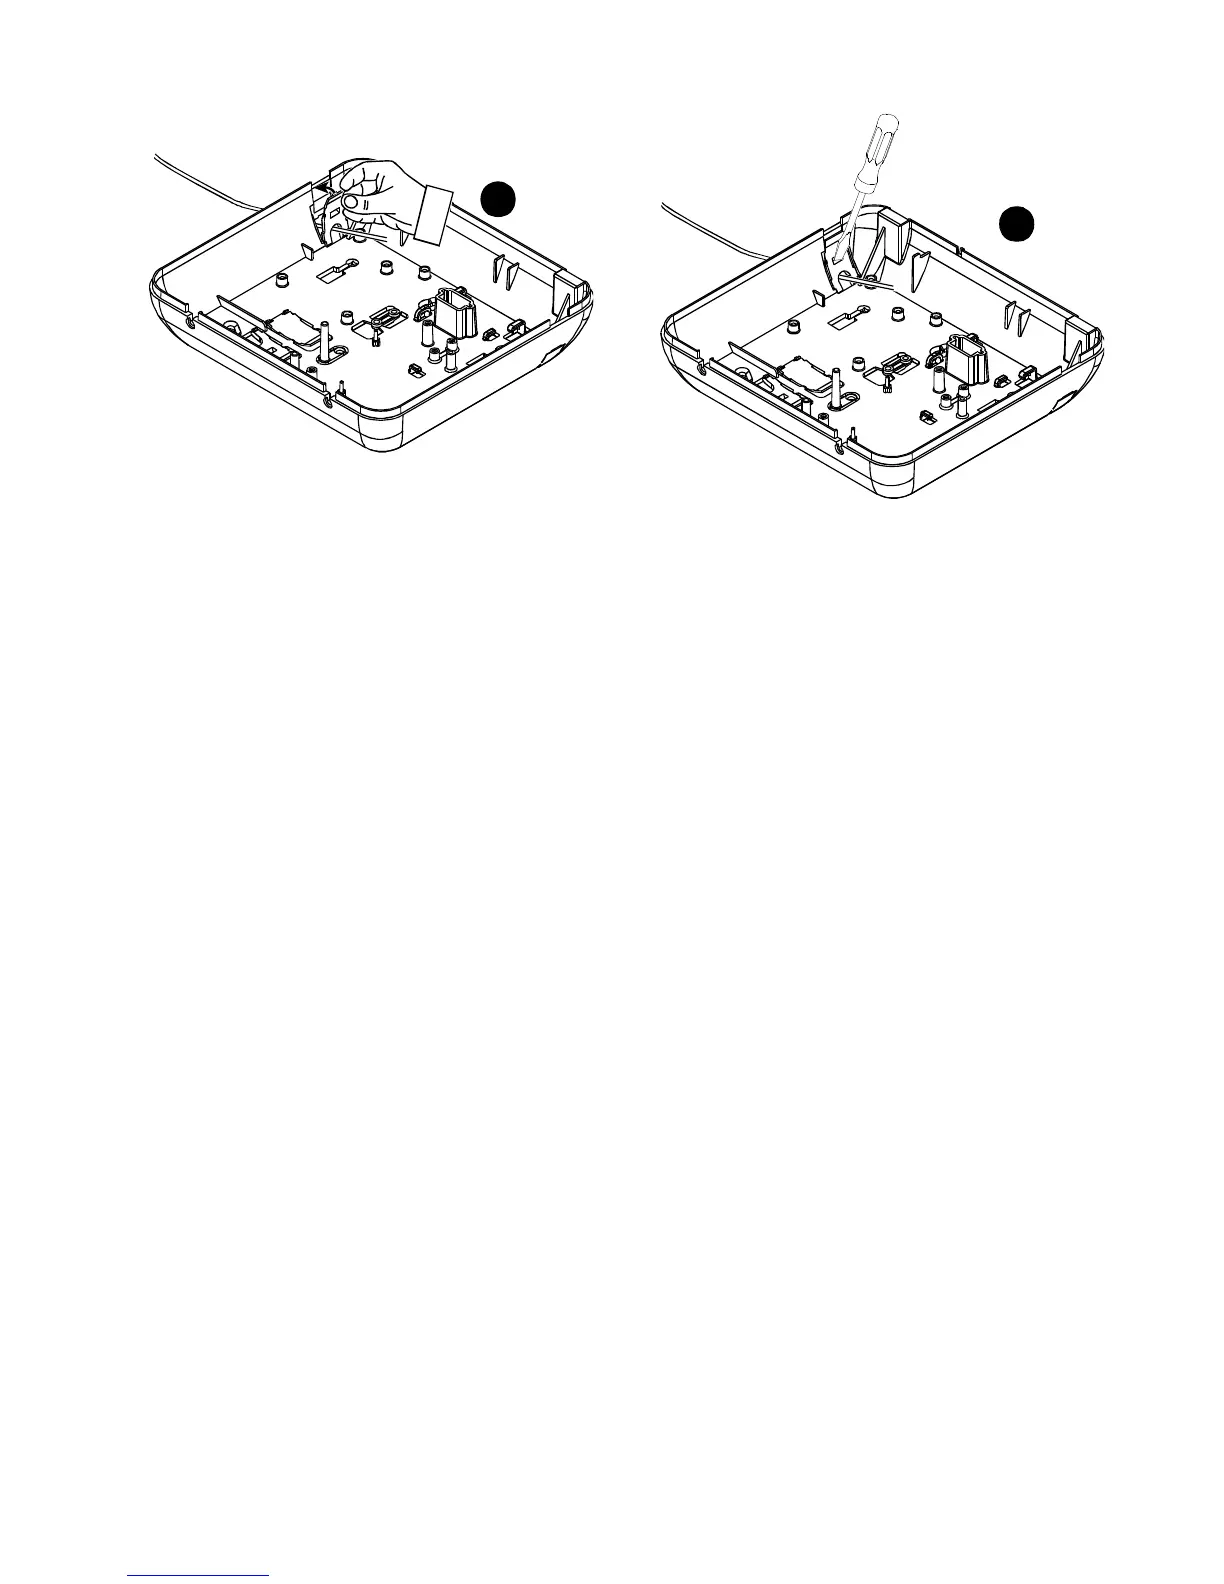
To Route the Cable (continued):
3. Position the clamp (1 of 2) as shown and then rotate into place.
4. Using a slotted screwdriver press downward gently on the point illustrated in the drawing. Make sure the
clamp is locked (a click is heard).
Figure 3.8 – Cable Wiring

Table of Contents

Other manuals for Visonic POWERMASTER 10

Questions and Answers:

Question and Answer IconNeed help?

Do you have a question about the Visonic POWERMASTER 10 and is the answer not in the manual?

Visonic POWERMASTER 10 Specifications

General IconGeneral
Communication ProtocolsPowerG
Frequency433-434 MHz, 868-869 MHz
System TypeWireless
CommunicationGSM
Remote ControlYes
Event Log1000 events
Partitions3
Humidity85% non-condensing
User Codes8
Backup BatteryNi-MH battery pack
Operating Temperature-10°C to +50°C

Related product manuals