Watlow EZ-ZONE
®
PMI Controller • 205 • Chapter 9 Features
Read and monitor the real-time current level through the Load Current RMS Ld.Cu prompt
while the most recent faults can be read via the Current Error C.Er and Heater Error h.Er
prompts. All of these prompts can be found in the Operations Page under the Current Menu.
CT Application Note:
Alarms have to point to the correct source for the current measurement. We have one
measurement that is sampled and held CU.r. Since this is a zero cross device, in zero cross
the current is going to 0 each time the output is turned off. We also calculate an Current
RMS value that takes into account on time versus off time. Be sure alarms are pointed to
the current that is sampled and held or anytime the PID power gets low like less than 2%,
the alarm will activate or if the outputs are off such as control mode set to OFF.
Open Loop Detection
When Open Loop Detection is enabled L.dE, the controller will look for the power output to
be at 100%. Once there, the control will then begin to monitor the Open Loop Detect Devia-
tion L.dd as it relates to the value entered for the Open Loop Detect Time L.dt. If the speci-
ed time period expires and the deviation does not occur, an Open Loop Error will be trig-
gered. Once the Open Loop Error condition exists the control mode will go off and an Open
Loop message will be display. If the process value goes in the opposite direction, a Reversed
Loop message is display. The sensor is likely wired in reverse polarity.
Note:
All prompts identified in this section can be found in the Loop Menu of the Setup Page.
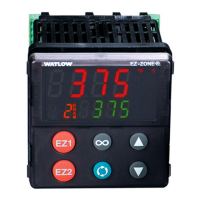
Programming the EZ Key/s
You can program the EZ Key either in the Setup Menu or with conguration software, such as
EZ-ZONE Congurator, using a personal computer.
The following examples show how to program the EZ Key to start and stop a prole.
1. To go to the Setup Page from the Home Page, press both the Up ¿ and Down ¯ keys for six
seconds. Ai will appear in the upper display and sEt will appear in the lower display.
2. Press the Up Key ¿ until fUn appears in the upper display and sEt will appear in the lower
display.
3. Press the Advance Key ‰ until Digital Input Level LEv appears in the lower display. Use an
arrow key to specify the state of the key (high or low) when the controller is powered up.
Functions will toggle with each press of the EZ Key, such as Profile Start/Stop.
Note:
If the level is set to low, the profile will execute automatically on power up.
4. Press the Advance Key ‰. The lower display will show Digital Function fn. Press the Up
¿ or Down ¯ key to scroll through the functions that can be assigned to the EZ Key When
Prole Start/Stop p.sts appears in the upper display and fn appears in the lower display,
press the Advance Key ‰ once to select that function and move to the Function Instance
fi parameter.
5. Press the Up ¿ or Down ¯ key to scroll to the prole that you want the EZ Key to control.
6. The instance tells the controller which of the numbered functions should be acted upon.
For proles, there are 4 instances. Press the Innity Key ˆ once to return to the sub-
menu, twice to return to the main menu or three times to return to the Home Page.

 Loading...