4.10 Low Voltage Controller
Chapter 4: Removal, Replacement, and Adjustment Procedures
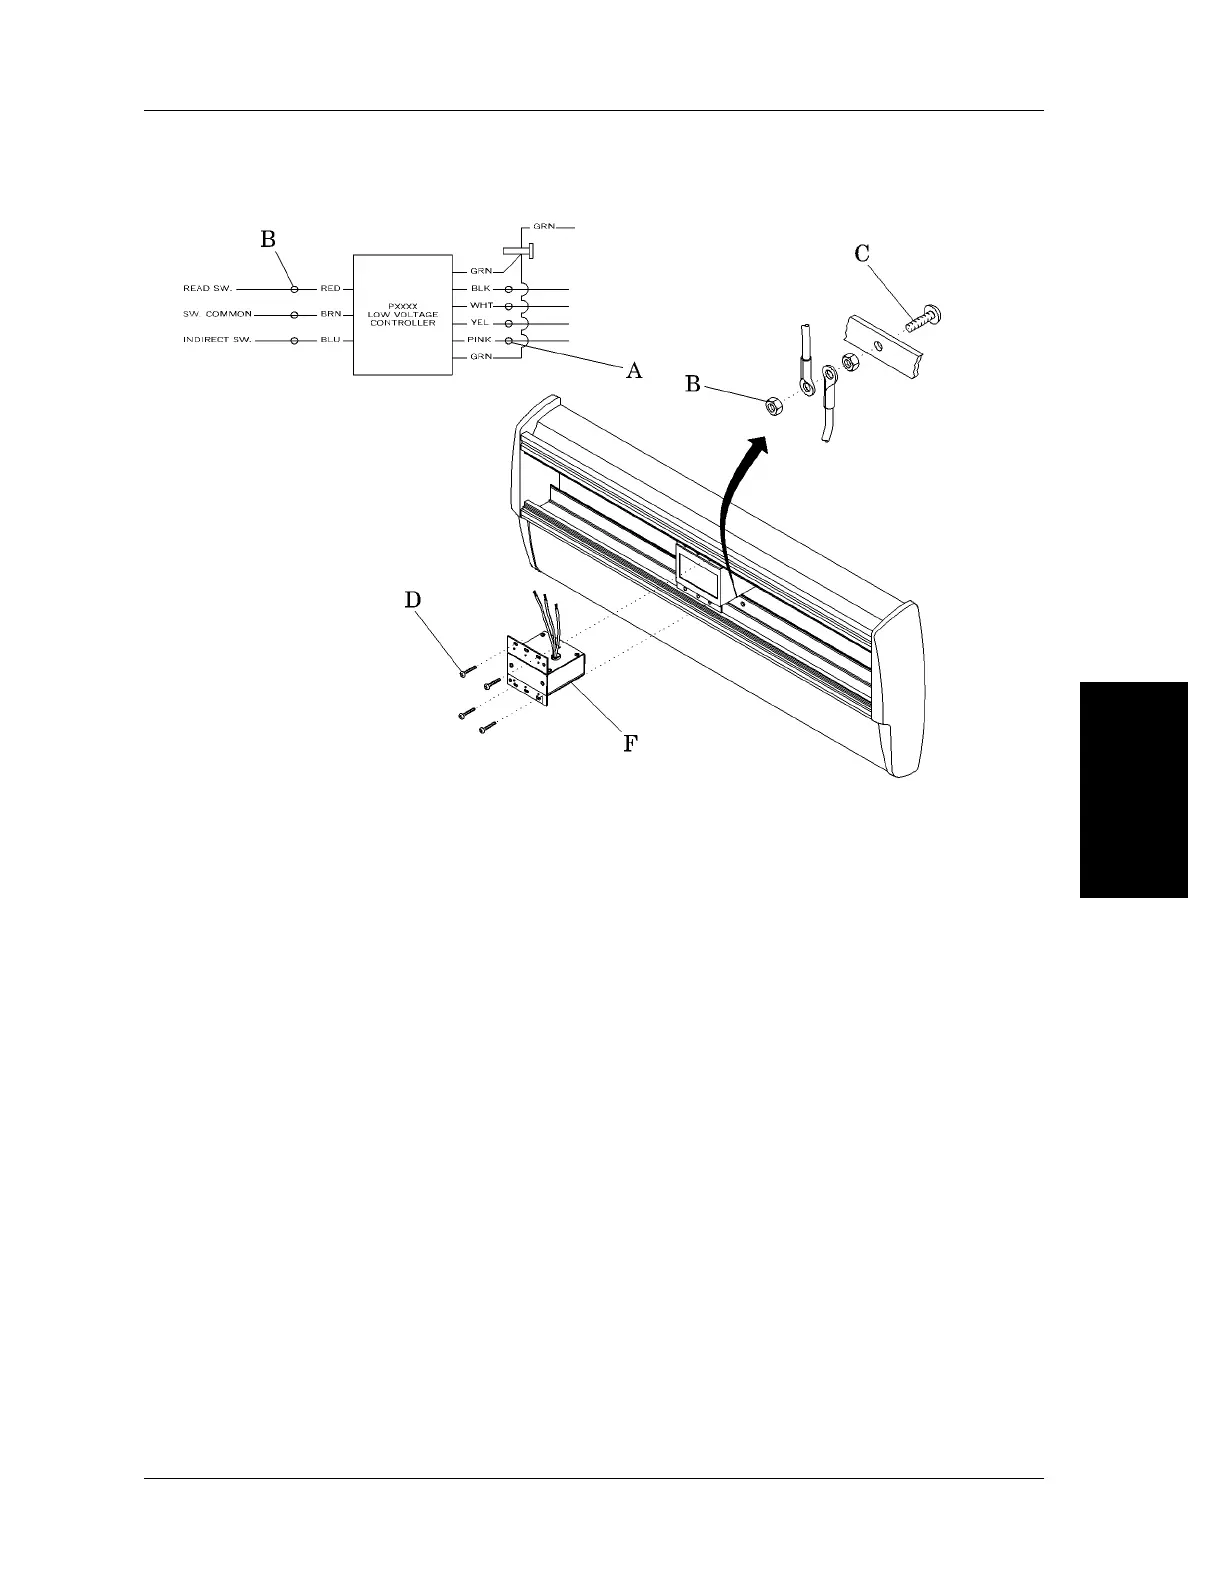
Figure 4-10. Low Voltage Controller Removal
4
m148a021
5. Separate the three wire joints.
6. Remove the four wire nuts (A) from the wires on the high voltage side of
the controller.
7. Separate the four wires.
8. Using the adjustable wrench, remove the nut (B) from the ground stud (C),
and remove the two ground wires.
9. Using the phillips head screwdriver, remove the low voltage controller
mounting screws (D) and the controller (F) from the receptacle box.
Replacement
1. Make sure the replacement low voltage controller (F) has the same part
number as the one removed.
2. Insert the low voltage controller (F) into the receptacle box.
Integris® 2001 Headwall System Service Manual (man148ra) Page 4 - 23