October 2012
4-23
ColorQube 8570/8870 Service Manual
REP 2.3
Repairs and Adjustments
Xerox Internal Use Only - Revised, 3rd Revision
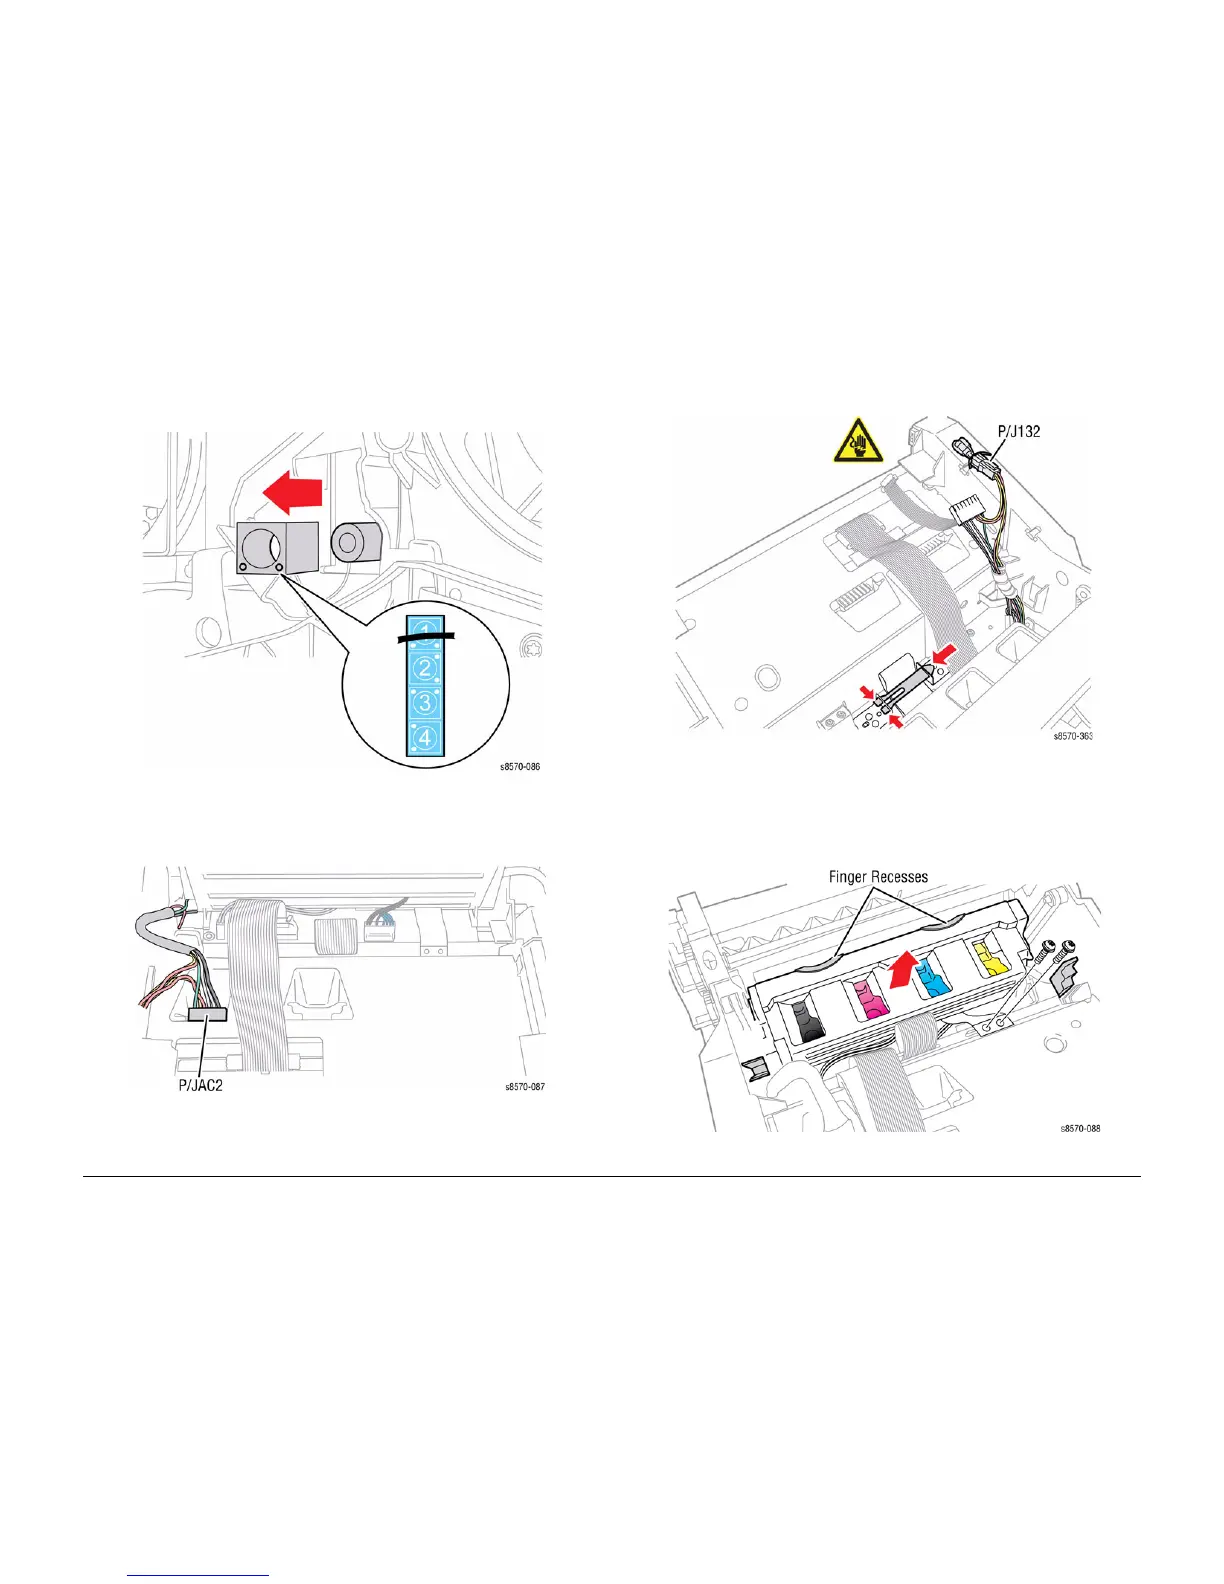
18. Remove the Roll Block on the left end of the Printhead Shaft.
NOTE: The check mark on the label indicates the proper orientation of the Roll Block.
Figure 9 Removing the Roll Block
19. Disconnect the Printhead Heater wiring harness connector P/JAC2 and free the wiring
harness from the restraint.
Figure 10 Printhead Electrical Connections
20. Remove the Printhead Data ribbon cable retaining clip.
21. Disconnect the Printhead Fuse connector P/J132.
Figure 11 Removing the Ribbon Cable Retaining Clip
22. Remove 2 screws (metal, T-20) that secure the Ground cable.
23. Push the Air Hose into the chassis.
24. Hold and lift the Printhead using the finger recesses and place the ends of the shaft in the
cradle notches near the top of the frame as shown in Figure 12.
Figure 12 Printhead Cradle Notch Locations

 Loading...


