3-32
1
2
3
4
5
6
7
8
9
10
ENGINE
VALVES
3.
Once the contacting surface of the valve face is pol-
ished and becomes shiny, apply mechanic’s blue lay-
out fluid to make sure that there are traces of even
contact in the center of the valve face.
After every lapping procedure, clean off the compound
from the valve face and valve seat.
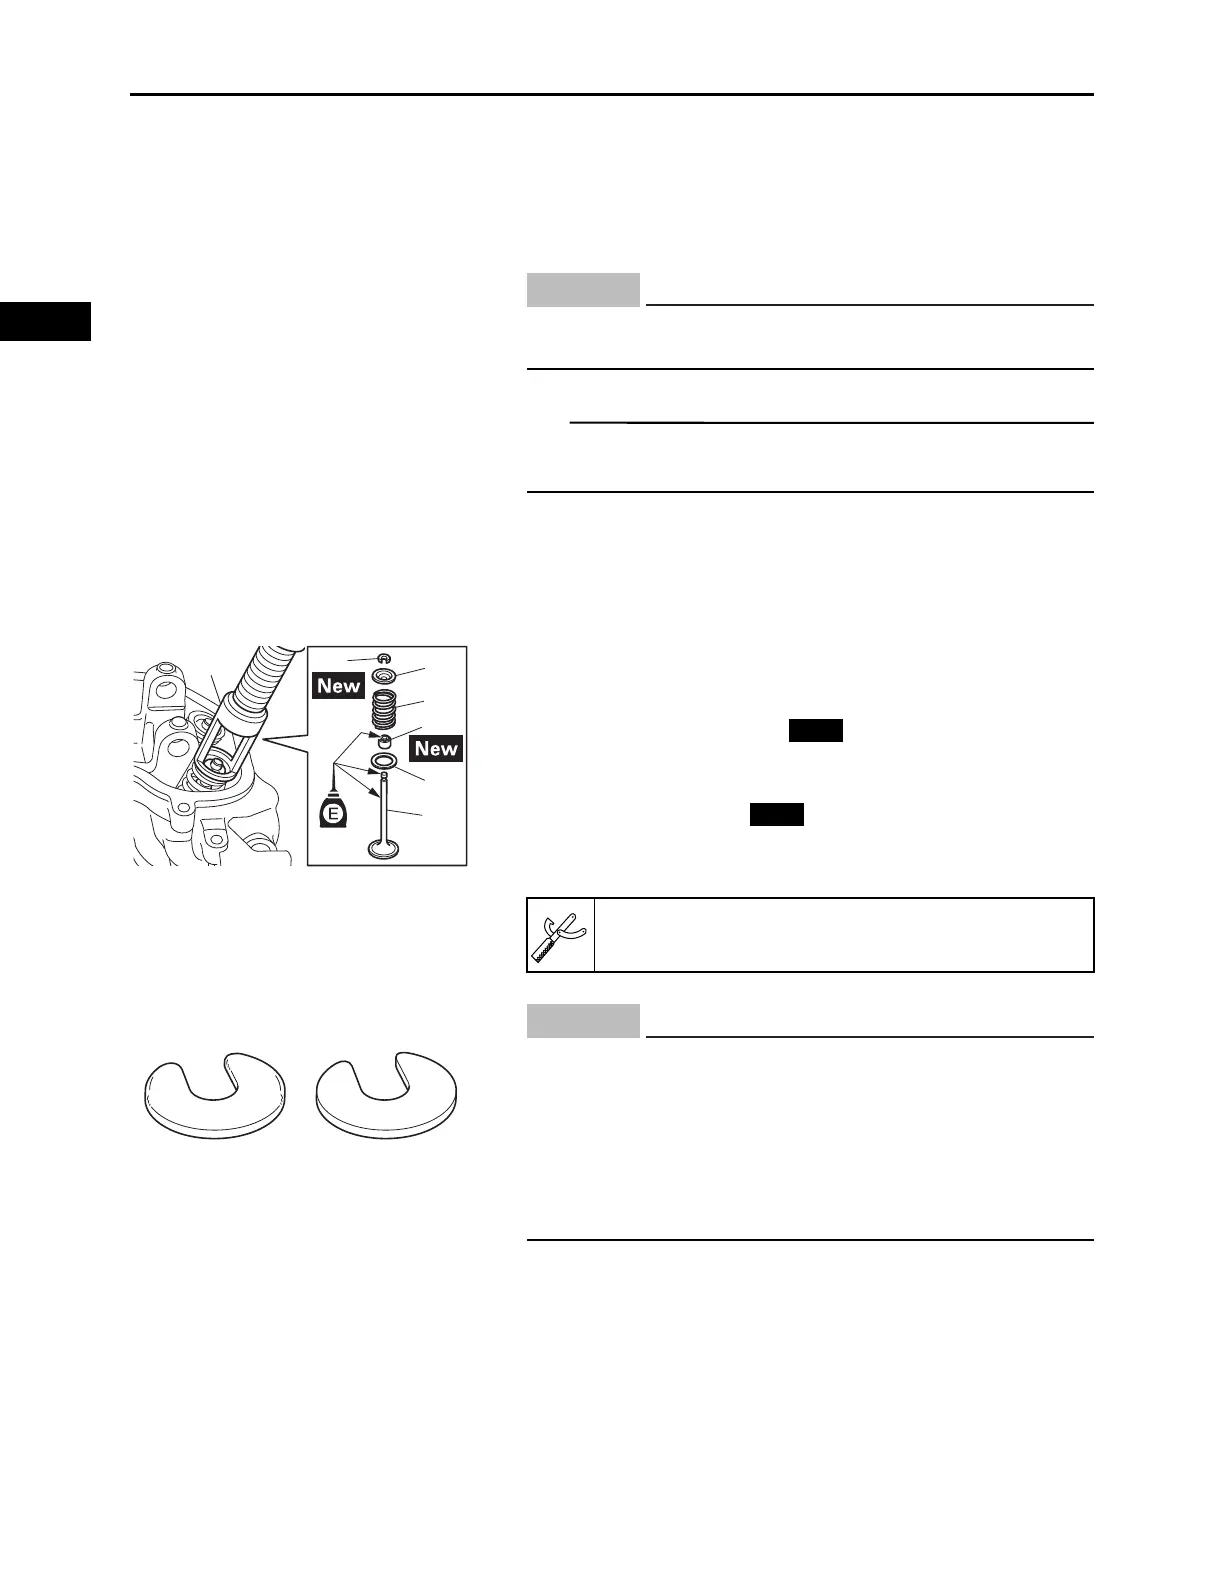
INSTALLING THE VALVES AND VALVE SPRINGS
The following procedure applies to all of the valves, valve
springs and related components.
1.
Install:
•Valve “1”
• Valve spring seat “2”
• Valve stem seal “3”
• Valve spring “4”
• Valve spring retainer “5”
• Valve cotter “6”
Use the valve spring compressor “7” to install the
parts.
Do not let the lapping compound enter the gap
between the valve stem and the valve guide.
Valve spring compressor:
90890-01253
• Do not compress the spring more than necessary.
• Surface “a” with the rounded edges of the valve cot-
ter must face downward (to the valve spring retainer
side) when installing it on top of the valve spring
retainer. If surface “b” of the opposite side is facing
downward when the valve cotter is installed, it could
result in the premature wear of the valve cotter.