4-1
4
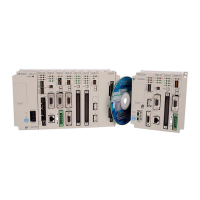
System Startup and Sample Programs
4
System Startup and Sample Programs
This chapter describes the procedure for starting the MP2300 system and sample programs for
typical operation and control.
4.1
Model System Startup Procedure
- - - - - - - - - - - - - - - - - - - - - - - - - - - - - - 4-2
4.1.1
Flowchart for Model System Startup
- - - - - - - - - - - - - - - - - - - - - - - - - - - - - - - - - - - - 4-2
4.1.2
System Configuration
- - - - - - - - - - - - - - - - - - - - - - - - - - - - - - - - - - - - - - - - - - - - - - 4-3
4.1.3
Initializing SERVOPACKs
- - - - - - - - - - - - - - - - - - - - - - - - - - - - - - - - - - - - - - - - - - - - 4-5
4.1.4
Setting and Saving Communication Process (Communication Manager)
- - - - - - - - - - 4-6
4.1.5
MP2300 Self-configuration
- - - - - - - - - - - - - - - - - - - - - - - - - - - - - - - - - - - - - - - - - - 4-12
4.2
Starting the Sample Program - MPE720 Ver 6.
- - - - - - - - - - - - - - - - 4-13
4.2.1
Copying and Transferring Sample Program Files
- - - - - - - - - - - - - - - - - - - - - - - - - - 4-13
4.2.2
Setting Motion Fixed Parameters and Adjusting the Settings for Servo Control
- - - - - 4-17
4.2.3
Saving Data from the MP2300 to Flash Memory, and Transferring Data to
Your Computer from the MP2300
- - - - - - - - - - - - - - - - - - - - - - - - - - - - - - - - - - - - - 4-21
4.3
Starting Sample Program - MPE720 Ver 5.
- - - - - - - - - - - - - - - - - - - 4-23
4.3.1
Starting MPE720 Ver 5.
and Creating Folders
- - - - - - - - - - - - - - - - - - - - - - - - - 4-24
4.3.2
Reading Sample Programs and Setting and Saving Parameters
- - - - - - - - - - - - - - - 4-28
4.3.3
Other Operations
- - - - - - - - - - - - - - - - - - - - - - - - - - - - - - - - - - - - - - - - - - - - - - - - - 4-42
4.4
Checking Sample Program Operation
- - - - - - - - - - - - - - - - - - - - - - - - - - 4-44
4.4.1
How to Open the Tuning Panel Window
- - - - - - - - - - - - - - - - - - - - - - - - - - - - - - - - - 4-44
4.4.2
Operation Check 1: Manual Operation
- - - - - - - - - - - - - - - - - - - - - - - - - - - - - - - - - - 4-46
4.4.3
Operation Check 2: Position Control
- - - - - - - - - - - - - - - - - - - - - - - - - - - - - - - - - - - 4-53
4.4.4
Operation Check 3: Phase Control - Electronic Shaft
- - - - - - - - - - - - - - - - - - - - - - - 4-58
4.4.5
Operation Check 4: Phase Control - Electronic Cam
- - - - - - - - - - - - - - - - - - - - - - - - 4-62
4.5
System Startup Using Self-Configuration
- - - - - - - - - - - - - - - - - - - - - - - 4-68
4.5.1
Starting the System for First Time
- - - - - - - - - - - - - - - - - - - - - - - - - - - - - - - - - - - - - 4-68
4.5.2
System Startup when Adding Electronic Devices
- - - - - - - - - - - - - - - - - - - - - - - - - - 4-71
4.5.3
System Startup when Replacing Electronic Devices
- - - - - - - - - - - - - - - - - - - - - - - - 4-73