7-25
IM 04P01B01-01E
Setup Operations for Changing/Adding Functions (Basic Setting Mode)
7
7.16 Changing the Time Printout Format
This section explains the details of changing the time printout format of alarm printout,
message printout, recording start printout, and new chart speed printout.
Basic Setting mode cannot be entered when recording is in progress or when
computation is in progress on models with the computation function (/M1 option).
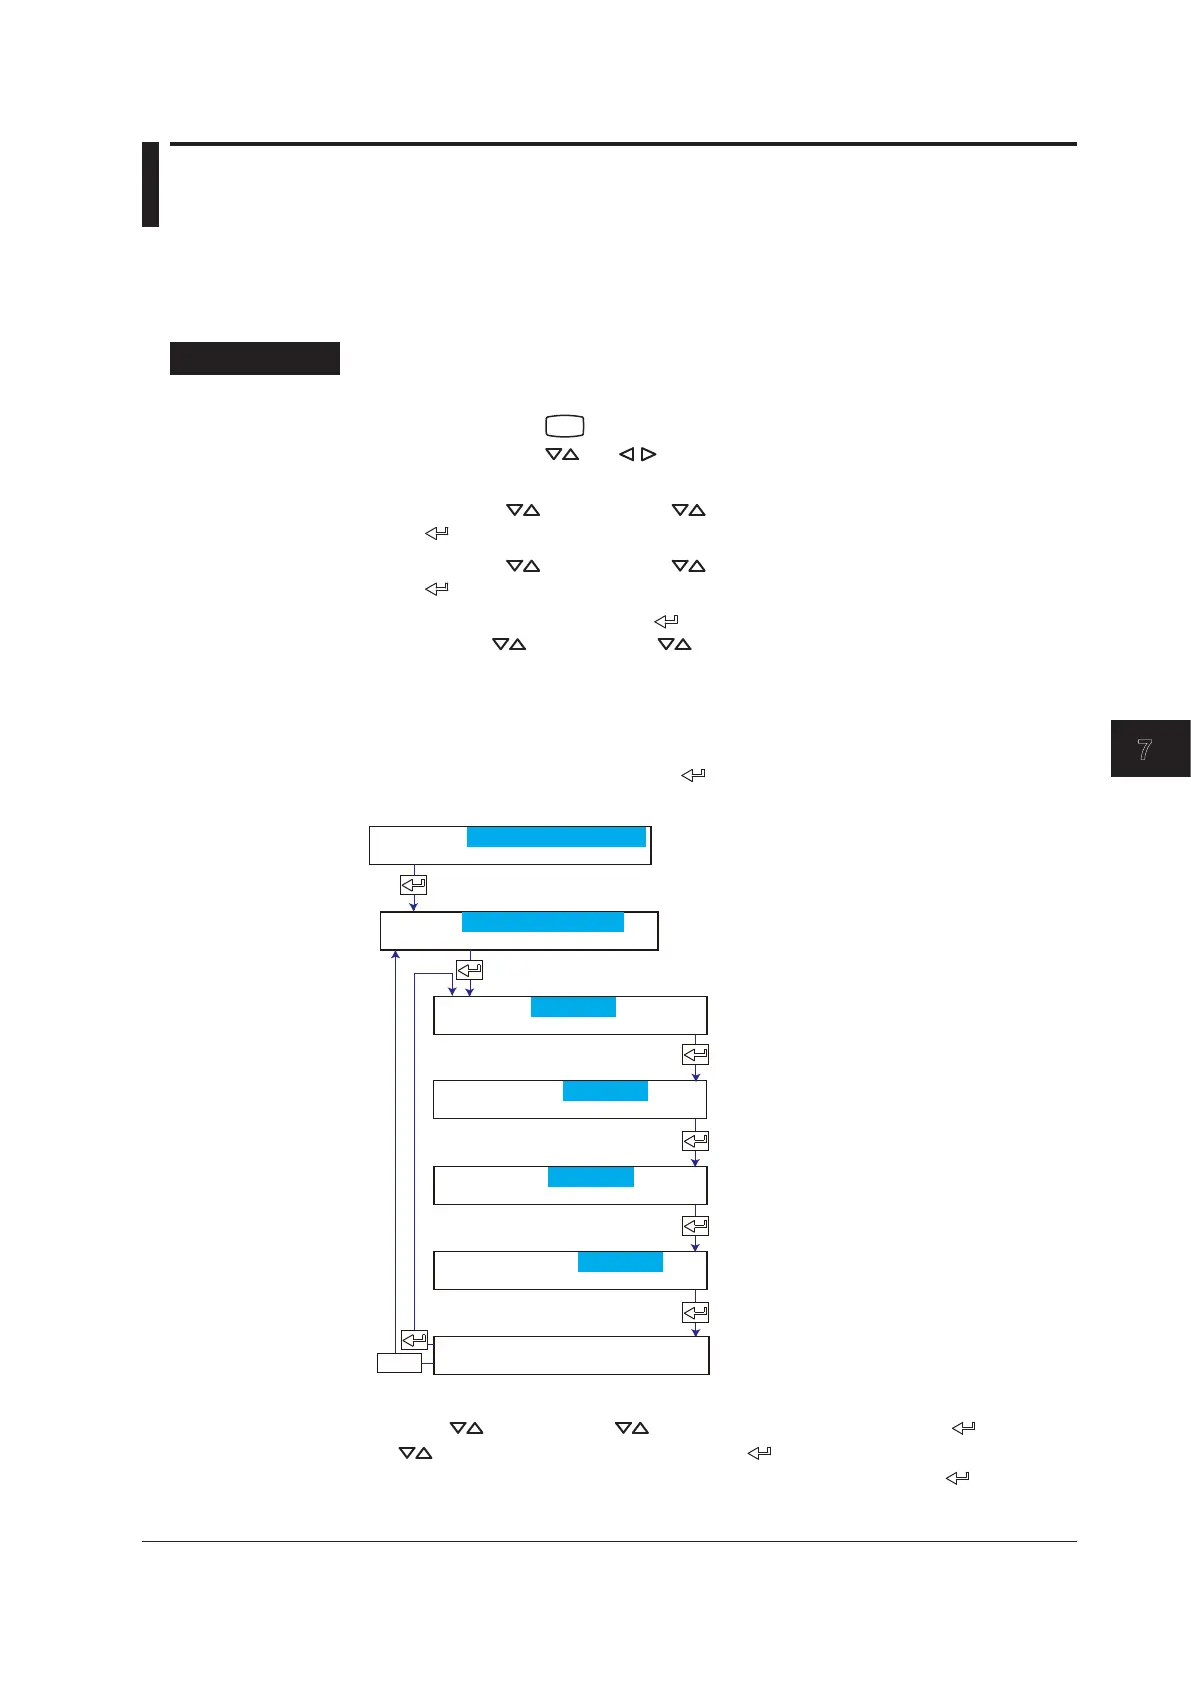
Procedure
Changing the Settings
1.
Hold down the
key for 3 seconds to enter Setting mode.
2.
Hold down the and keys simultaneously for 3 seconds to enter Basic
Setting mode.
3.
Press the key or SHIFT + key to select Personalize and then press the
key.
4.
Press the key or SHIFT + key to select Time print and then press the
key.
5.
Set each item and press the key.
Use the
key or SHIFT + key to select values.
For the procedure on how to enter values or characters, see section 4.2.
If you press the ESC key in the middle of the operation, the settings entered up to
then are cancelled, and the display returns to a higher level menu.
6.
When the Setting complete screen appears, do either of the following:
To correct the setting, press the
key.
If you are done, press the ESC key.
Select the time printout format of the
alarm printout.
Select the time printout format of the
message printout.
Select the time printout format of the
recording start printout.
The new setting takes effect.
Select the time printout format of the
new chart speed printout.
ESC/?
Mode=Time print
Alarm=HH:MM
Message=HH:MM
RCD On=HH:MM
C. Speed=HH:MM
Personalize
Setting complete
Basic=Personalize
Applying the Changes and Returning to Operation Mode
Press the key or SHIFT + key to select End and then press the key. Press
the
key to select Store and then press the key. The changes are applied, and
the screen returns to Operation mode. If you select Abort and press the
key, the
changes are discarded, and the screen returns to Operation mode. Press the ESC key to
return to the Basic= screen.
 Loading...