11-9
IM 04P01B01-01E
Maintenance
11
7.
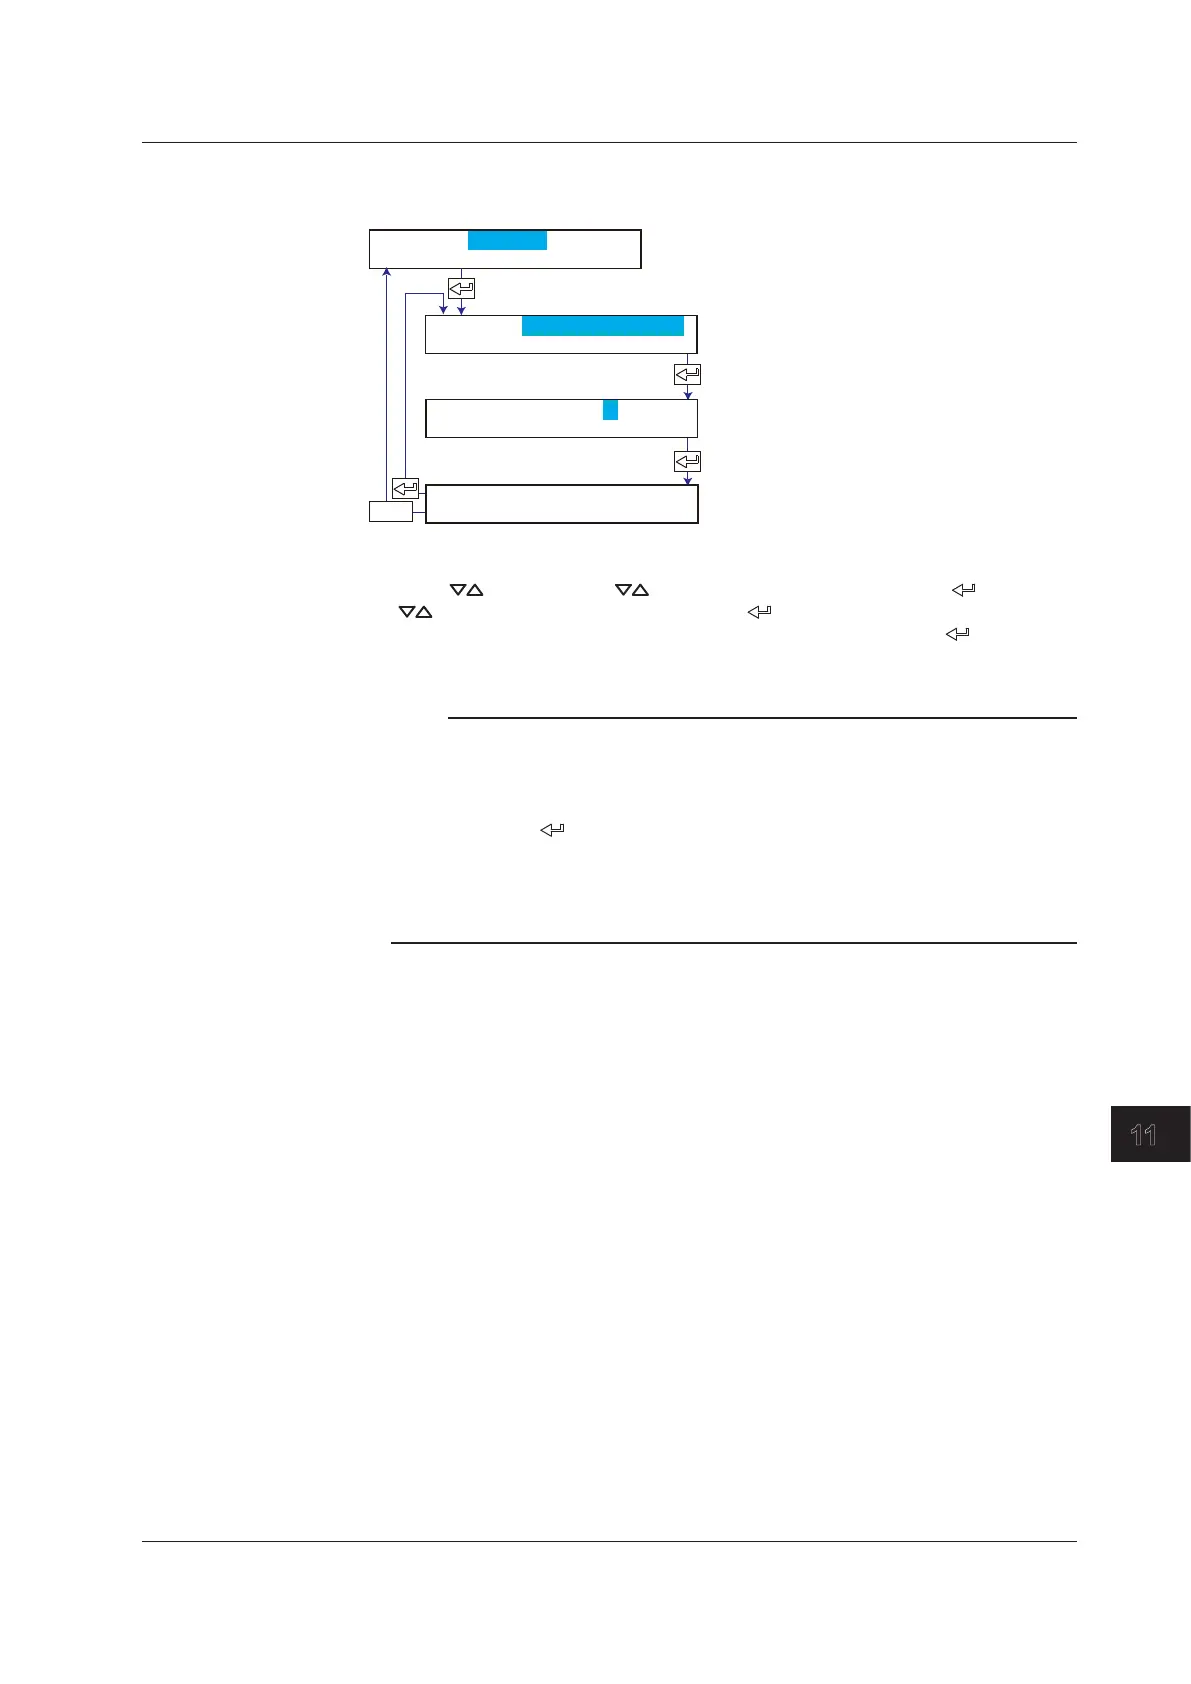
Press the ESC key to finish the adjustment. The screen returns to the
Basic=P_Adj screen.
Select Hysteresis, Zero, or Full.
Change the value to adjust the dot
printing position.
The dot printing position moves.
ESC/?
P_Adj=Hysteresis
P_Adj
Hysteresis=-2
Applying the Changes and Returning to Operation Mode
Press the key or SHIFT + key to select End and then press the key. Press
the
key to select Store and then press the key. The changes are applied, and
the screen returns to Operation mode. If you select Abort and press the
key, the
changes are discarded, and the screen returns to Operation mode. Press the ESC key to
return to the Basic= screen.
Note
When the Customized Menu is enabled, the operation is different.
• When “P_Adj” in the Customized Menu is On
1. Perform steps 1-4 of “Adjusting the Dot Printing Position.”
2. When the instrument enters Basic Setting mode, “Menu kind” appears. Select “Free”
then press a key.
3. Perform the steps starting with step 5 of “Adjusting the Dot Printing Position.”
• When“P_Adj”intheCustomizedMenuisO
See “Disabling the Customized Menu” or “Changing the Settings without Disabling the Basic
Setting Mode Lock.”
<Related Topics> Enabling/Disabling the customized menu: Section 7.22
Changing the settings without r
eleasing the basic setting mode lock:
Section 7.22
11.6 Adjusting the Dot Printing Position (Dot Model)
 Loading...