SK=léÉê~íáçå
fåëíêìÅíáçå=j~åì~ä=`êçëëÄÉ~ã=PQM=ÉåMOE`loF =VP=çÑ=N PQ
`êçëëÄÉ~ã=çéÉê~íáçå
6.8.1.2. Adjusting tilt eucentricity
Before you can start imaging or milling, it might be necessary to adjust tilt eucentricity. By adjust-
ing the eucentricity, the specimen surface is moved into the tilting plane of the super-eucentric
stage. That is why the image does not shift out of the screen when the stage is tilted.
CAUTION
Danger of damaging objective lens or specimen if the specimen is too close to the objec-
tive lens.
Since the eucentricity is adjusted by using the M-axis, the working distance will be
changed during the eucentricity setup.
Ensure the working distance is 10 mm or more.
Procedure
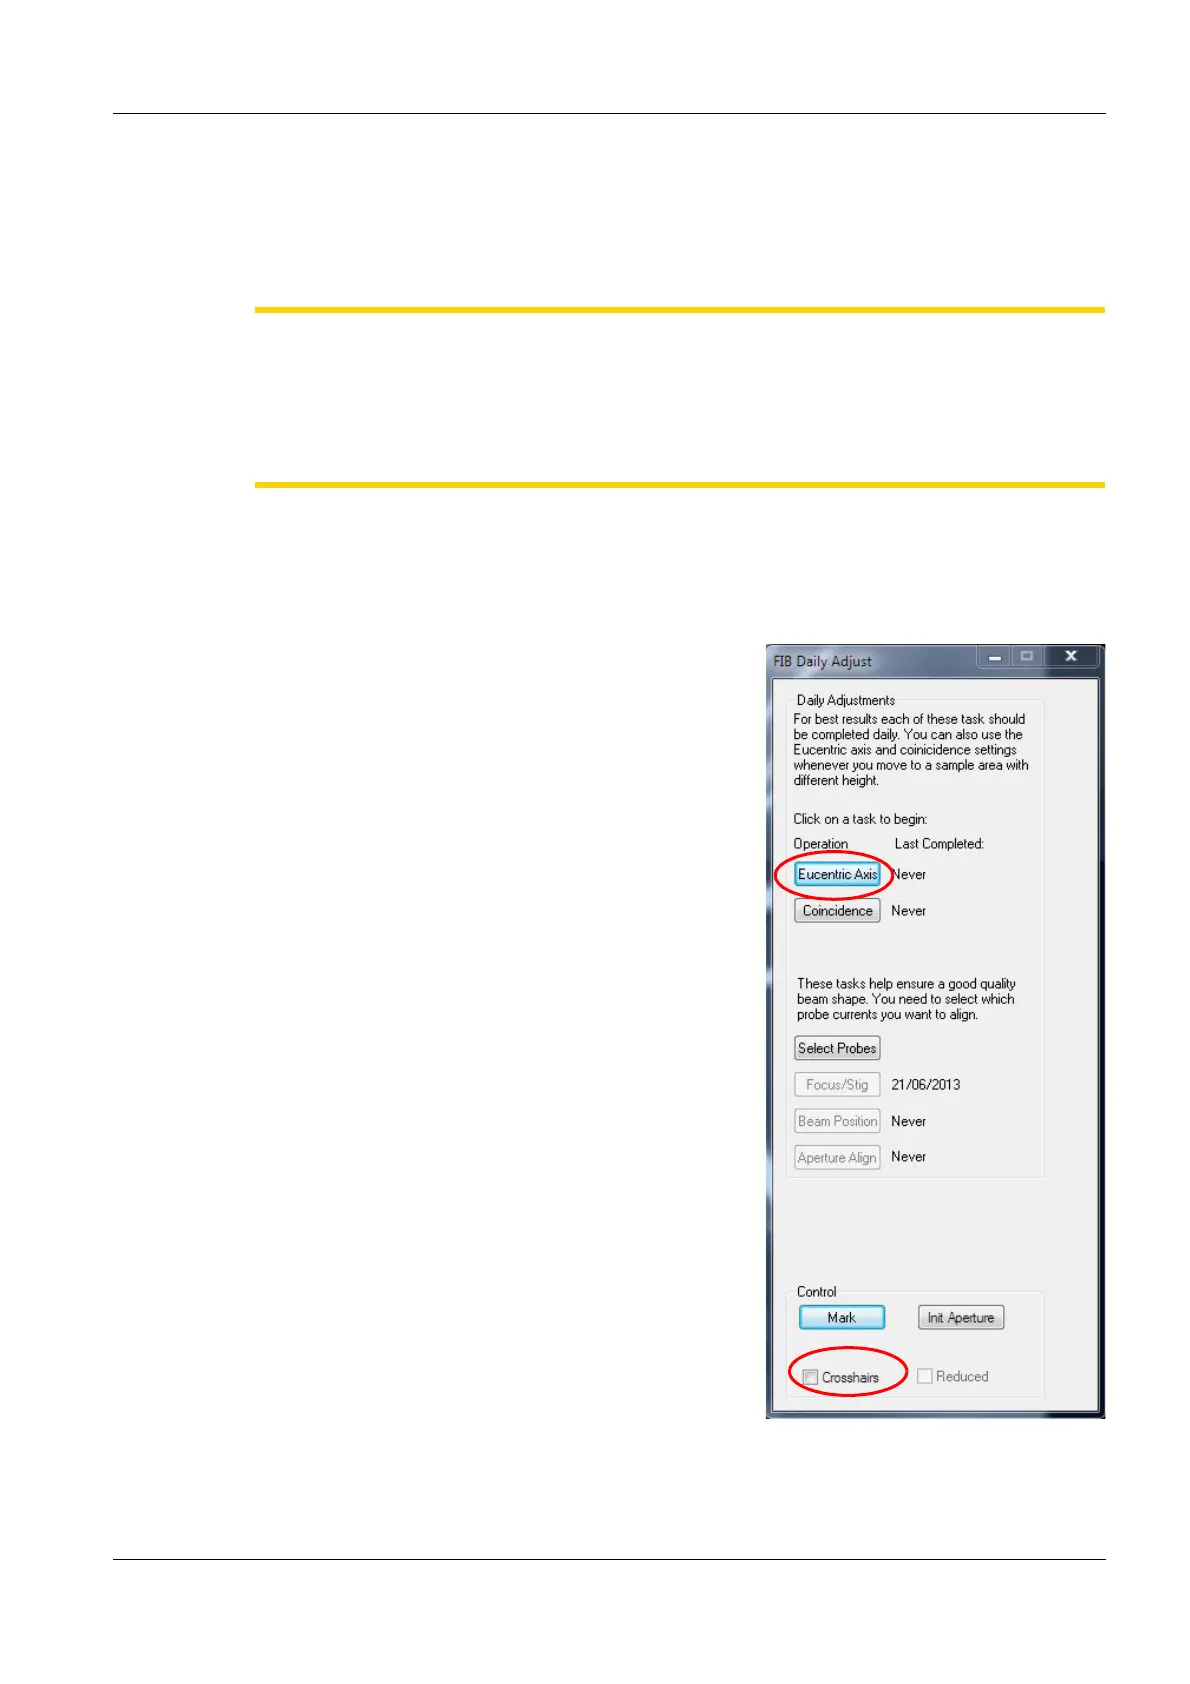
1 Open the Panel Configuration Bar.
2 Double-click FIB Daily Adjust.
The FIB Daily Adjust panel opens.
3 To show the crosshairs, activate the Cross-
hairs checkbox .
4 Center a characteristic feature in the middle of
the screen (i.e. in the middle of the crosshairs).
5 Click Eucentric Axis.
6 Click Start.
7 Follow the instructions in the wizard.
To re-centre the feature, use the Centre feature
function (<Ctrl+Tab>) or change X/Y.
To change the tilt degree of the stage:
a In the SEM Control panel, select the Stage
tab.
b In the Go To T(ilt) field, enter the required
degree.
 Loading...