SK=léÉê~íáçå
fåëíêìÅíáçå=j~åì~ä=`êçëëÄÉ~ã=PQM=ÉåMOE`loF =VT=çÑ=N PQ
`êçëëÄÉ~ã=çéÉê~íáçå
6.8.1.4. Setting the coincidence point
Before you can start imaging or milling, you have to align the specimen to the coincidence point.
The coincidence point is the crossing point of electron beam and ion beam. Only if a specimen
feature is located in the coincidence point, it can be imaged simultaneously as well in SEM mode
as in FIB mode.
Procedure
1 Check that SEM Beam Shift is set to zero.
2 Position the feature of interest under the SEM.
3 Make sure the eucentricity is setup.
4 Set a WD of 5 mm.
5 Go to SEM view.
6 In SEM view, centre the feature.
7 Open the Panel Configuation Bar.
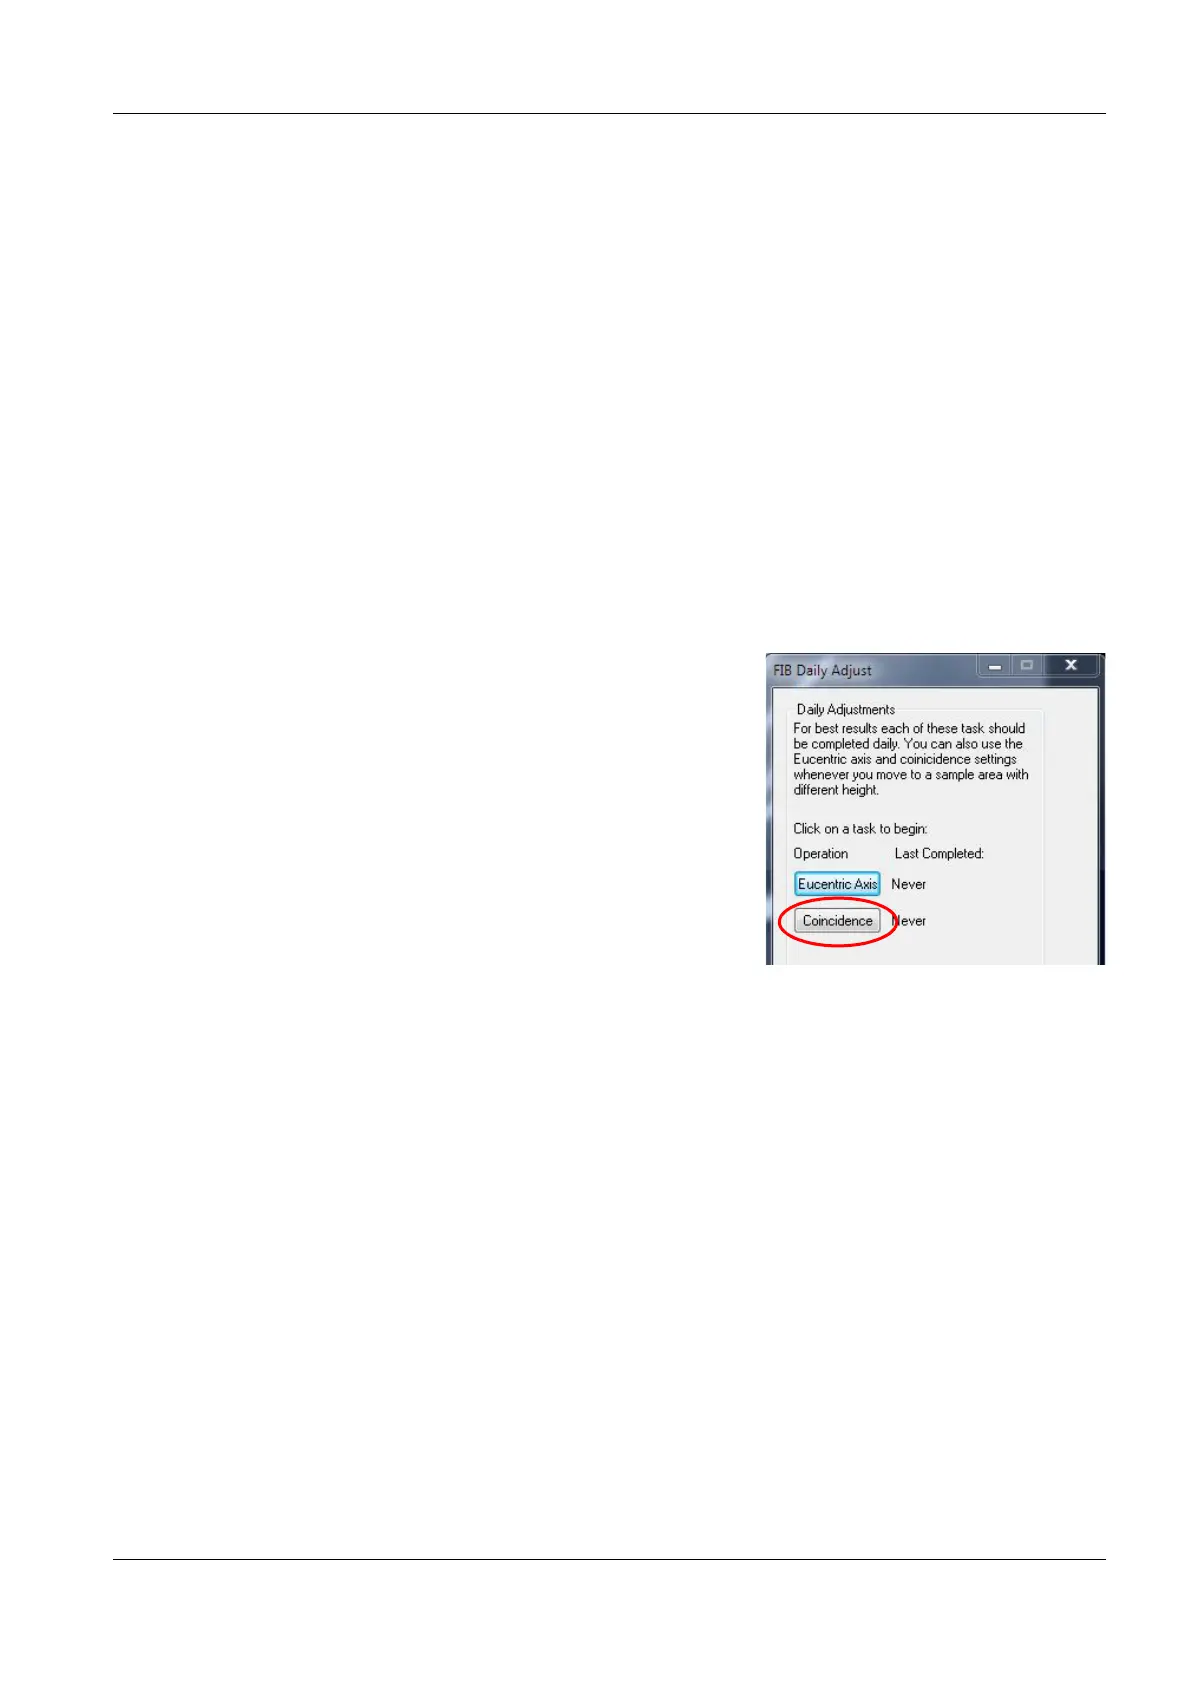
8 Double-click FIB Daily Adjust.
The FIB Daily Adjust panel opens.
9 Tilt the stage to 54°.
10 Click Coincidence.
11 Follow the instructions in the wizard.
12 Click Start.
13 To centre the feature, only move the stage.
Do not use the centre point function, because it
is based on Beam Shift and can therefore have
a negative effect on the alignment.
14 Move Z.
15 Repeat the procedure until the Finish button is shown.
Now, the workstation is ready to apply the CrossBeam
®
functions.
In general, the magnifications of SEM image and FIB image are not identical.
If you wish both magnifications to be the same, proceed as following:
a From the menu, select View/SEM Status.
b In the Select tab, select FIB Lock Mags.
cSet FIB Lock Mags=Yes by clicking the entry.