Configuring the ISA Adapter
2-10
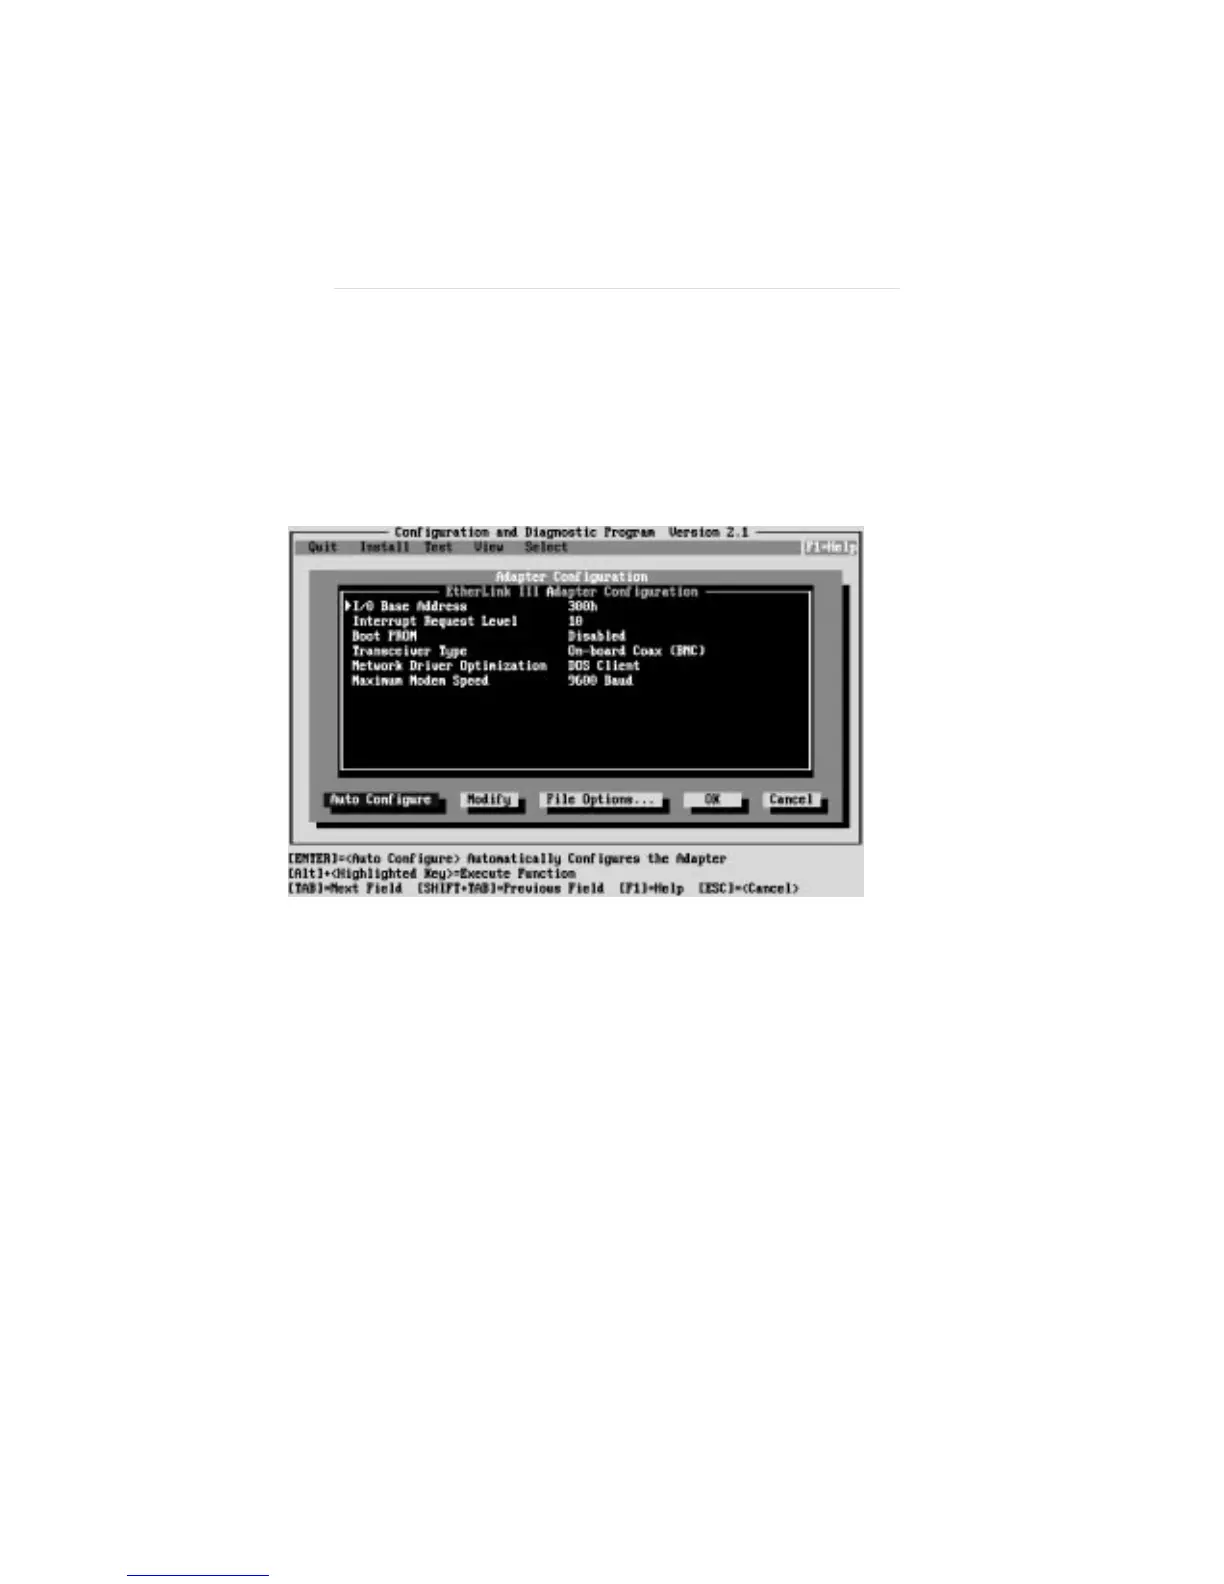
3. The menu selection Configure Adapter appears
already highlighted. Press [Enter].
A configuration screen similar to that shown in
Figure 2-5 appears.
Figure 2-5. Configuration Dialog Box
4. From the screen similar to the one shown in
Figure 2-5, make sure the <Auto Configure>
command button is highlighted and press [Enter].
This automatically configures the I/O Base Address,
Interrupt Request Level, and Transceiver Type on the
adapter to settings that do not conflict with any other
device in your computer. To change any of the
above settings or those for the Boot PROM, Network
Driver Optimization, Maximum Modem Speed, or
Transceiver Type, follow the steps in “Changing
Software Option Settings.”