Performing Troubleshooting and Diagnostic Tests 7-13
4. After the test is completed:
a. Exit the Configuration and Diagnostic Program.
b. Remove the loopback plug.
c. Connect to the network. Refer to Chapter 5,
“Connecting to the Network,” for instructions.
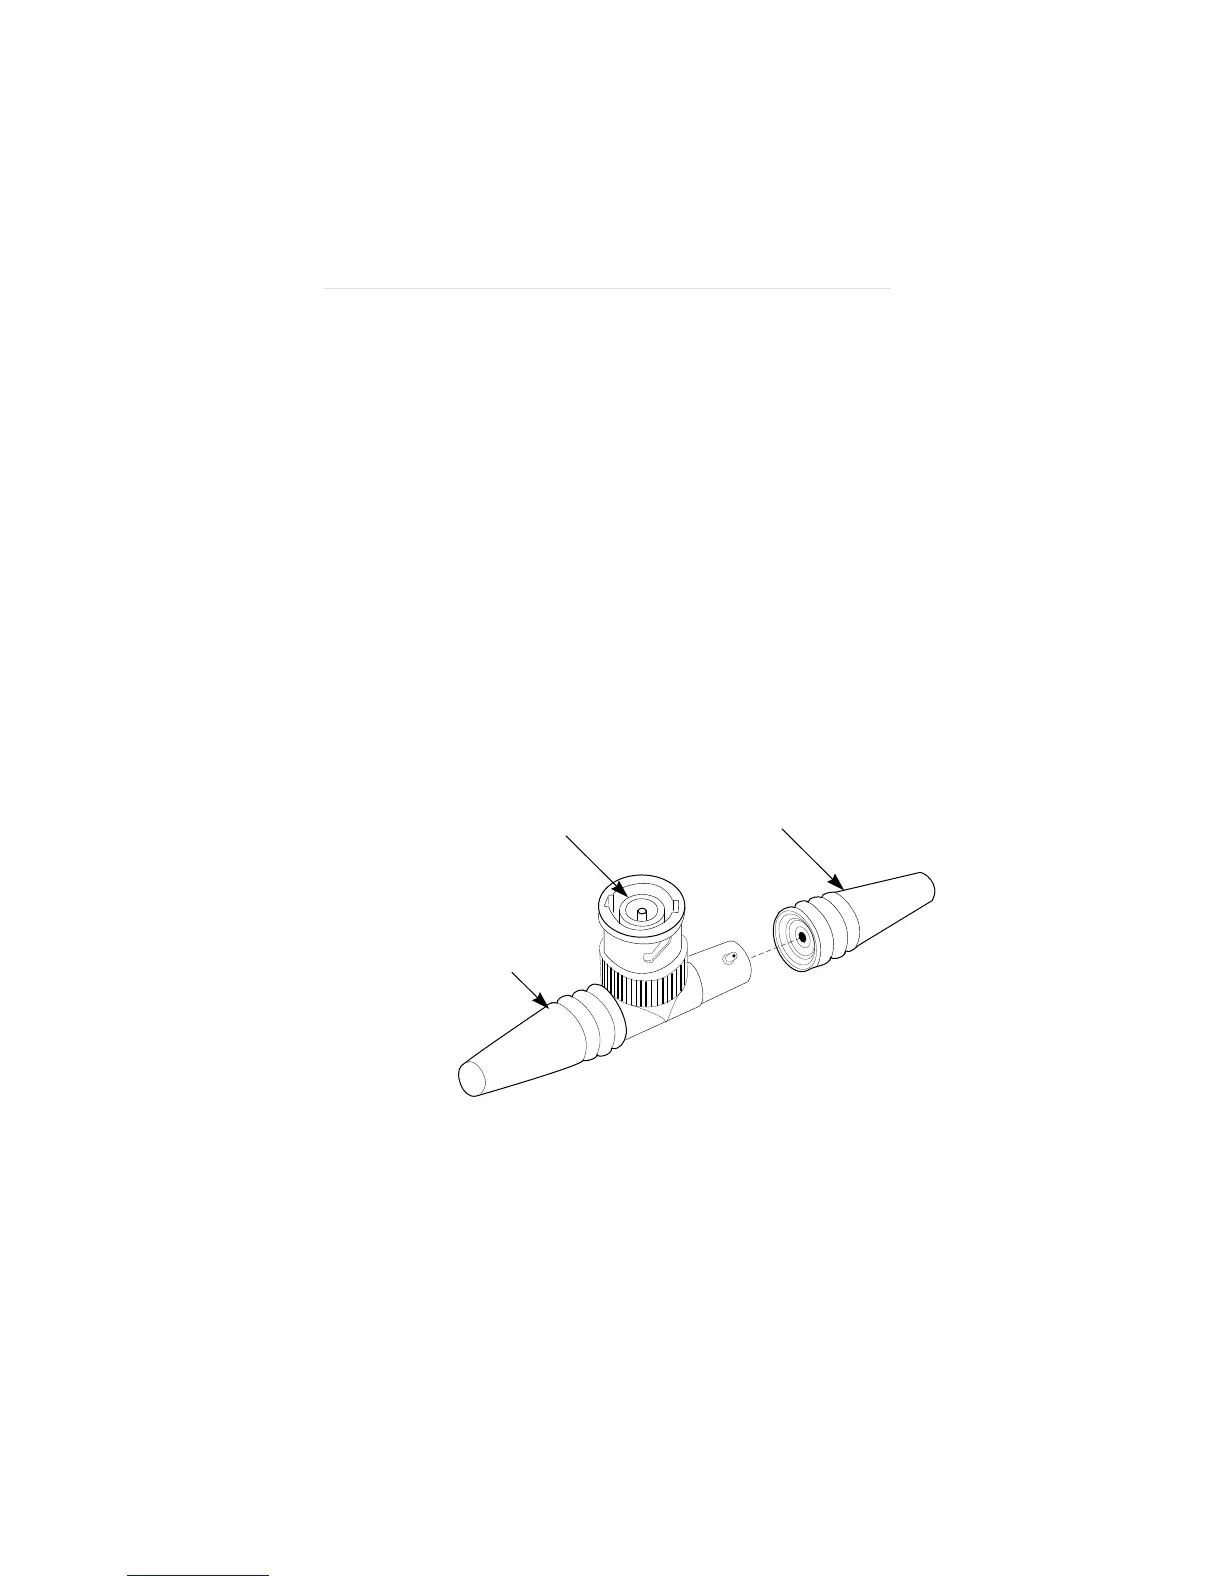
If you do not have a loopback plug, you can order one
from your authorized network supplier (3Com part
number 3C537) or you can make your own. To assemble
the loopback plug, connect two 50-ohm network cable
terminators to a T connector, as shown in Figure 7-6.
You can purchase the terminators from your network
supplier (3Com part number 3C535).
Terminator
Terminator
T connector
Figure 7-6. Assembling a Loopback Plug