INSTALLATION PROCEDURES
78 FOX615Installation
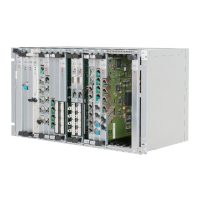
2. Identify the slot for the plug-in unit and engage the unit to the upper and
lower rails. Slide unit half way in (Figure 50, a).
3. Insert plug-in unit as follows:
− Push both levers (11), (12) in outward position (A).
− Slide the unit in until its connectors touch the front of the backplane
connectors (13). Do not insert completely!
− To engage the unit with the backplane connectors, press carefully and
simultaneously the levers (11) and (12) inwards (B) while at the same
time pressing (C) the unit via the unit front into the subrack.
− The lever movement and insertion force will engage the connectors of
the unit to the backplane connectors.
− Tighten both fixing screws (14) to fix the unit to the subrack (for rec-
ommended torques, refer to section Torques (on page 34)).
4. Repeat the steps 2 to 3 for all units to insert.
End of instruction
Risk of operating trouble!
Forced insertion can damage the connectors of the unit and/or the back-
plane.
→ Never use force to insert a unit!
3.9.3.2 Connecting signal cables
Signal cable connection Proceed as follows:
1. Applicable for DIN based front connectors only:
Check for latching clips (refer to positions (LC) in Figure 50). If no clips
are fitted, insert the clips to the positions shown in Figure 50. The latch-
ing clips are packed with the original cables from the manufacturer or
provided separately.
2. Plug the connector of the signal cable onto the front connector of the
unit.
3. Attend to the click of the latching system (if provided) or secure connec-
tor if applicable.
4. Realign the cable(s) on the cable tray. Ensure close contact of the dis-
mantled cable shield to the earthing bar.
5. Fix the cable(s) firmly (e.g. using cable ties).
6. Repeat the steps 1 to 5 for all units and interfaces.
End of instruction
Latching clips are required for some of the connectors (DIN 41 612 based
interfaces):
→ Latching clips are packed with the original cables from the manufac-
turers.