Page 43
SYSTEM MENU
Control Stick Calibration - User Option
The Control Stick Calibration function serves several different purposes:
l
After changing the Operating Mode, it is necessary to recalibrate the control sticks to ensure accurate control centering and
maximum travel.
l
Different brands of servos center differently, so if you use a different brand of servos, or mix different brands of servos with
Airtronics servos, the Neutral position should be recalibrated to ensure optimum centering.
l
Some pilots prefer to use Stick Stops to limit the movement of the control sticks. The Travel function allows you to adjust the
servos to move 100% of their maximum travel if you choose to limit the movement of the control sticks.
2) Press the Navigation Pad
6
to highlight NEUTRAL/TRAVEL, then
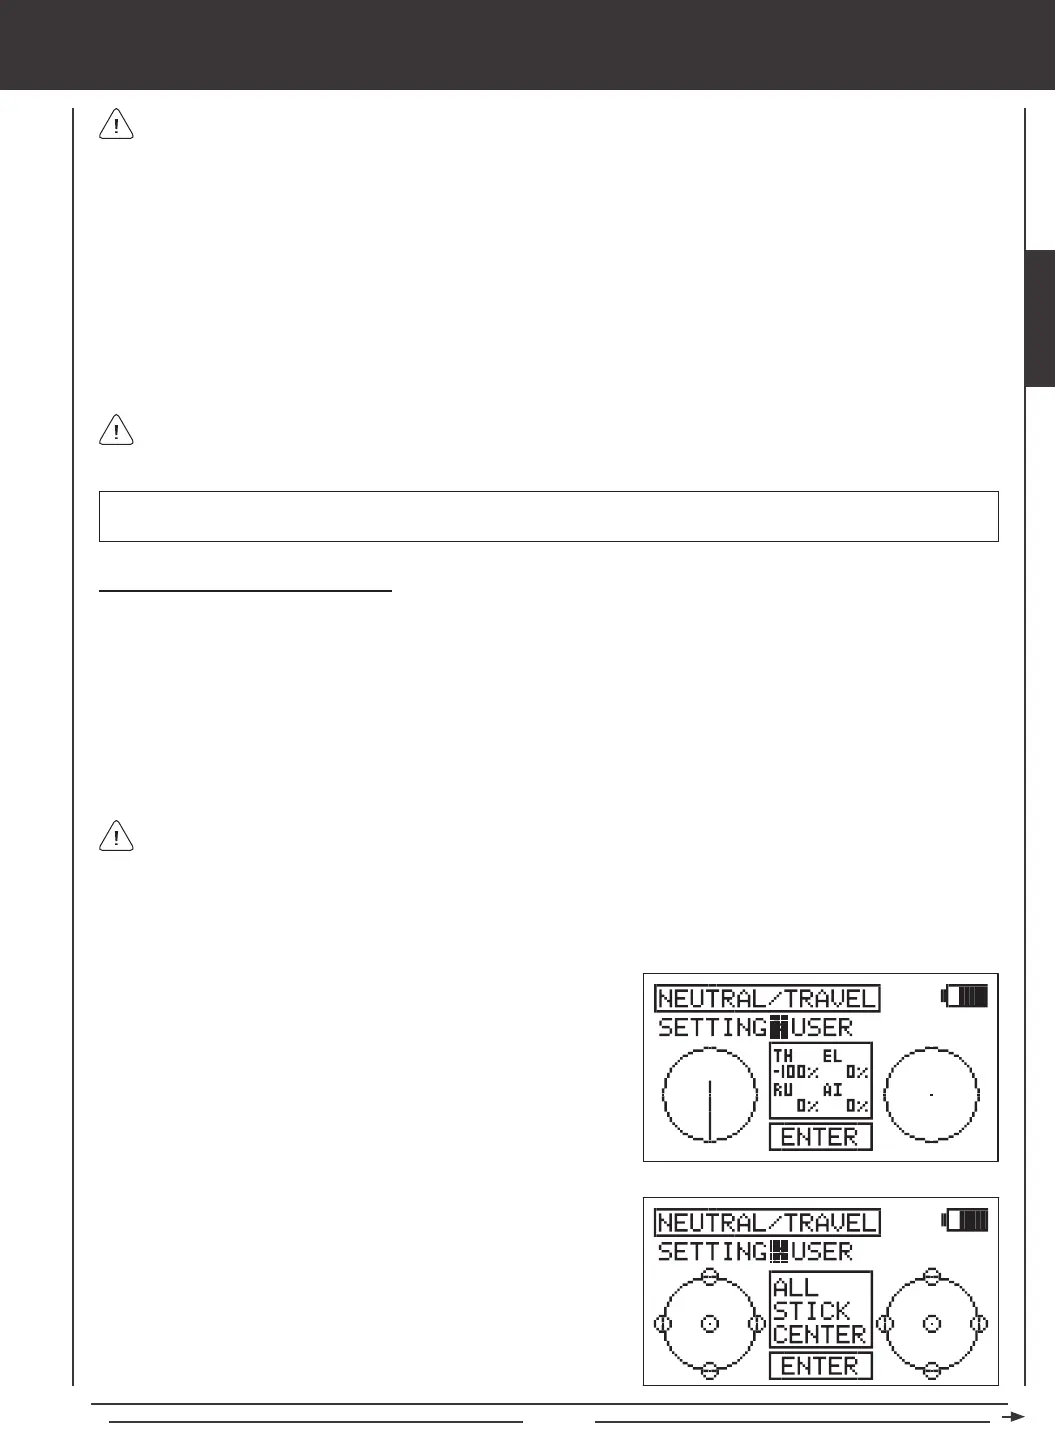
press the ENTER key to display the NEUTRAL/TRAVEL menu. The
cursor will default to SETTING>FACTORY.
3) Press the YES/+ or NO/- keys to choose the SETTING>USER option.
When reinstalling the back half of the transmitter, be very careful that you don't bend or otherwise damage the battery
pins (F). These long battery pins should be carefully slid through the matching holes in the back half of the transmitter
before pushing it down into place.
12) Adjust the throttle ratchet plates to your preference. To make the throttle control stick detents less noticeable, loosen the
socket-cap screw on the outer ratchet plate, using a 1.5mm hex wrench. To make the throttle control stick detents rmer,
tighten the socket-cap screw on the outer ratchet plate, using a 1.5mm socket-cap wrench.
13) Some helicopter pilots prefer to eliminate the throttle ratchet completely. To do this, loosen the socket-cap screw on the outer
ratchet plate , using a 1.5mm hex wrench until the throttle detents can't be felt anymore. Next, tighten the socket-cap screw
on the inner throttle plate, until you're satised with the throttle control stick resistance.
14) Test the control sticks to ensure that they are operating smoothly and to your liking.
15) When satised with the results carefully reinstall the back half of the transmitter, then reinstall the transmitter battery and
plug it back in. The battery connector is polarized and can therefore be plugged in only one way.
The throttle ratchet plate with a V-Shape in it should be installed toward the outside of the transmitter.
IMPORTANT After changing the Operating Mode, it is necessary to recalibrate the control sticks to ensure accurate control
centering and maximum travel. See the Control Stick Calibration - User Option section below.
1) Press the Navigation Pad
56
to highlight MODE SETUP, then press the ENTER key to display the MODE SETUP menu.
The MODE sub-menu will be highlighted by default.
4) Press the ENTER key to begin the NEUTRAL/CALIBRATION process.
ALL STICK CENTER will be displayed in the prompt window.
5) Center both control sticks, then press the ENTER key.
Limiting the maximum movement of the control sticks while maintaining 100% servo travel will increase the sensitivity of
the servos. We recommend setting negative Exponential to soften the control feel around neutral. For more information,
see page 77 (AERO), page 118 (GLID), or page 161 (HELI).
SYSTEM


 To Next Page