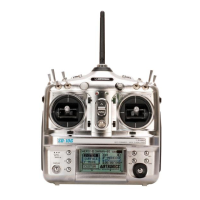
Page 8
basic model setup order
The information on this page describes the Basic Model Setup Order that you can use to setup a new model. Regardless of the
model you are ying, using the basic functions of the SD-10G transmitter for most applications is easy and will get your model
setup quickly. It's a simple 5-step process.
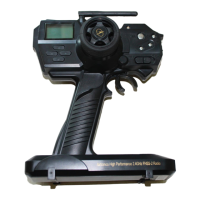
1) Bind the Receiver to the Transmitter and Position the Receiver Antennas:
l
Turn the transmitter ON and navigate to the SYSTEM>MODULATION menu.
l
Hold down the Bind Button on the receiver. While holding down the Bind Button on the receiver, turn the receiver ON.
l
Release the Bind Button on the receiver. The Bind LED will slowly blink.
l
Scroll down to TRANSMIT BIND CODE and press the YES/+ key. The Bind LED will blink rapidly.
l
After the Bind LED stops blinking rapidly, press the END key. The Bind LED will turn solid.
l
Install the receiver in your model, making sure that the two receiver antenna wires are mounted 90º to each other.
l
Rotate the transmitter antenna so that it is positioned at a 45º angle toward you.
2) Choose a Model Type:
l
Navigate to the SYSTEM>TYPE menu. Press the YES/+ or NO/- keys to select the Model Type that matches your
model, either AERO (Powered Aircraft), GLID (Sailplane), or HELI (Helicopter).
3) Make Model Type Selections:
l
Scroll down to choose the various options related to the Model Type you've chosen.
AERO - Select what type of wing (Normal or Delta), the number of aileron servos (1 or 2), the number of ap servos (1 or 2),
the type of tail (Normal, V-Tail, or Dual Elevator Servos), and how many engines (1 or 2) your model features.
GLID - Select what type of wing (Normal or Delta), the number of aileron servos (2 or 4), the number of ap servos (1, 2,
or 4), and the type of tail (Normal or V-Tail) your model features.
HELI - Select the type of swashplate your model features. Each Swashplate Type features a diagram showing where the
servos are positioned on the swashplate. Choose the Swashplate Type that matches your model.
l
After making your selections, press the ENTER key, then the YES/+ key. The pre-programmed model template will be
loaded into the transmitter.
4) Name Your Model:
l
Navigate to the SYSTEM>MODEL NAME menu and input a name for your model. This will allow you to easily choose this
model again for later use. The Model Name will be displayed on the Top menu so that you know which model is currently
in use.
5) Plug In Servos and Setup Control Surfaces:
l
Navigate to the Surface menu (it's directly below SYSTEM on the Top menu). The upper portion of the Surface menu
displays which servos plug into which channel slots in the receiver. Use this information to plug your servos into the
receiver in the correct order.
l
Use the Surface menu to adjust direction of travel (NOR/REV), centering (CENT) and maximum travel (EPA) in both
directions for each of your servos. Adjust the settings for each servo separately to ensure that the movements are correct
and that the swashplate, dual ailerons, dual elevators, etc, are moving the same amount.
MODULATION
6
6
TYPE
MODEL NAME
6
SURFACE
6
TRANSMIT BIND CODE
AERO, GLID, OR HELI
6
6
REV, CENT, EPA, LIMT
6
SYSTEM