APPENDIX C: CALIBRATION
HF-2500A HIGH FREQUENCY WELD CONTROL
990-371 C-3
6. The first calibration screen is the CAUTION
screen. If you are qualified to proceed
with the calibration press to continue.
7. The next page is for the CALIBRATION
SHUNT
. This screen asks for the actual
value of the 1000 micro-ohm shunt.
<CALIBRATION SHUNT>
Shunt value : 0987.6 μΩ
Number change ▼ Proceed
The actual value is printed on the exterior of the R7500-8 shunt. Enter this value using the
number keys, and press to continue.
NOTE: The next calibration screen is the CURRENT SHUNT. It is not necessary to change the
current shunt value unless the internal welding transformer was changed. If it was changed,
remove the top cover and enter the shunt value, which is stamped on the copper conductor
connected to the transformer. Press to continue.
8. The next two screens are 1. CALIBRATE
D/A HIGH and 2. CALIBRATE D/A LOW.
Following the screen instructions, adjust
the energy output using the measuring
parameter feature of the oscilloscope.
NOTE: Do not use a visual assessment.
Press the period [ . ] key to advance to
the next step.
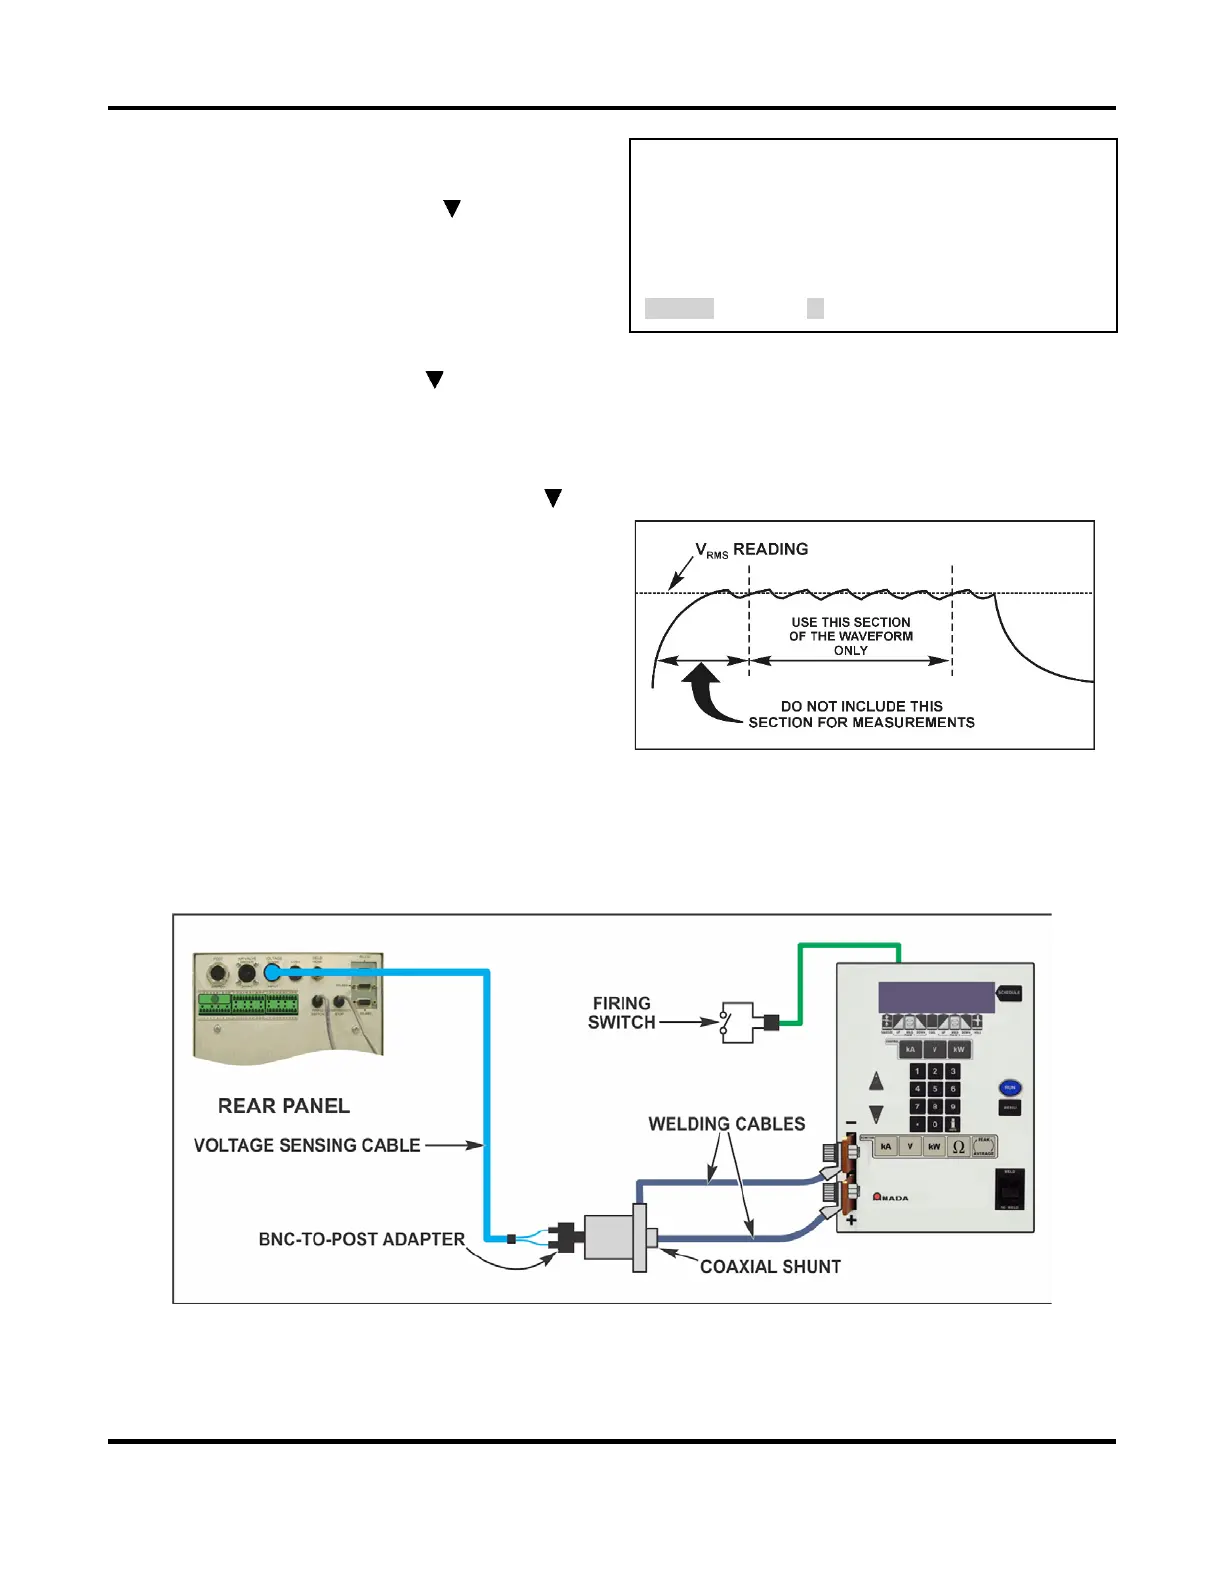
9. The next calibration screen is CALIBRATE HIGH. Disconnect the oscilloscope from the shunt
resistor and connect the output of the shunt resistor to the VOLTAGE SENSE INPUT connector
using the male BNC to binding post adapter and voltage sense cable. Follow the screen
instructions for this step and the next step, 4. CALIBRATION LOW.
Final Calibration Setup
10. The last calibration screen is 5. END OF CALIBRATION. Press the MENU key. HF-2500A
calibration is now complete.
 Loading...


