Maintenance, repair- and care-work
UF 01 DB 238. 07.04
211
7.2.4.2 Checking and exchanging the piston diaphragms
Important!
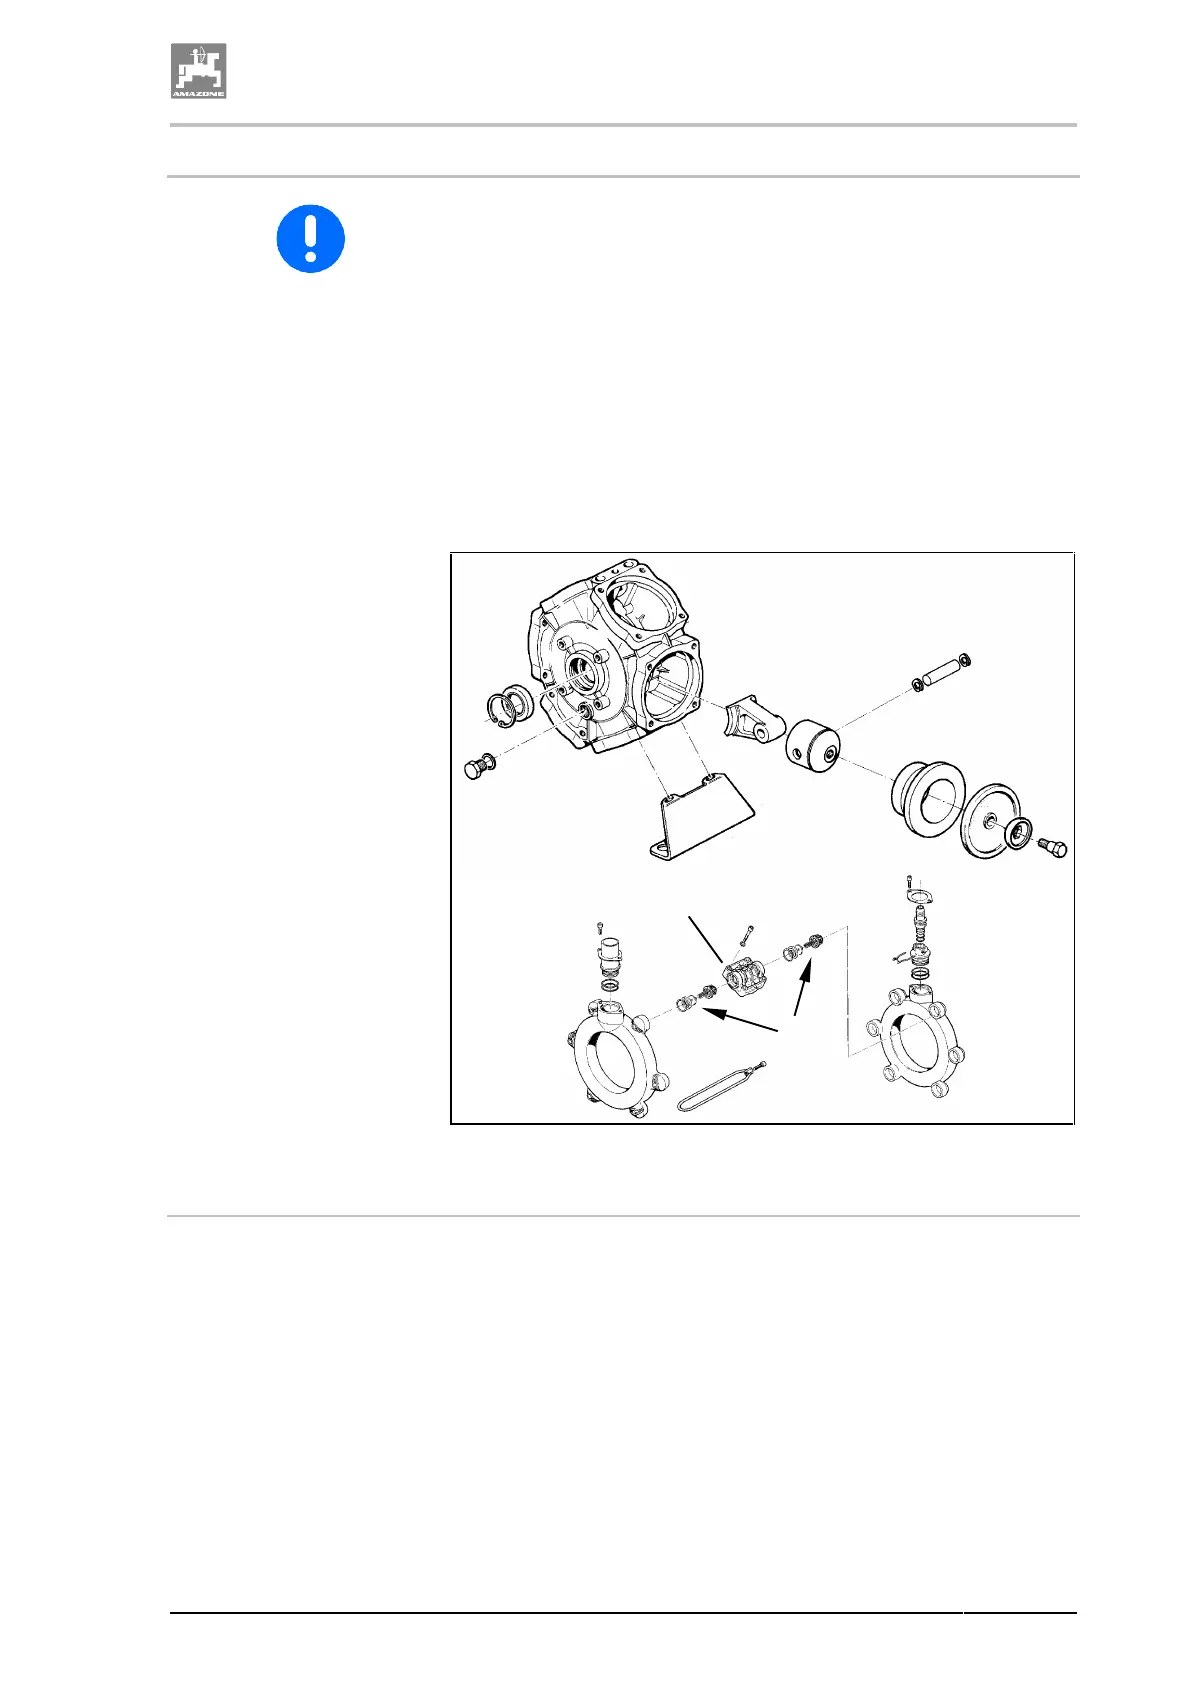
x Check the piston diaphragms (Fig. 221/1) at least once a
year by dismantling.
x Pay attention to the fitting position of the suction- and
pressure-side valves, before you remove the valve groups
(Fig. 221/5).
x In case of checking and exchanging the piston diaphragms
it is recommended to conduct this work for each piston in-
dividually. Start to dismantle the next piston only after hav-
ing completely reassembled the checked one.
x Always bring the piston to be checked in the upper position
so that any oil inside the pump housing is not draining out.
x As a matter of principle always exchange all 6 piston dia-
phragms (Fig. 221/6), even if just one piston diaphragm is
swollen, broken or porous.
Fig. 221
Checking the piston diaphragms
1. Take off pump.
2. Slacken bolt (Fig. 221/1) and remove tensioning clamp (Fig. 221
/2).
3. Take off suction- and pressure channel (Fig. 221/3 and Fig.
221/4).
4. Take off valve groups (Fig. 221/5).
5. Tighten bolts (Fig. 221/6).
6. Take off the cylinder head (Fig. 221/7).
7. Check the piston diaphragms (Fig. 221/8).
8. Exchange faulty piston diaphragms (Fig. 221/8).
1
2
3
4
5
6
7
8



 To Next Page