ZA-X BAG0235.4
8.2 Setting the spread rate
CAUTION
Set the spread rate only when the machine is attached, the drive
switched off and the sliders closed.
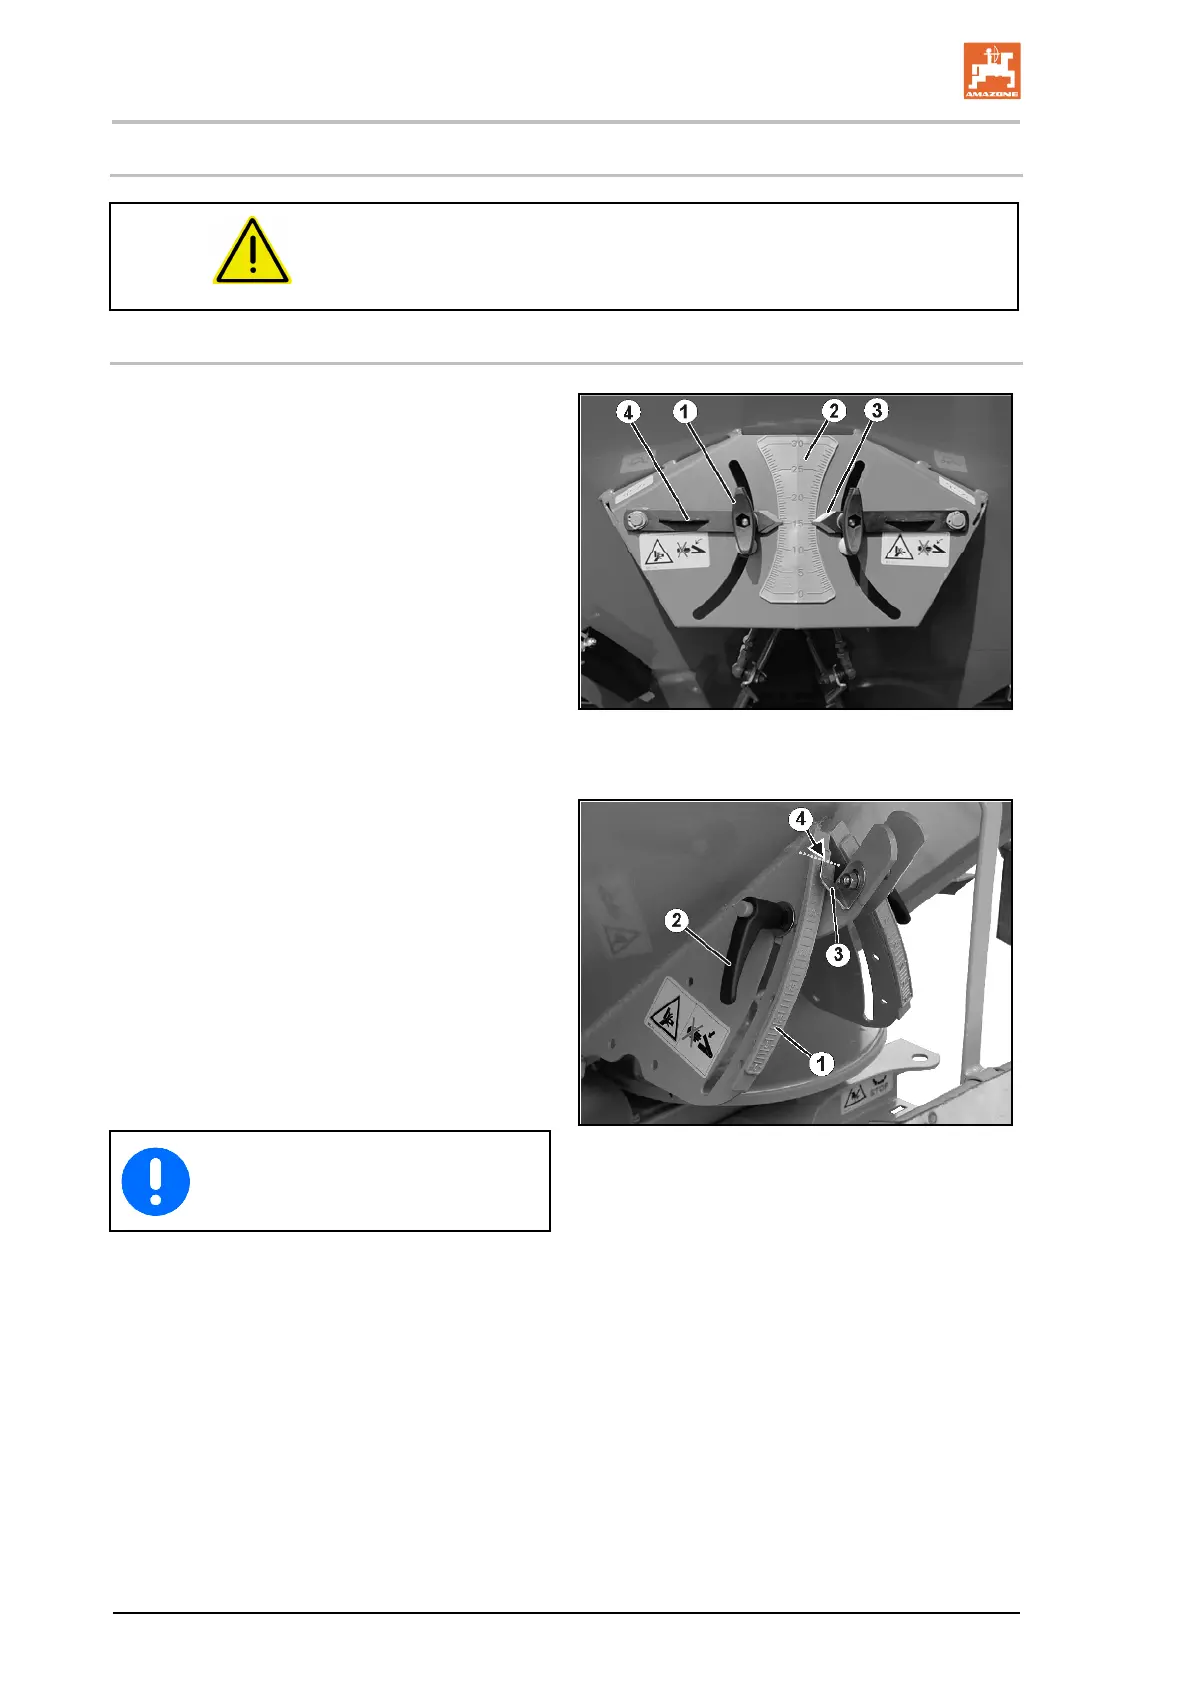
8.2.1 Setting the slider position using the setting lever
Determine the specific slider position required,
either by taking it directly from the setting chart
or by measuring it using the calibration kit (op-
tional).
ZA-X 903, 1403:
1. Close the sliders hydraulically.
2. Undo the thumb nut (Fig. 60/1).
3. On the scale (Fig. 60/2), find the scale val-
ue for the slider position you have taken
from the setting chart or determined using
the calibration kit.
4. Set the read-off edge (Fig. 60/3) of the two
setting levers (Fig. 60/4) to this scale value.
5. Retighten the thumb nuts (Fig. 60/1).
60
1. Close the sliders hydraulically.
2. Unscrew the clamping lever (Fig. 61/2).
3. On the scale (Fig. 61/1), locate the scale
value for the slider position you have taken
from the setting chart or determined using
the calibration kit.
4. Set the read-off edge (Fig. 61/4) of the nee-
dle (Fig. 61/3) to the scale value.
5. Retighten the clamping lever (Fig. 61/2).
61
Select identical slider positions for the
left and right sliders!
 Loading...