Light Gauge Metal Roof and Wall Panels Installation • August 2016 13
ASC Building Products
A Division of ASC Profiles LLC
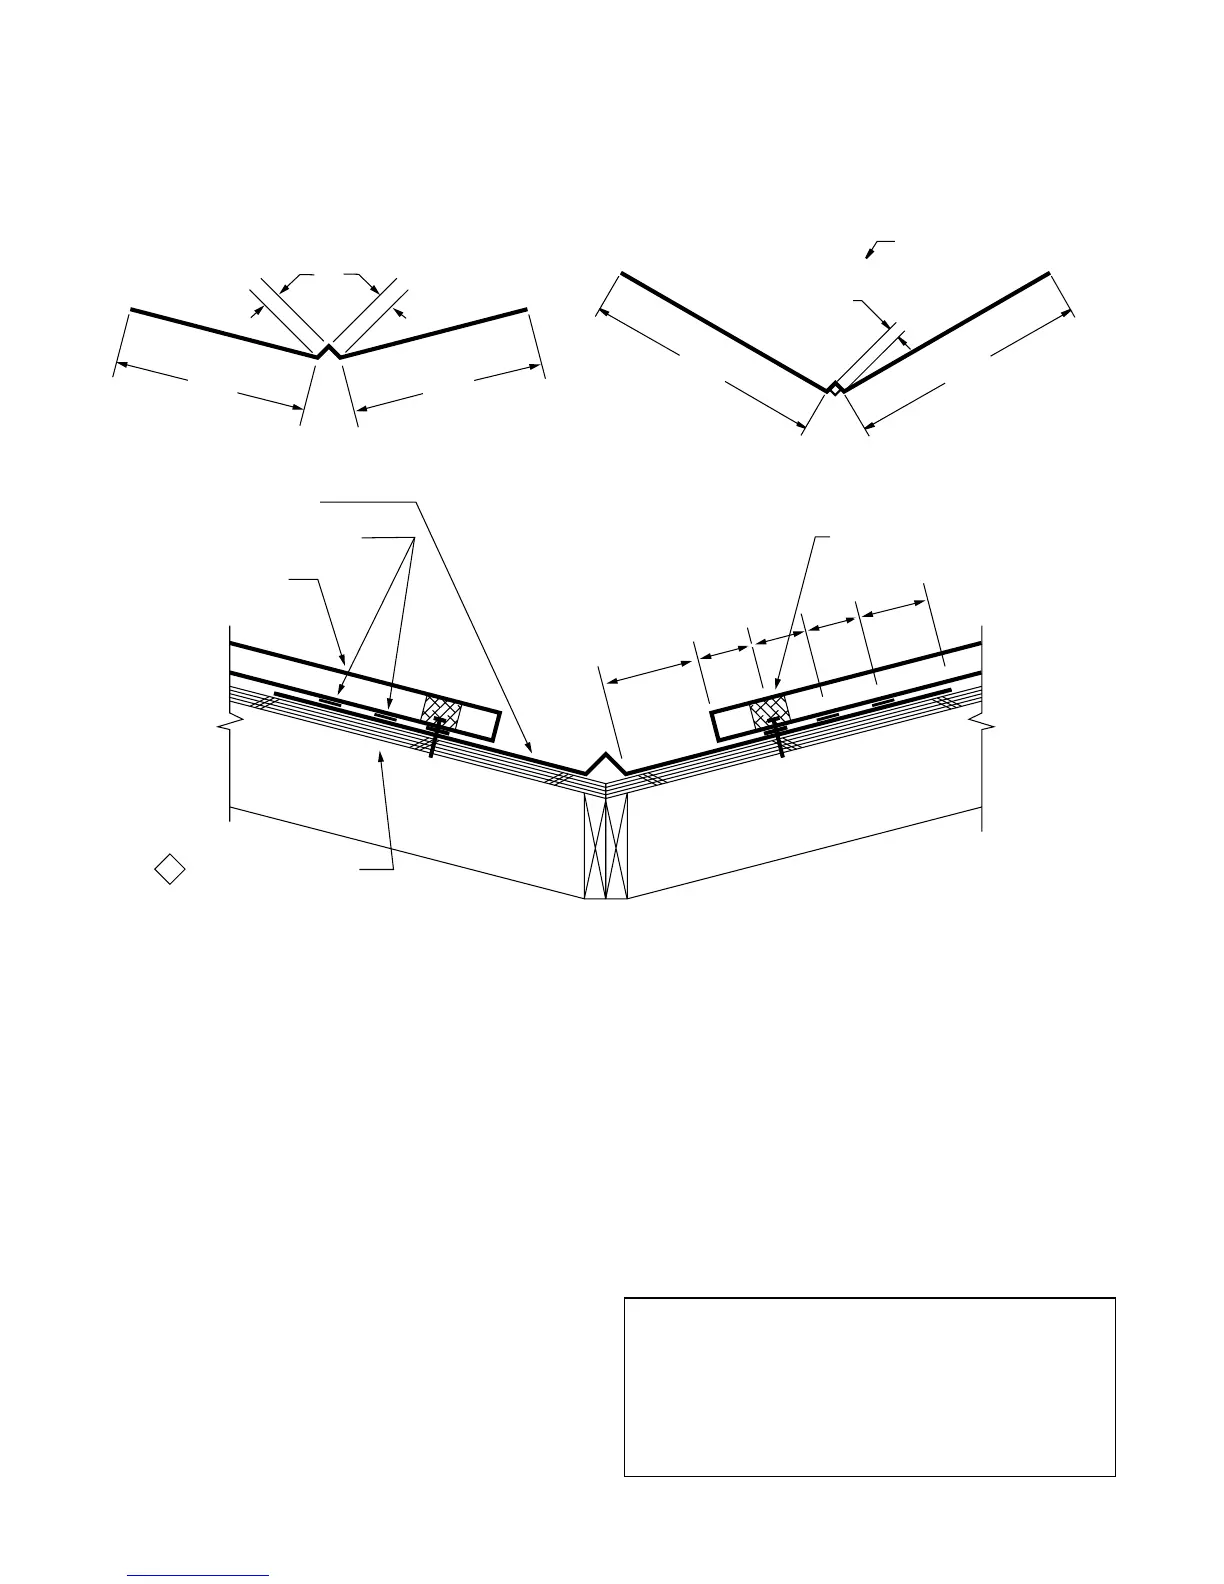
2"
3"
4"
2"
2"
1"
13"
13"
'W' VALLEY (V1)
2 ROWS BUTYL MASTIC TAPE
ASC'S LIGHT
GAUGE ROOFING
2. #14 WOOD SCREW
SEE ILLUSTRATION
ON PAGE 7
INSTALL EMSEAL CLOSURES
DIAGONALLY ACROSS THE BOTTOM
SIDE OF THE PANEL AND
SET IN SEALANT ALL AROUND
SEE NOTE
BELOW
1" TYP
IF PAINTED,
THIS SIDE
19-7/16"19-7/16"
Valley Flashing
V1
V2
Procedures
• Place a second layer of 36" roof felt in the valley
center line with 18" of roof felt on each side.
• Starting at the low end, trim and place the valley
flashing so it overhangs the eaves 1". (see page 14)
• Caulk and lap the subsequent valley flashings a
minimum of 8".
• Parallel to the valley, place two rows of
1
⁄2" butyl
mastic tape sealant spaced as shown.
• The polyethylene closures cannot be installed diagonally
across a panel. At mitre cuts, use emseal closures at a
right angle to the panel ribs.
• Field cut the panels holding a minimum of 4" back
from the valley as shown. Larger valleys without
the center “V”, may be required in snow country
installations.
• Attach the panels to the roof and ‘thru-fasten’ along
the bottom end using a #14 x 1" woodscrew
at 8" up from the valley aligned with the second row of
butyl mastic tape.
• When valleys are required, install sidelap neoprene
mastic tape along the sidelap a minimum of 10'-0" up
from the panel edge.
Note: In areas where snow, ice and heavy rain con-
ditions exist, panels may need to be held back more
than 4" and the valley flashing overall width must be
increased. A high temperature cold-applied rubberized
underlayment should be used extending at least 3' up
from the center of the valley on each side.