18 August 2016
www.ascbp.com
Light Gauge Metal Roof and Wall Panels
Installation Guide for Delta Rib
™
, Delta Rib
™
III, Nor-Clad
®
, Strata Rib
®
& 2½ Corrugated
5"
5/8"
3/8" HEM
4"
5/8"
3/8" HEM
1 1/8"
1/2"
2 3/4"
4"
1/2"
1 1/4"
BUTYL MASTIC TAPE
2. #14 WOOD SCREW
@ 24" O.C.
ASC'S LIGHT
GAUGE ROOFING
3. #12 x 3/4" STITCH SCREW
OR
4. #14 x 7/8" LAP SELF DRILLER
@ 24" O.C.
GABLE (G2)
2. #14 x 1" METAL WOOD
@ 24" O.C.
2"
1-1/8"
3/8" HEM
5/8"
4"
3/8" HEM
1/2"
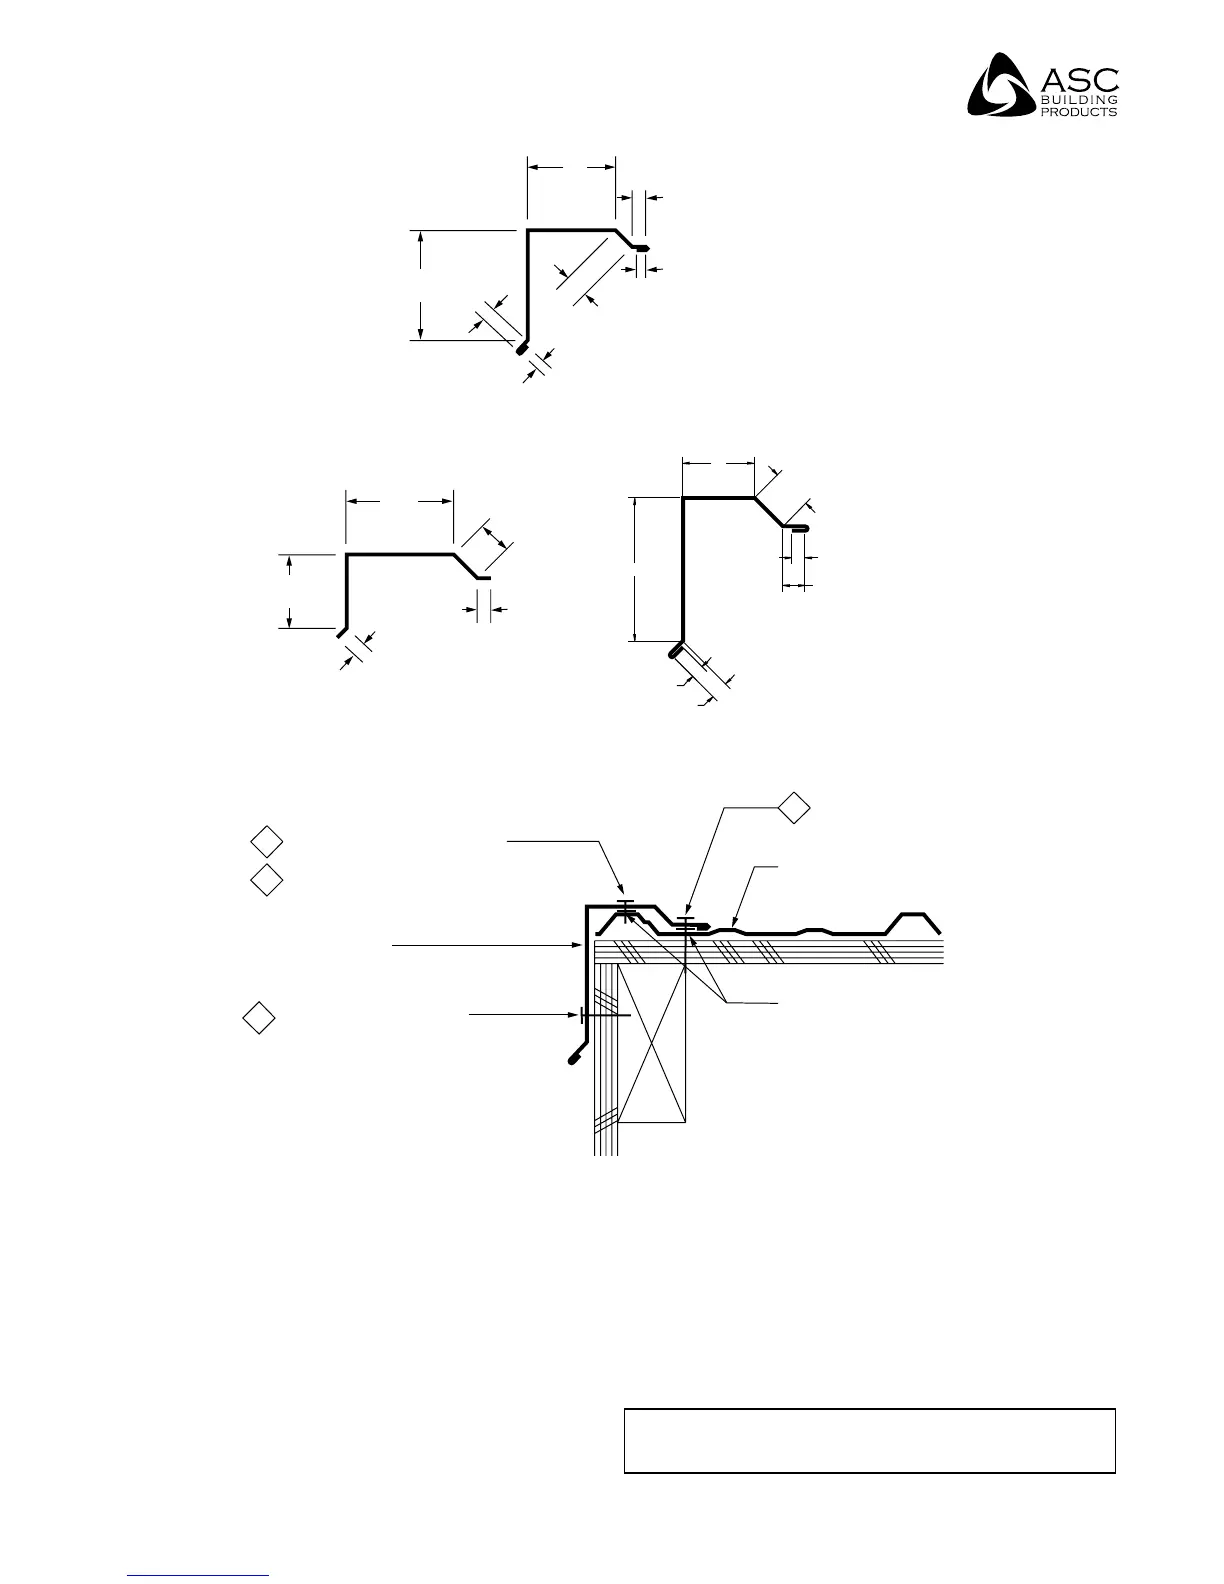
Gable Flashing
5"
5/8"
3/8" HEM
4"
5/8"
3/8" HEM
1 1/8"
4"
1/2"
1/2"
2"
3/8"
2 3/4"
4"
1/2"
1 1/4"
BUTYL MASTIC TAPE
2. #14 WOOD SCREW
@ 24" O.C.
ASC'S LIGHT
GAUGE ROOFING
3. #12 x 3/4" STITCH SCREW
OR
4. #14 x 7/8" LAP SELF DRILLER
@ 24" O.C.
GABLE (G4)
2. #14 x 1" METAL WOOD
@ 24" O.C.
G1
G3
G4
Procedures
• Place the first roof panel according to the
instructions on pages 4 and 8.
• Place butyl mastic tape along the top of the panel
rib as shown.
• Install the gable flashing by placing it firmly over the
rib. Use stitch screws to fasten flashing to the panel
and use color matched woodscrews at 24" o.c. to
fasten flashing to structure.
• Caulk and lap the flashing a minimum of 3".
(see page 44)
• Mitre cut the flashing at the peak to join each side at
the ridge. (see page 21)
• Snip and fold the gable at the eave to close the
end. Use rivets to fasten.
Notes: “G1” is a standard gable. Narrower gables,
“G3” and “G4”, are also available.