Light Gauge Metal Roof and Wall Panels Installation • August 2016 7
ASC Building Products
A Division of ASC Profiles LLC
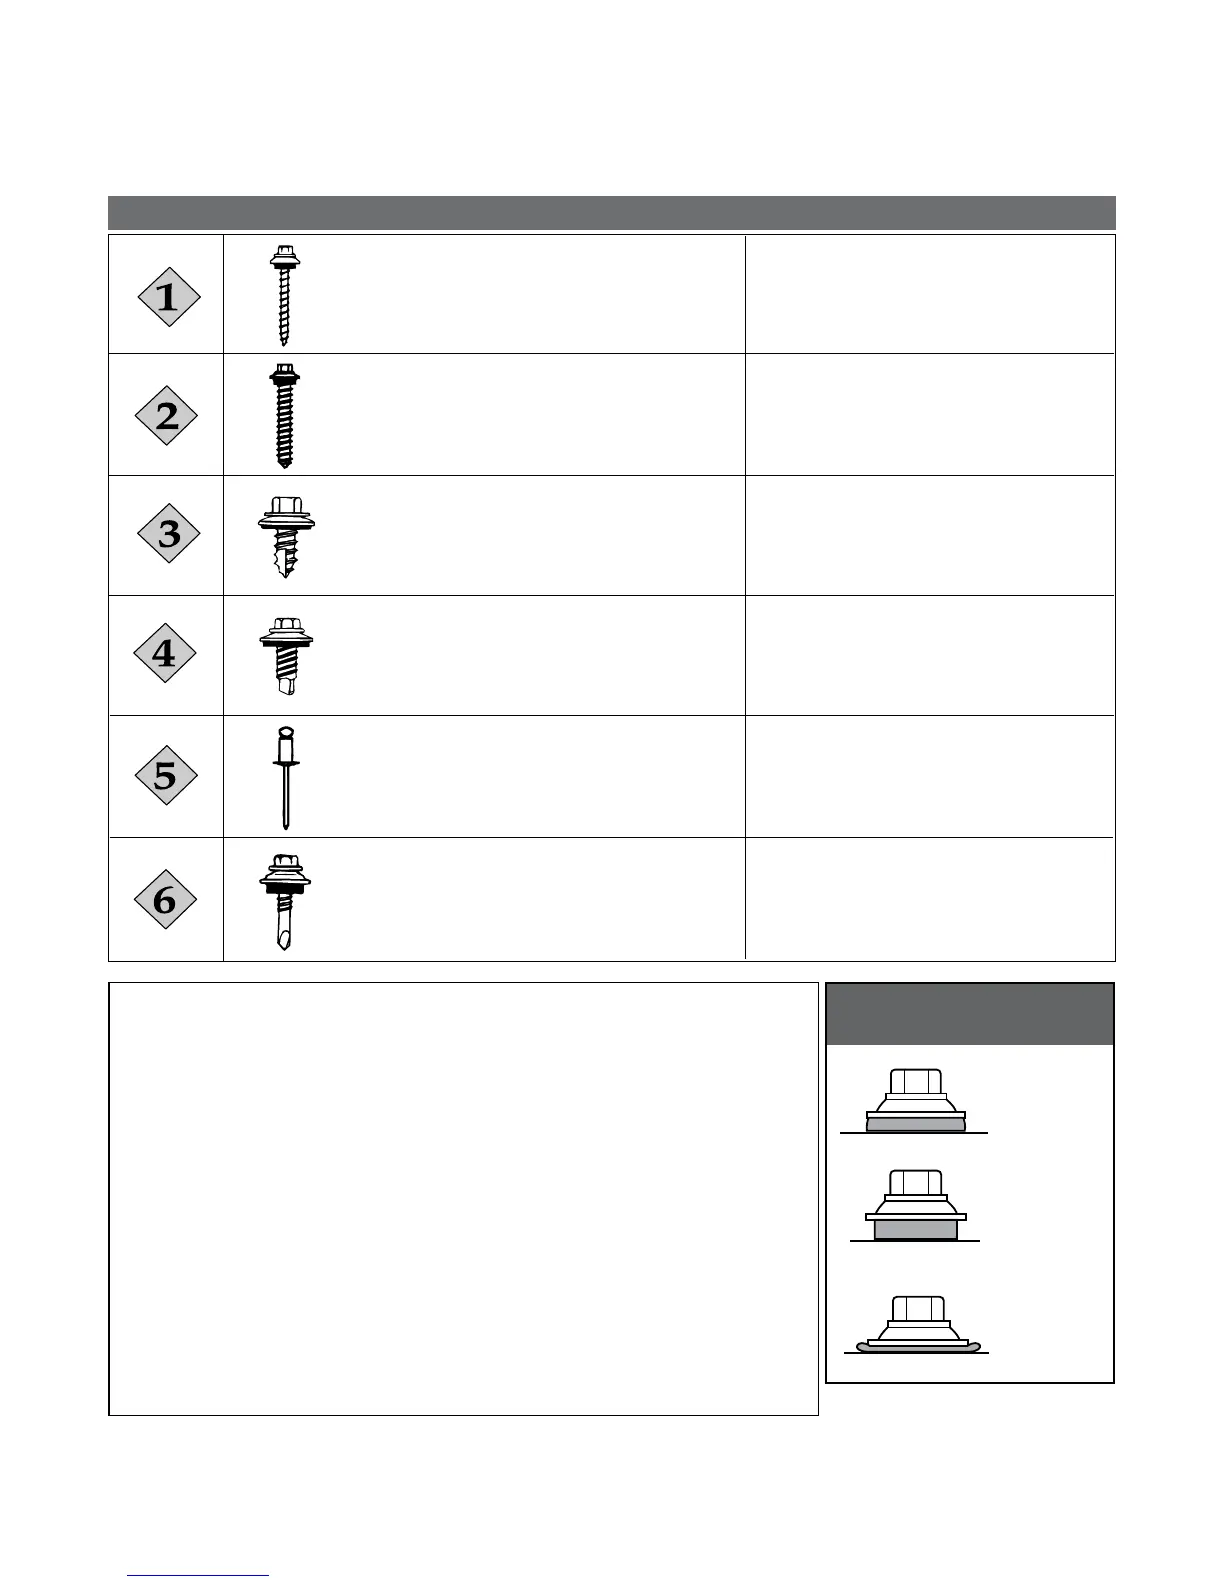
No. 9 x 1", 1
1
⁄2", 2", 2
1
⁄2", 3" Wood Screw
1
⁄4"
Hex Head
Panel to dimensional lumber
Panel to plywood minimum
1
⁄2" thick.
Trim and side lap attachments.
Trim and side lap attachments.
Trim-to-trim or
trim-to-panel attachments.
Panel to purlin or deck attachments
No. 14 x 1", 1
1
⁄2" Wood Screw
5
⁄16" Hex Head
No. 12 x
3
⁄4" Stitch Screw
1
⁄4" Hex Head
(compatible with No. 9 Wood Screw)
No. 14 x
7
⁄8" Lap Self Driller
5
⁄16" Hex Head
(compatible with No. 14 Wood Screw)
STST-42 Stainless Steel Rivet
1
⁄8" x
1
⁄8"
No. 12 x 1", 1
1
⁄2", 2", 2
1
⁄2" Self Driller
5
⁄16" Hex Head
Fastener # Description Use
Fastener Selection
Notes
• The table above shows the Light Gauge panel fasteners provided by ASC Building
Products. Refer to the panel installation, flashing details, and fastener placement
pages of this manual for specific fastener usage. See page 6 for fastener spacing.
• Panel attachment screws must be long enough to penetrate through the roof decking
at least
3
⁄8", or penetrate solid lum ber at least one inch.
• All screws must be coated to provide protection against corrosion.
• Exposed fasteners should have sealing washers and be the same color as the parts
they attach.
• Roofing nails will also be required, but are not furnished by ASC. They are typically
used to temporarily hold a flashing in place that needs to be installed prior to panels.
• Screws must be properly driven to ensure proper seal and holding strength. Do not
under \drive or overdrive the screws. Recommended drill speed is 2000 rpm. Use of a
depth-sensing nosepiece will aid in properly driving screws.
Proper Installation of
Gasketed Fasteners
Correctly
Driven
Under
Driven
Over
Driven