Light Gauge Metal Roof and Wall Panels Installation • August 2016 29
ASC Building Products
A Division of ASC Profiles LLC
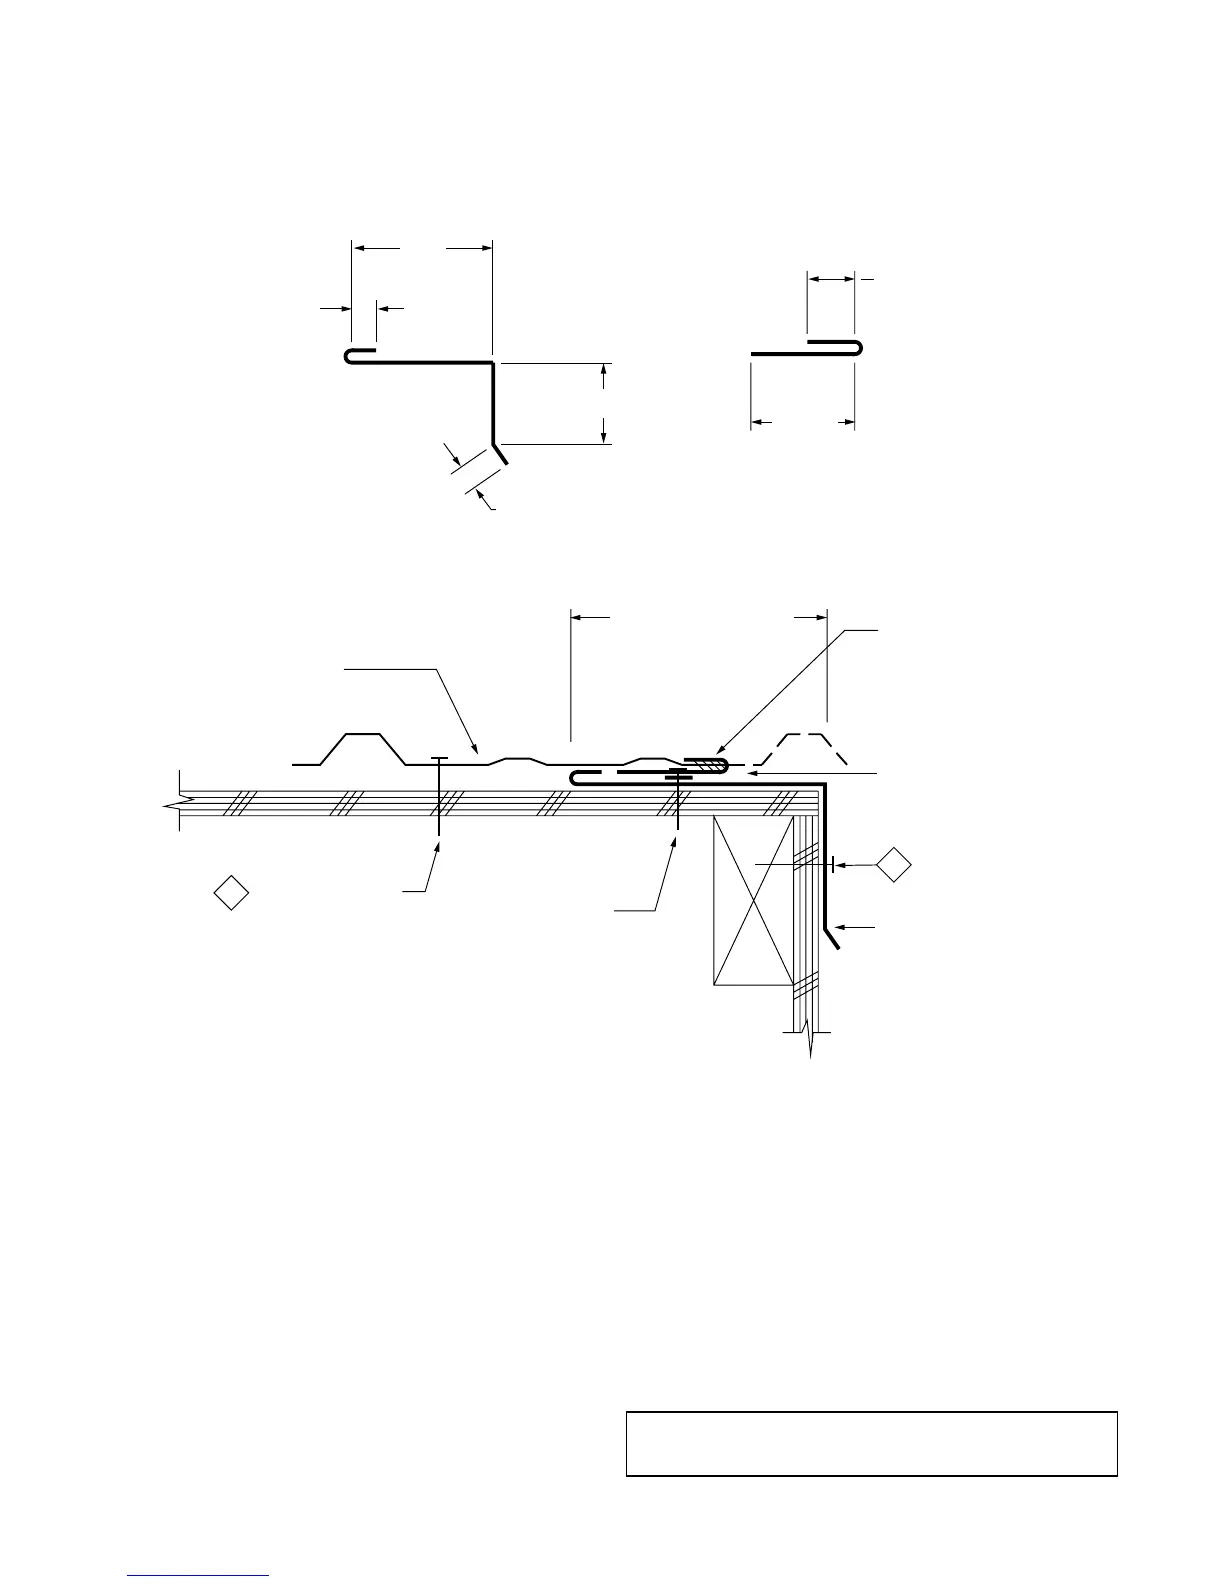
3/8" HOOK
6"
1/2"
4"
1" HOOK
2 1/2"
ASC'S LIGHT
GAUGE ROOFING
ADJUSTMENT AREA
2. #14 WOOD SCREW
SEE ILLUSTRATION
ON PAGE 7
ROOFING NAILS
@ 12" O.C.
STARTER STRIP (SS1)
FIELD CAULK
2. #14 x 1" WOOD SCREW
@ 24" O.C.
ADJUSTABLE GABLE (G5)
Adjustable Gable Flashing
G5
SS1
Procedures
• In many instances, the roof sheet will have to be field
modified (major rib removed along the gable). See roof
map on page 5 and locate “adjustable gable". If gable
trims are used in this location, and as the roof drains
from the ridge, water will flow inside the gable trims
shown on page 17. The adjustable gable trim pieces
shown above can assist in a proper roof in stal la tion.
• When a major rib on a Light Gauge panel occurs over
the roof area within 3" of the edge of the gable, cut the
panel and remove the major rib from the end of the
sheet from the low eave to allow for the placement of
the starter strip.
• Install the gable trim, extending the horizontal leg 6"
uphill and underneath the eave on the portion of the
roof sheet at the gable/eave intersection.
• Locate the placement of the starter strip to insure that
the cut edge of the roof sheet can be inserted into the
1" leg of the starter strip.
• Field caulk inside the open hem and the under side of
the starter strip per the detail on this page and install
parallel to gable.
Note: Locate starter strip to allow proper installation of
adjustable gable trim as shown.