Light Gauge Metal Roof and Wall Panels Installation • August 2016 27
ASC Building Products
A Division of ASC Profiles LLC
1"
ASC'S LIGHT
GAUGE ROOFING
ROOFING NAILS
@ 24" O.C.
2. #14 x 1" WOOD SCREW
SEE ILLUSTRATION
ON PAGE 7
PITCH BREAK (PB4)
BOTTOM POLYETHYLENE CLOSURE
SET IN SEALANT ALL AROUND
TOP POLYETHYLENE CLOSURE
SET IN SEALANT ALL AROUND
ROW OF BUTYL MASTIC TAPE
WOOD BLOCKING
2. #14 WOOD SCREW
SEE ILLUSTRATION
ON PAGE 7
3. #12 x 3/4" STITCH SCREW
OR
4. #14 x 7/8" LAP SELF DRILLER
@ EACH RIB OR EVERY THIRD
RIB FOR CORRUGATED
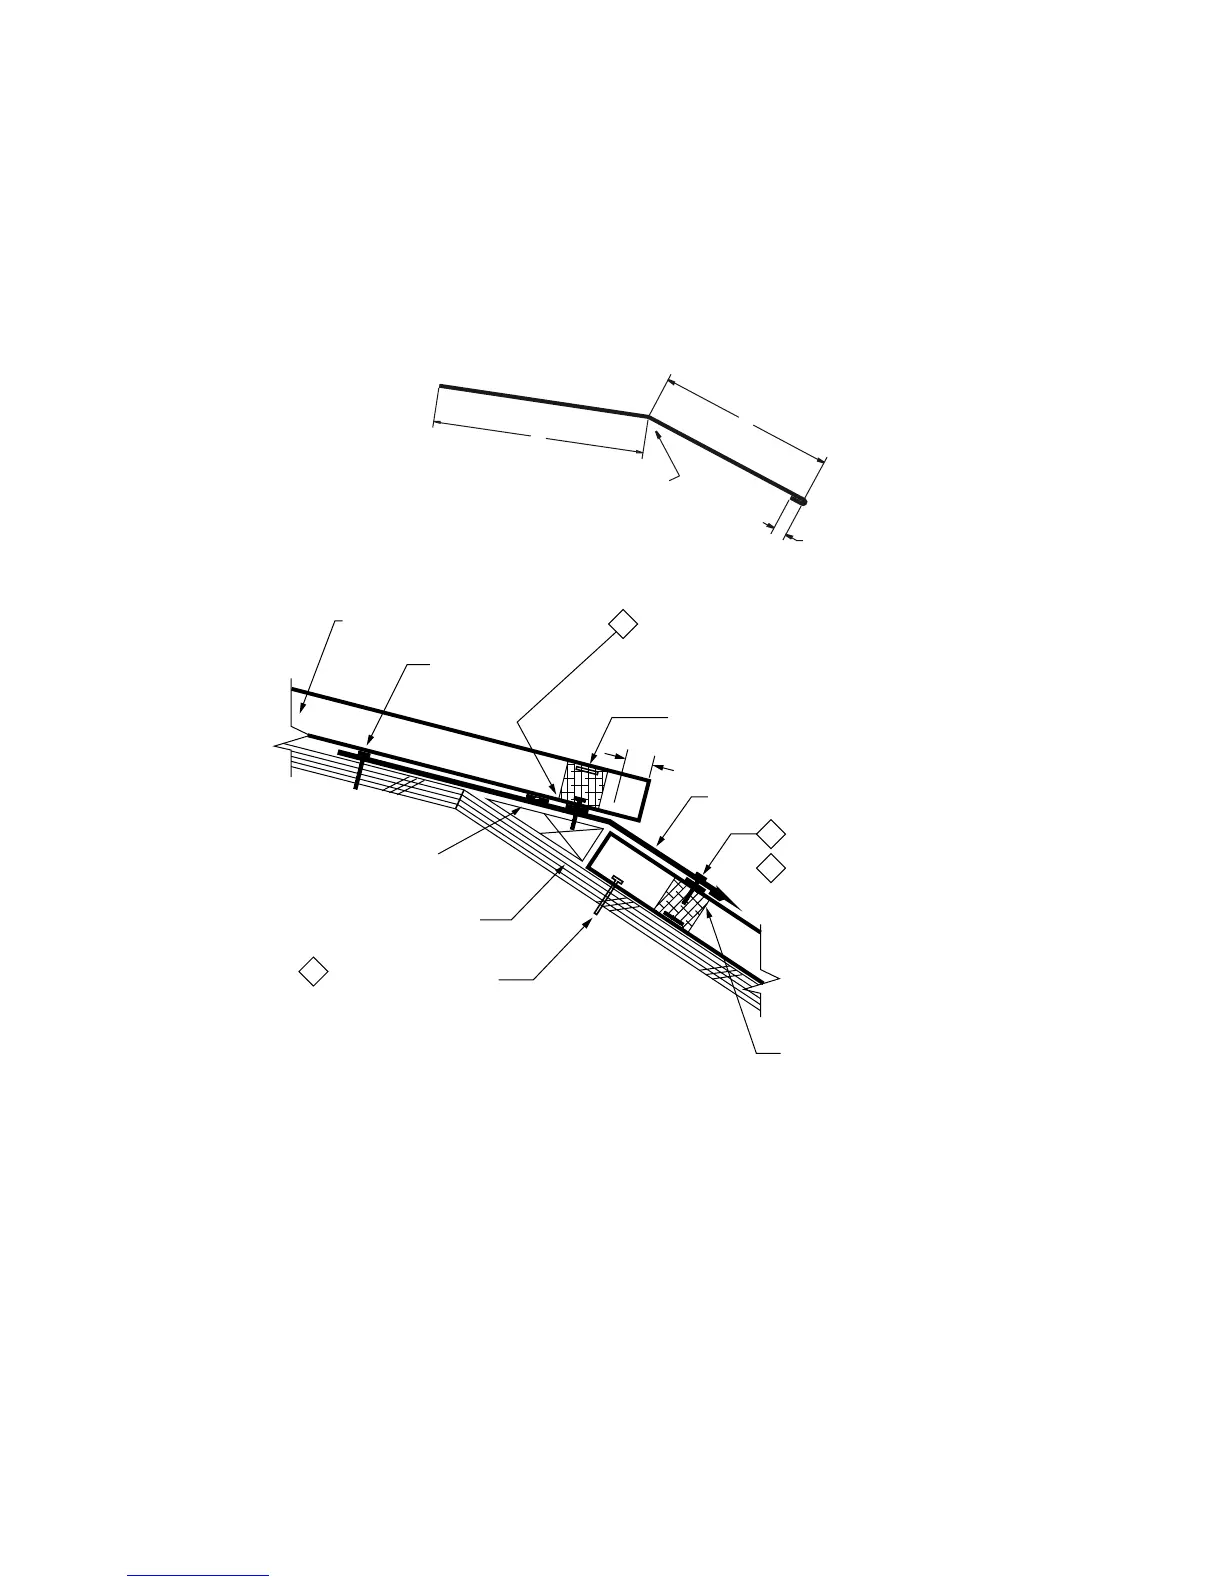
SLOPE (S1)
SLOPE (S2)
5"
6"
3/8" HEM
SPECIFY ANGLE
Slope Transition - Low Slope to High Slope
This flashing must be installed prior to uphill panels.
Procedures
• Install sealant on the bottom and top of the
polyethylene closure. Set the closure as shown above.
• Fasten the transition flashing to the substrate with
roofing nails at 24" o.c., prior to installing the uphill
panels.
• Caulk and lap the flashing a minimum of 3".
(see page 44)
• Parallel to the transition, place one rows of
1
⁄2" butyl
mastic tape as shown above.
• Attach the uphill panels with a 1" overhang.
• Install wood blocking as needed for support.
• Place a small length of sealant on the top of each rib
as shown.
PB4