Light Gauge Metal Roof and Wall Panels Installation • August 2016 45
ASC Building Products
A Division of ASC Profiles LLC
Procedures
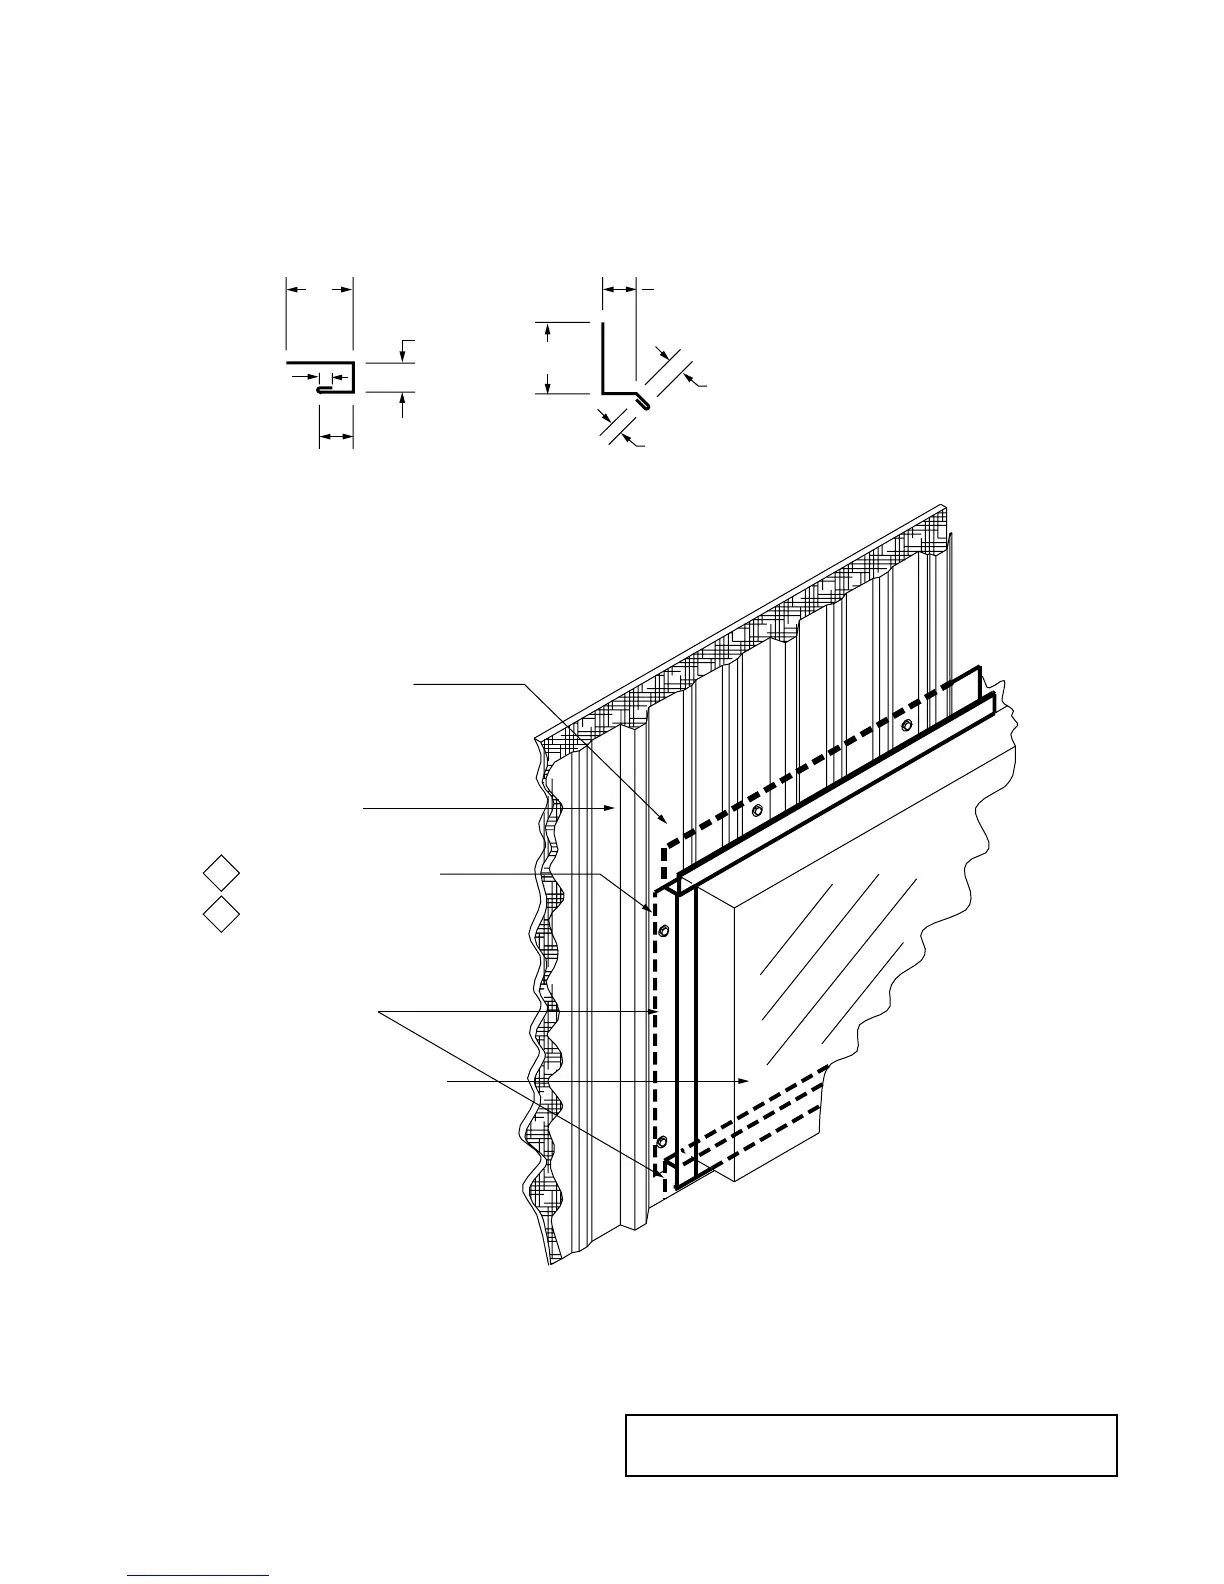
• When installing Light Gauge panels, “B1”, the Drip
Flashing, is preferred at the head.
• A horizontal cut, 1" long, needs to be made in the wall
panel at the intersection of the jamb and head trim. Extend
the head trim into this slot, allowing for proper drainage to
the outside of the building.
• Concealed neoprene closures left out for clarity. Place
inside closure behind panel at C-metal (C-1) or base trim
(B1)
C1
B1
Wall Details
Window/Door Trim Corner
3/8" HEM
1"
7/8"
2 1/8"
1"
1/2"
3/8" HEM
2"
ASC'S LIGHT
GAUGE WALL PANE
BASE TRIM (B1)
C-METAL (C1)
BASE TRIM (B1)
(If required)
C-METAL (C1)
(If required)
3. #12 x 3/4" STITCH SCREW
OR
4. #14 x 7/8" SELF DRILLER
@ EACH RIB OR EVERY 8" O.C.
FOR CORRUGATED
OR
1. #9 WOOD SCREW
2. #14 WOOD SCREW
@ 24" O.C. MAX
C-METAL (C1) OR
BASE TRIM (B1)
FOR CORRUGATED
ASC'S LIGHT
GAUGE WALL PANEL
C-METAL (C1)
GLAZING AND WINDOW
FRAME BY OTHERS
1. #9 WOOD SCREW
OR
2. #14 WOOD SCREW
@ 24" O.C. MAX
Note: “C1” is shown at head location. “B1”, Base Trim,
can also be used.