4 August 2016
www.ascbp.com
Light Gauge Metal Roof and Wall Panels
Installation Guide for Delta Rib
™
, Delta Rib
™
III, Nor-Clad
®
, Strata Rib
®
& 2½ Corrugated
Roof Preparation
ASC’s Light Gauge Roofing can be used in both
new construction and retrofit roofing applications. We
recommend the installation of Light Gauge Roofing over
a continuous rigid substrate such as plywood, wood
decking, or over in ter mit tent supports. Contact ASC for
additional information.
The following steps need to be taken to prepare the roof
for installation of Light Gauge Roofing panels:
New Roofs:
1. Make sure there are no nails or other objects
protruding from the substrates that might puncture the
underlayment or the roof panels. Clean all debris from
the roof.
2. Check all details for possible roof penetrations
which must be added to the deck prior to roof panel
installation.
3. Cover the entire roof deck with a minimum of 30
lb asphalt-saturated felt paper. Some synthetic
underlayments may be used in place of felt with our
roofing. Installer must ensure they meet the minimum
standards of 30 lb felt and that the manufacturer
has approved them for use with metal roofing. For
applications over spaced framing other types of
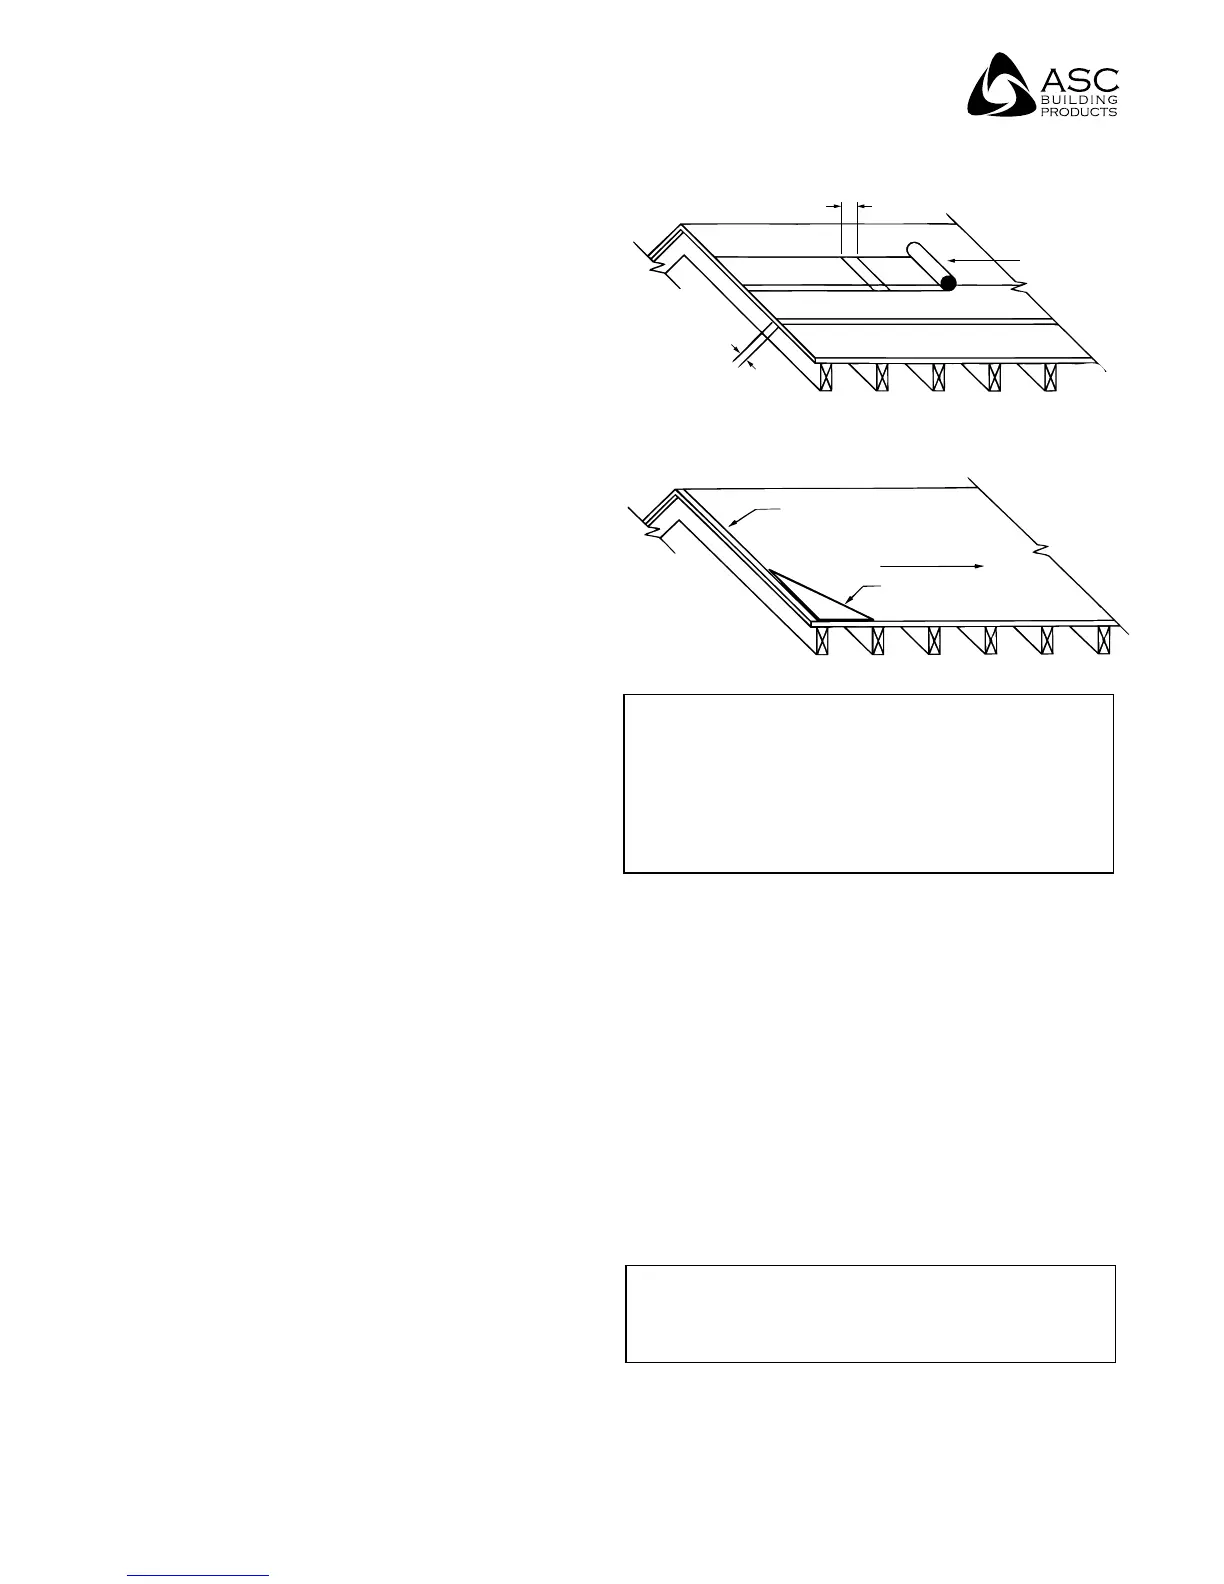
moisture barriers may be required. Begin at the eave
and roll the felt horizontally (parallel to the eave).
Allow each con sec u tive course to overlap the previous
one 3 inches. Overlap the end a minimum of 6" when
starting a new roll of felt. Areas of felt paper that have
been torn or cut should be replaced or repaired prior
to installation of the metal roof. (See illustration #1).
4. Place an alignment line along the gable end where
the first roof panel will be installed. This line must
be parallel to the gable edge of the roof deck
and square with the eave line. Check the roof for
squareness by making a 3' line across the eave. (See
illustration #2).
Completing the 3' x 4' x 5' triangle should place the 4'
edge of the triangle parallel with the gable. The first
roof panel will be placed parallel with this line. Slight
variations or out-of-square conditions up to 3" can be
covered by the gable trims shown on page 18.
5. It is very important to measure the entire length of
the roof from gable to gable. Correct placement
of the panels will allow the panel’s ribs on each
side to be covered by the gable flashing shown on
page 18. This will create a symmetrical appearance
on both gables. Should this be impractical, the
adjustable gable detail on page 29 can be used.
3" SIDE LAP
30# FELT PAPER
ILLUSTRATION #1
ILLUSTRATION #2
ALIGNMENT LINE
DIRECTION OF
PANEL APPLICATION
3' x 4' x 5' TRIANGLE
4'
5'
3'
Note:
In areas where snow, ice, and heavy rain conditions exist,
a high temperature cold-applied rubberized underlayment
should be used in lieu of felt in the valleys. Felt on the
remainder of the roof will lap over the membrane where
the two meet. See Valley page 13.
Existing Roofing:
Some jurisdictions will allow reroofing over existing roofing
without the need for tearoff. Check with your local codes
or building department for your specific requirements.
For best results, Light Gauge Roofing requires a relatively
smooth and flat substrate. Application over rough and/or
uneven surfaces is not recommended, for example, wood
shingles.
If the roof is to be stripped down to the existing decking,
follow the procedures for new roofs on page 4. Be sure to
check the existing roof and repair any damaged areas prior
to installation of the new roof system.
Note:
Do not apply Light Gauge Roofing over roofs with
structural damage or trapped moisture.