30 August 2016
www.ascbp.com
Light Gauge Metal Roof and Wall Panels
Installation Guide for Delta Rib
™
, Delta Rib
™
III, Nor-Clad
®
, Strata Rib
®
& 2½ Corrugated
Vent Flashing
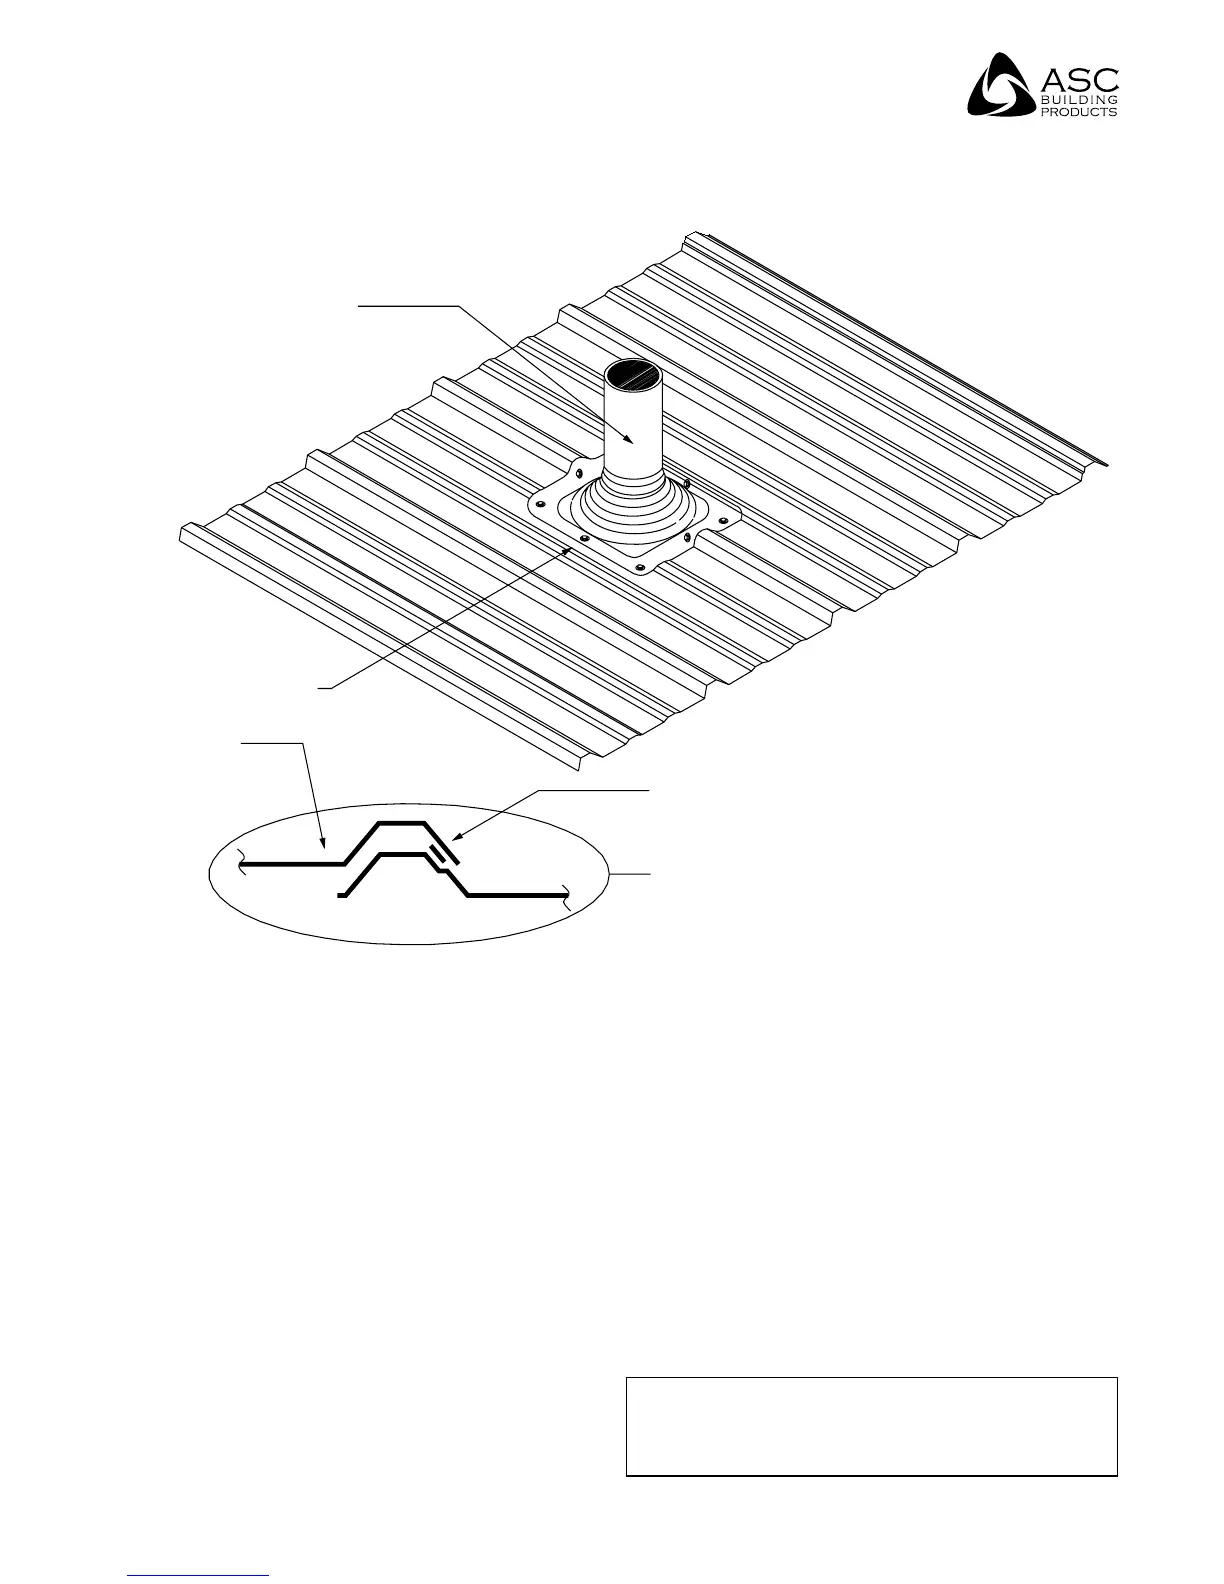
Procedures
• Trim the opening in the flashing to 20% smaller
than the pipe diameter.
• Slide the flashing down over the pipe.
• Seal between the vent flashing and the roofing with
gunnable caulk and set the flashing.
• Form the flashing to fit the profile of the roof.
• Fasten the flashing with fasteners at 1" o.c. Refer to
the fastener selection guide on page 7.
• Penetrations occurring over spaced supports
require additional support framing.
• A stainless steel draw band should be installed at
the top of the vent/pipe flashing.
• A minimum drainage area of 2" should be‚
maintained between the base of the flexible vent/
pipe flashing and the roof panels’ major ribs.
• When a penetration occurs through a Nor-Clad
®
panel sidelap, gunnable caulk needs to be installed
in the capillary groove from the penetration to the
ridge. This will prevent water from running downhill
in the capillary groove and into the roof opening.
Refer to illustration #5, above.
VENT / PIPE FLASHING
FASTEN @ 1" O.C.
NOR-CLAD
ROOF PANEL
GUNNABLE CAULK
IN CAPILLARY GROOVE
SEE PROCEDURES BELOW
ILLUSTRATION #5
Note: For the best drainage when a square-based pipe
flashing is used, one corner of the flexible pipe flashing
should be oriented to the high-side of the roof.