8 August 2016
www.ascbp.com
Light Gauge Metal Roof and Wall Panels
Installation Guide for Delta Rib
™
, Delta Rib
™
III, Nor-Clad
®
, Strata Rib
®
& 2½ Corrugated
1"
1"
ASC'S LIGHT
GAUGE ROOFING
Panel Installation
GENERAL
Study the details section of this manual prior to the
installation of the panels. Pay close attention to
the following:
• Flashings that need to be installed prior to the
panels include Valley, Eave, Vented Eave,
Adjustable Gable and Chalet Gable.
• Apply sealant or mastic tape to the pre-installed
flashings as shown in the detail section of this
manual.
SEE PAGE 6 & 7 FOR
FASTENER PLACEMEN
AND SELECTION
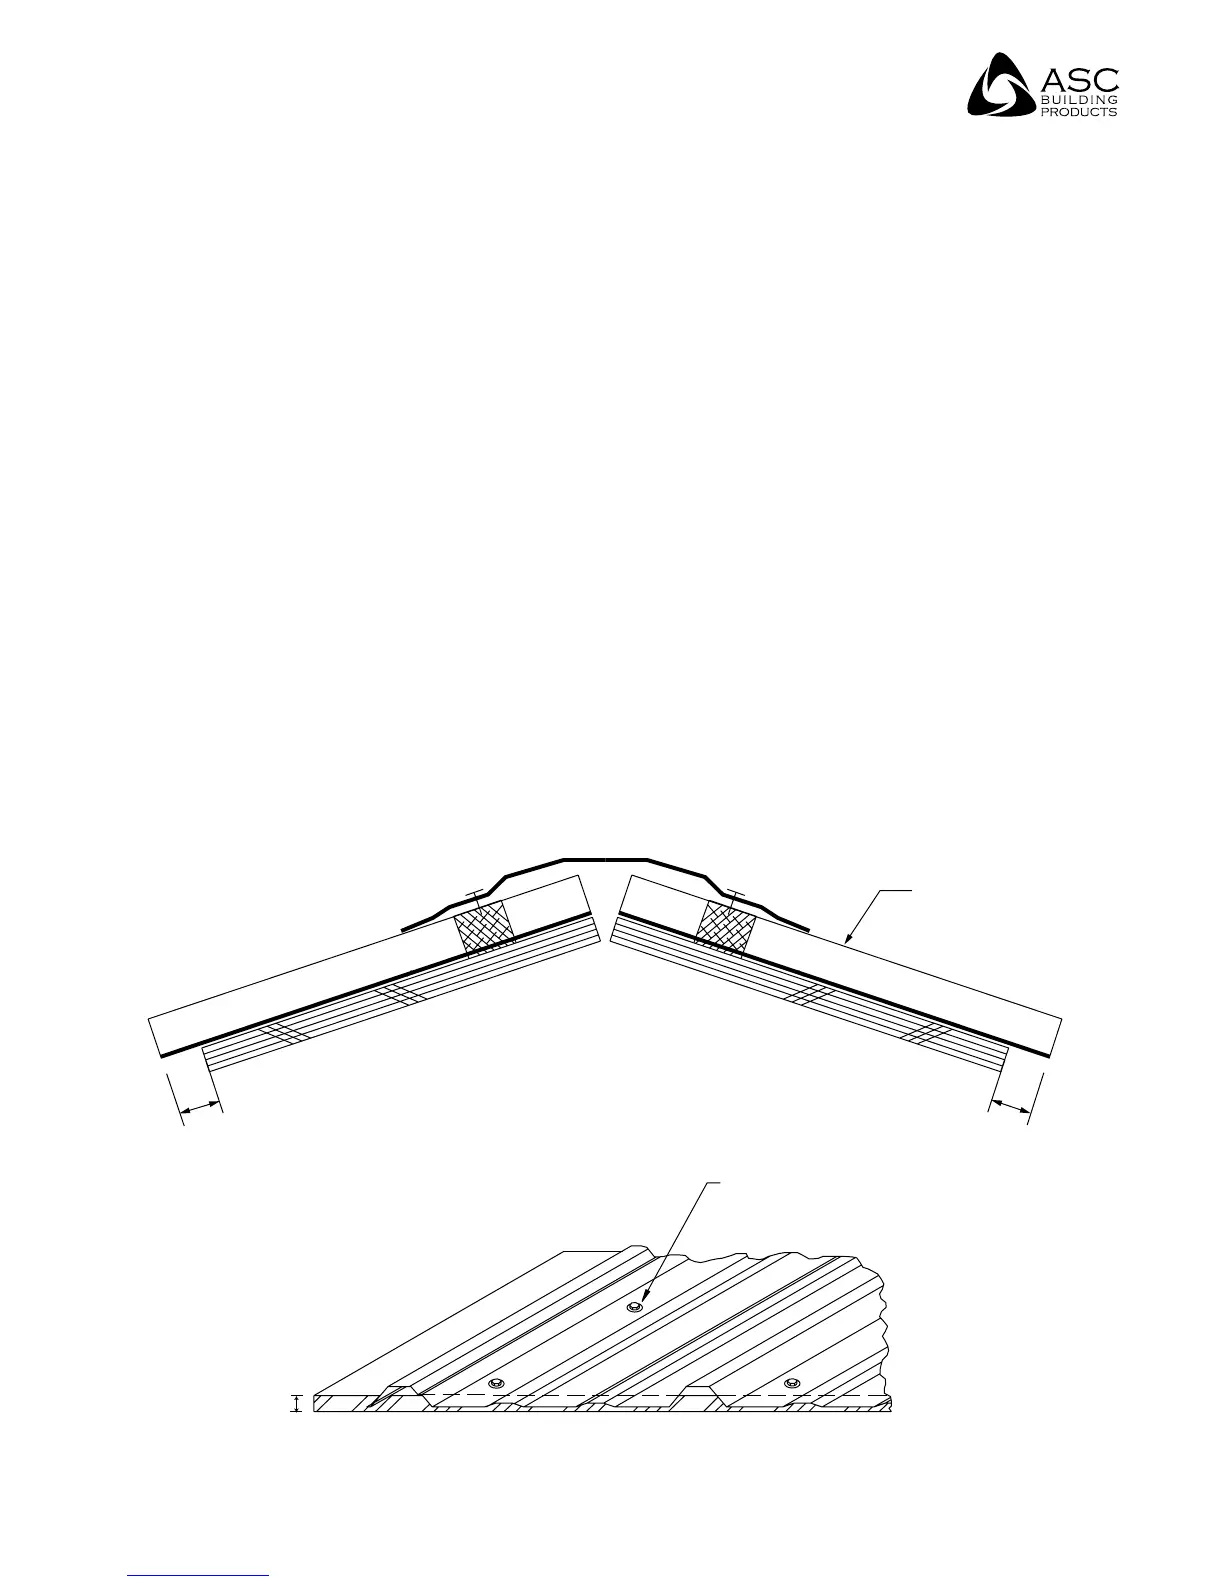
1" OVERHANG
ILLUSTRATION #3
ILLUSTRATION #4
PROCEDURE
1. Install eave trim, valley trim and inside closure prior
to panel installation.
2. Align the edge of the first panel with the alignment
line constructed along the start gable. (See page 4
item 4 and illustration #3 below). Allow the panel to
overhang the eave 1" minimum.
3. Check the downhill end of the panel. If the panel
length is correct, the panel should overhang 1"
past the eave trim as shown below in illustration
#4. Also, the panel should not extend past the
centerline of the ridge. (See page 9)
4. After the first panel is properly aligned, fasten per
the fastener placement and spacing guidelines on
page 6.
5. Lay down the second and third panels, checking
alignment, making sure they are square. This will
ensure that a sawtooth effect at the eave and ridge
is avoided.
6. Metal debris/shavings should be removed from the
roof progressively and daily to prevent immediate
corrosion and scratching of the top coat.