Ch. 13. Cell Body and Sample Stage Guide Sec. 13.1. Cell Body Guide
2.
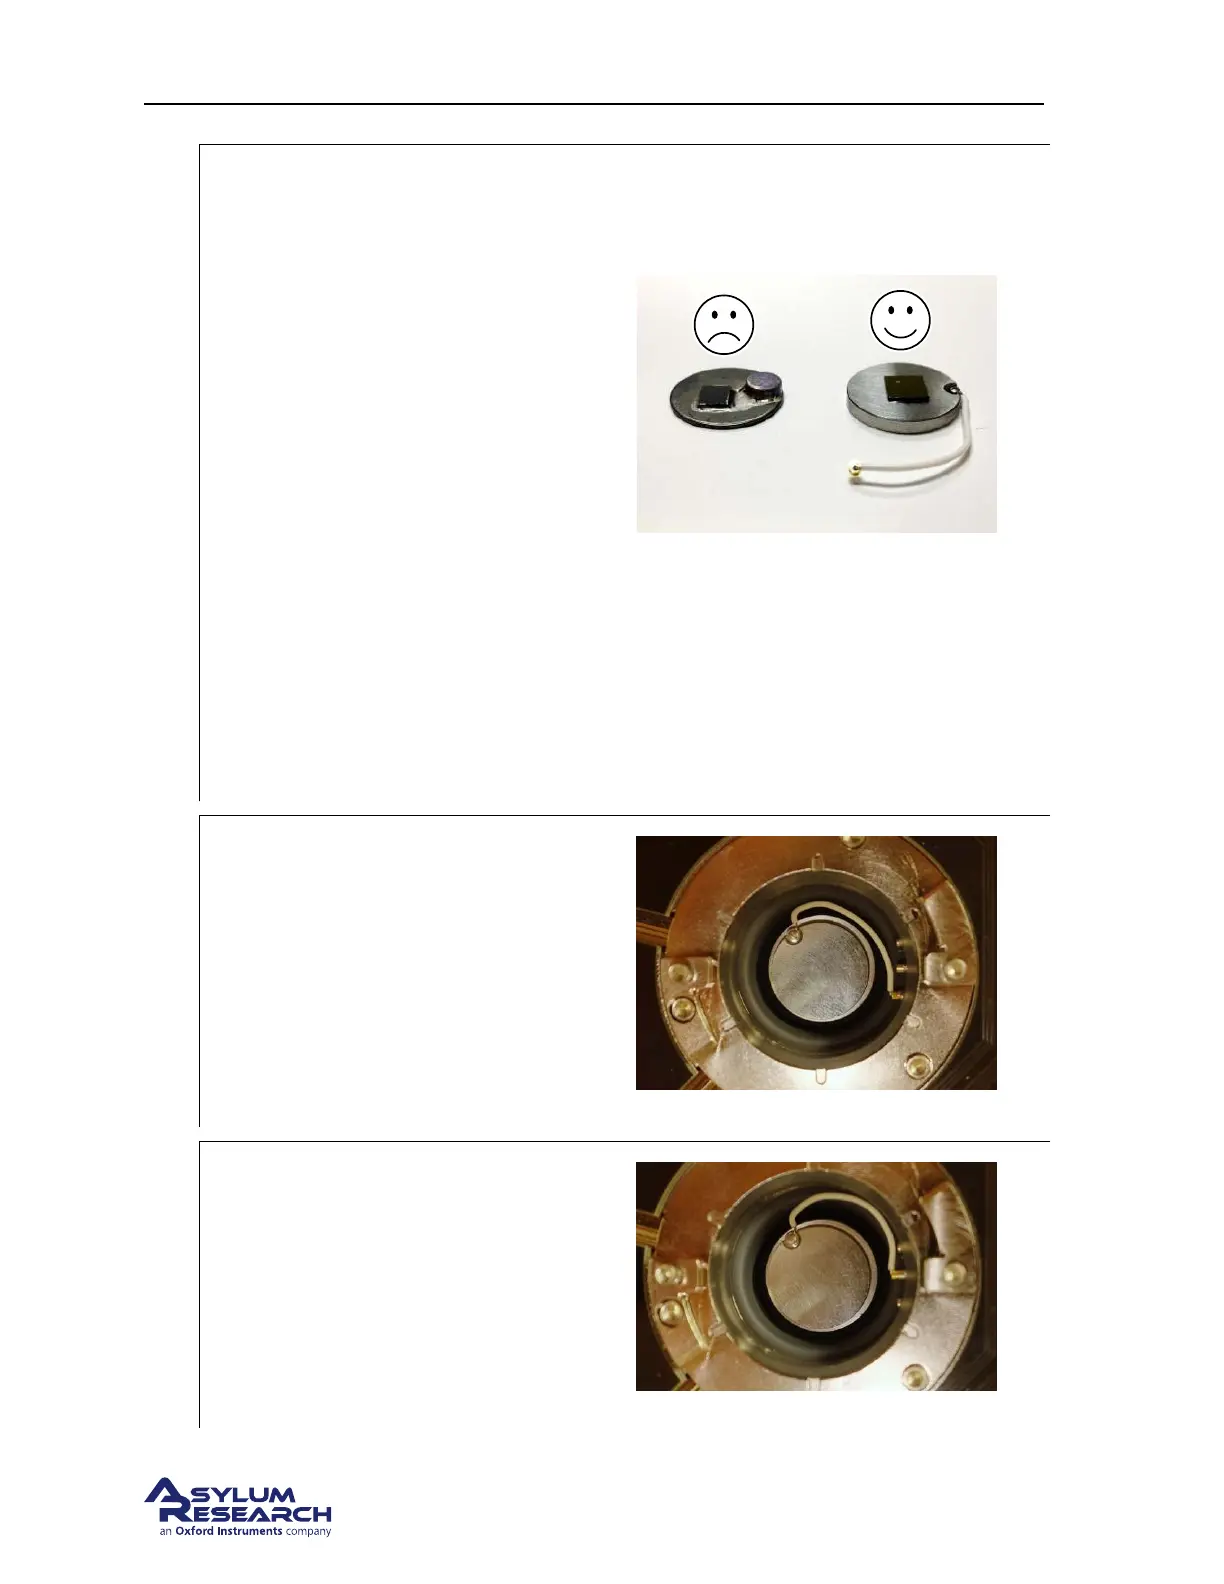
WARNING: Never load “non-flat” samples
into the ES scanner.
• Unlike the S scanner, the ES scanner
cannot accept “non-flat” samples.
• A “non-flat” sample is any sample in
which the region to be scanned is not
the tallest feature on the sample puck.
For example, the sample shown shown
on the left has a magnet glued to the
puck that is taller than the sample.
• Given the low profile of the ES
cantilever holders, it would not be
possible to engage on the sample shown
shown on the left since the magnet
would hit the cantilever holder before
the cantilever engaged on the sample.
• For electrical measurements, use the
low-profile electrical sample puck (as
shown on the right) provided in the
accessory kit.
Warning: Pay attention! Attempting to start-
ing a tip approach on a “non-flat” sample may
cause serious damage to your cantilever holder
and/or sample stage.
3.
Sample BIAS Connection:
• Insert the sample puck as shown.
• Use blunt tipped tweezers to connect the
wire as shown: to the FRONT
connection. This applies a sample bias.
Note Lower the cell body to get more sample
access: see
Step 17 on page 136.
4.
Sample GROUND Connection:
• Insert the sample puck as shown.
• Use blunt tipped tweezers to connect the
wire as shown., to the MIDDLE
connection. This applies a sample bias.
Note Lower the cell body to get more sample
access: see
Step 17 on page 136.
DRAFT
Page 153