Ch. 7. iDrive Imaging Sec. 7.3. Older Models
using low-pressure compressed air or by blotting with a soft tissue.
For stringent cleaning, the iDrive cantilever holder must be disassembled. Only the parts exposed to the
sample liquid should be cleaned. The cantilever holder body and associated electronics should be kept
dry.
The cantilever holder clips, insulator plates, window assembly and evaporation skirt can be cleaned by
soaking in ethanol. Sonication of the parts can also be performed. Rinse the parts in clean de-ionized
water. Dry the parts with either low-pressure compressed air or a soft tissue before reassembling the
holder. please see
7.3.1.1
7.3.1.1. Disassembly
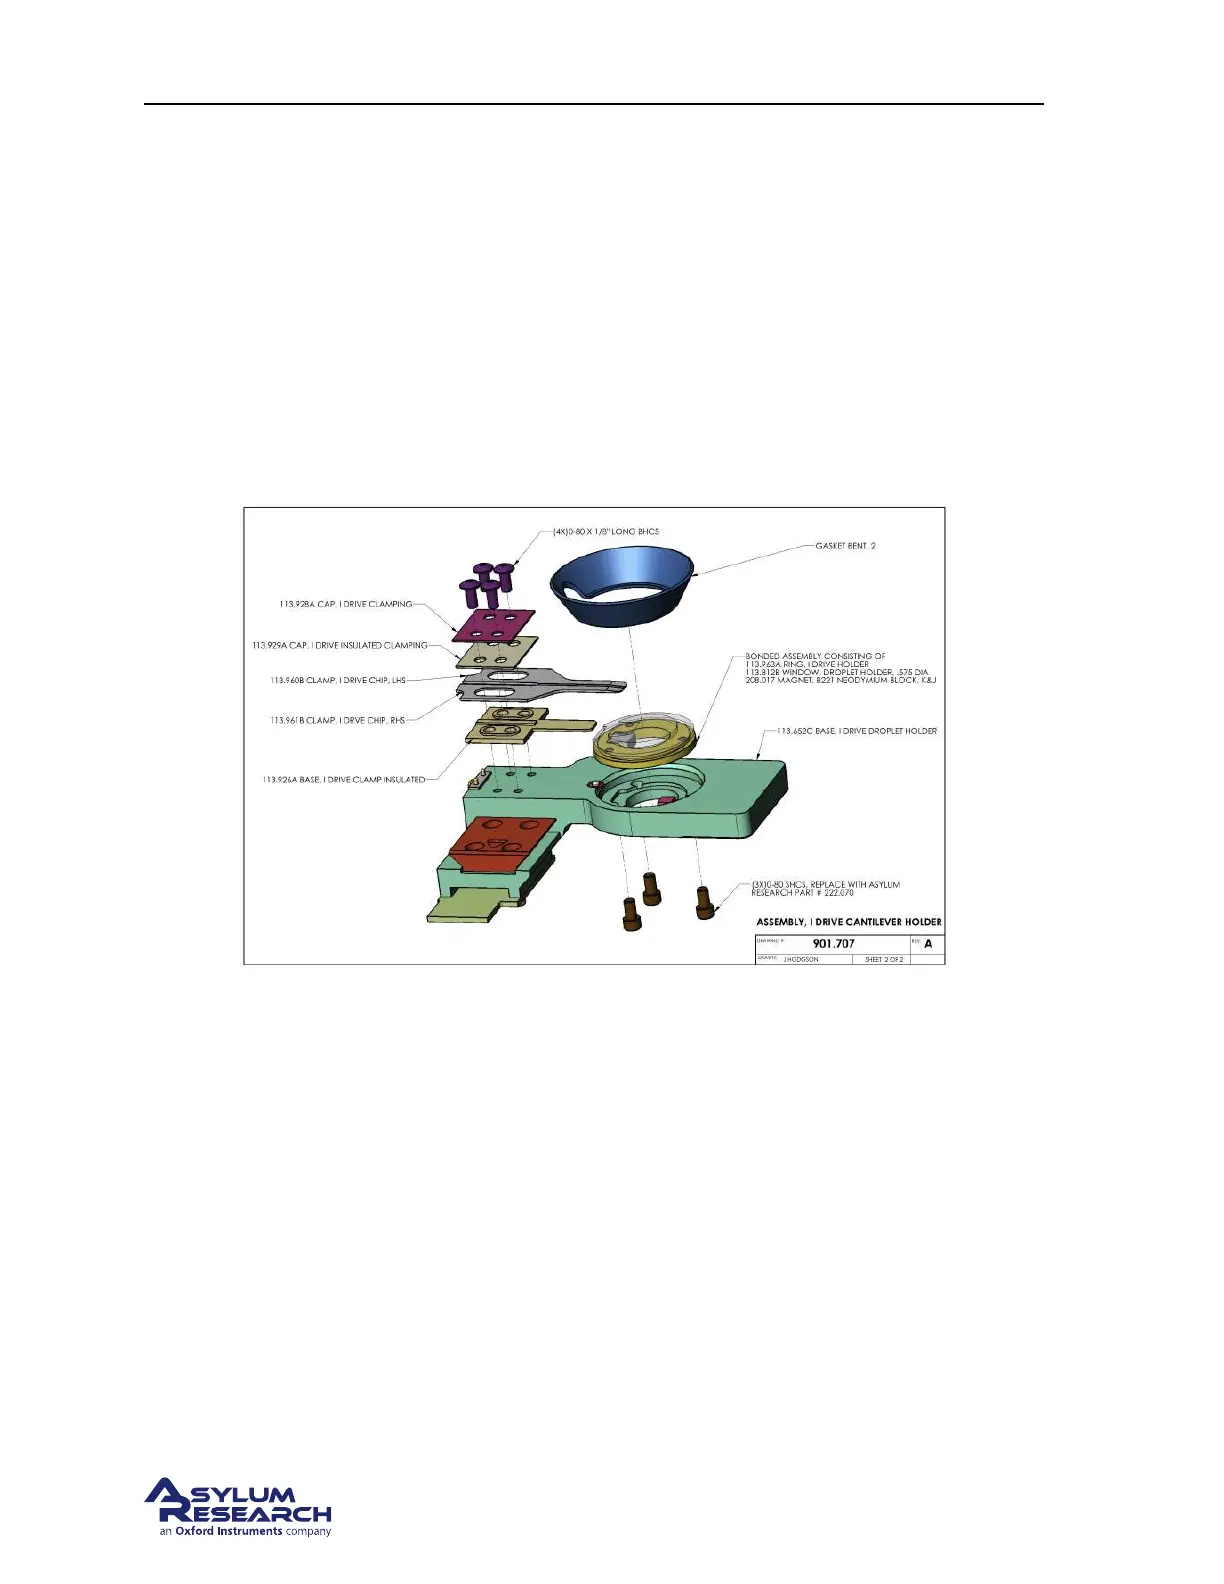
Figure 7.3.: Droplet Cantilever Holder Assembly Overview
The following steps will guide you through removing various components for cleaning as well as re-
assembling the holder afterward.
Before you disassemble the droplet holder, take the time to familiarize yourself with the way it is as-
sembled.
The key components are:
• The cantilever clip and the associated mounting (insulating) plates
• The droplet holder window assembly
• The piezo actuator for performing AC mode.
As you disassemble the holder, take note that the screws for attaching the window assembly are shorter
than the screws holding the cantilever clips. Reassembling the window with the longer screws can result
in damage to the glass by either cracking or causing it to become detached from the metal mounting
ring.
BETA
Page 84