9
Installation
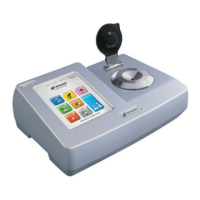
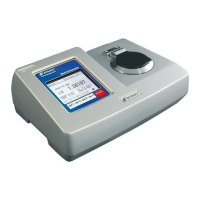
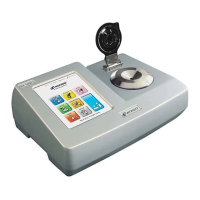
The RX-5000i-Plus / RX-5000i / RX-7000i / RX-9000i are a highly precision instrument.
1. Do not expose the instrument to an impact during installation.
2. Install the instrument in an environment that meets the criteria below:
An ambient temperature of 5 to 40℃
• No direct sun light
• Away from a heat source
No strong vibrations
• No dust or corrosive gas
• Flat surface
Powering on
1. Plug the AC power into an AC100 to 240V
(50Hz/60Hz) outlet and ensure the ground pin
is connected as well.
2. Turn the power on.
3. An opening image is displayed on the screen
for approximately 20 seconds, and then the
HOME screen below will appear.
※
The HOME screen will not appear automatically
if the system level (see the page 16- "
Levels") is set to "3." It requires the
administrator's password.
※ Once the instrument is turned off, wait for at
least 1 minute or more before turning it back
on. The instrument may malfunction if powered
on too soon.
※ The screen image may occasionally be
disrupted when the instrument is turned on. If
this happens, turn the power off and turn it on
again.
※
Touch the screen to skip the opening image, or
change the settings. (See the page 21
"System Information Settings")
Power on
※
When connecting to a printer, turn the power on
to the printer first.
 Loading...