Contact the Atlas Copco Customer Center/Dealer
in your area before removing the check valve.
◆
Clean the area around the shut-off valve on the
left side of the boom.
◆
Remove the end cap from the shut-off valve on
the boom and save for future use.
◆
Unscrew the end cap from the pressure line
and save for future use.
◆
Connect the pressure line to the shut-off valve
fitting of the supply line on the left side of the
boom.
◆
Clean the area around the shut-off valve on the
right side of the boom.
◆
Remove the end cap from the shut-off valve of
the boom and save for future use.
◆
Unscrew the end cap for the tank line and save
for future use.
◆
Connect the tank line to the shut-off valve fitting
of the return line on the right side of the boom.
Note: To transport leakage oil from the hydraulic
motor of the transverse drum cutter, use the
separate leakage oil line of the carrier. If a
separate leakage oil line is not available, it is
necessary to install one ( see chapter First
installation / Install separate leakage oil line).
Installation of a leakage oil line to drain oil to
tank is the responsibility of the operator.
NOTICE Environmental damage due to
hydraulic oil
Hydraulic oil is environmentally harmful and
must not penetrate the ground or enter the
water table or water supplies.
►
Collect any hydraulic oil which escapes.
►
Dispose of it in accordance with the
applicable environmental regulations.
◆
Position an oil receiver tank beneath the
leakage oil line of the transverse drum cutter.
◆
Use a funnel to fill up the leakage oil line with
hydraulic oil until it overflows.
◆
Connect the leakage oil hose from the
transverse drum cutter onto the separate
leakage oil line of the carrier's boom.
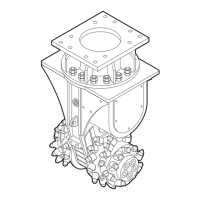
Mechanical mounting aspects
You need an assistant to attach the hydraulic
attachment to the carrier.
◆
Agree on hand signals with your assistant, to
enable him to help you placing the carrier in the
proper position to attach the hydraulic
attachment.
◆
Lower the stick of the carrier into the holder
provided on the adapter plate.
WARNING Injury by impacts
A sudden movement of the carrier may cause your
assistant to be hit and injured by the boom or the
hydraulic attachment.
►
Only move the boom very slowly and in a
controlled manner while an assistant is within
the danger zone.
►
Always keep sight of your assistant.
WARNING Hands and fingers being cut off
or hurt
Bores and surfaces can act like a pair of scissors
and cut off or hurt parts of your body.
►
Never use your fingers to check bores or fitting
surfaces.
◆
Let your assistant instruct you until the bores in
the adapter plate (B) and in the stick (A) are
properly aligned.
◆
Install the stick bolt (C) and lock it.
 Loading...