◆
Extend the bucket cylinder (E) until the bore in
the linkage (F) links up with the bore in the
adapter plate (B).
◆
Install the linkage bolt (G) and lock it.
◆
Carefully move the bucket cylinder (E) into both
end positions.
The adapter plate must not be stopped by
mechanical stops in either position. Consult the
Atlas Copco Customer Center/Dealer in your area
if the adapter plate is stopped by a mechanical
stop.
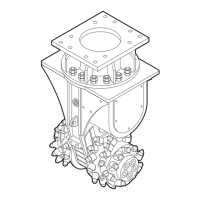
Removing the hydraulic
attachment from the carrier
◆
You need an assistant to remove the hydraulic
attachment.
◆
Agree on hand signals with your assistant, to
enable him to help you move the boom.
WARNING Injury by impacts
A sudden movement of the carrier may cause your
assistant to be hit and injured by the boom or the
hydraulic attachment.
►
Only move the boom very slowly and in a
controlled manner while an assistant is within
the danger zone.
►
Always keep sight of your assistant.
◆
Put out the assembly stand within reach of the
boom.
WARNING Unexpected movement
Sudden movements of the carrier may cause
serious injury.
►
Secure the carrier such that it cannot move
unexpectedly.
►
Observe the carrier manufacturer’s instructions.
WARNING Hydraulic hose flailing about
Pressurised hydraulic hoses will flail about when
bolted connections have come loose or have been
loosened. A hydraulic hose flailing about may
cause serious injuries.
►
Depressurise the hydraulic system before
disconnecting a hydraulic hose (see chapter
Depressurising the hydraulic system).
WARNING Hot parts
The cutter drums, hoses, pipes and fittings
become very hot during operation. Touching them
may lead to burns.
►
Never touch hot parts.
►
If you have to carry out activities where you
have to touch the parts, wait for them to cool
down first.
Safety and operating instructions DC 200, 400, 600, 1000, 1200, 2000, 2100, 2900
30 © Construction Tools GmbH | 3390 5192 01 | 2016-12-01
Original instructions
 Loading...