Connecting the USB Cable
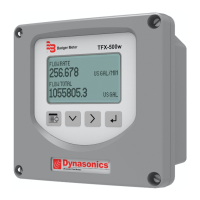
Use a USB cable when connecting a TFX-5000 meter to a computer with SoloCUE Flow Device Manager software.
WARNING
DO NOT USE THE MINI USB PORT IN A HAZARDOUS LOCATION WHERE EXPLOSIVE GAS OR DUST IS PRESENT.
DO NOT OPEN THE TRANSMITTER WHILE POWERED IF WATER OR SPRAY COULD CONTACT ELECTRONICS OR INTERIOR.
1. Open the enclosure cover.
2. Connect the USB cable to the mini USB port, aligning the pins in the cable with the holes in the port.
3. Program the transmitter.
4. Remove the USB cable and close the enclosure cover.
Initial Meter Setup
You can set up the meter using the TFX-5000 keypad or the SoloCUE Flow Device Manager software. This document addresses
procedures using the TFX-5000 keypad. To use SoloCUE, see the "SoloCUE Flow Device Manager Installation Guide" available at
www.badgermeter.com.
For in-depth parameter programming, see “Parameter Descriptions by Menu” on page23.
1. Program the meter settings:
When using the keypad to set up the TFX-5000 meter to measure ow, press MENU/BACK to enter the main menu. In the
SETUP > METER menu, enter the pipe characteristics, transducer, mounting and uid, and record the calculated spacing as
needed. Install transducer.See the transducer user manual for instructions.
2. Check calibration:
In the SETUP > METER > CALIBRATION menu, select Field for the Factor Mode. Enter the calibration and sensor factors from
the transducers into the scale factor and sensor factor value..
3. Zero the meter:
Due to different pipe characteristics, the meter must be zeroed in order to maintain accuracy. The recommended method
is to stop flow and make sure there is no flow before zeroing the meter. In situations in which that is not feasible, you may
zero the meter while the flow is steady or enter the zero manually. Based on ZERO MODE, the SET ZERO option will be
selectable.
a. If ZERO MODE is set to NO FLOW:
Check that the pipe is full of liquid and not flowing. Flow must be absolutely zero.
Securely close any valves and allow time for settling to occur.
Select SET ZERO-NO FLOW and click OK to set the new zero.
b. If ZERO MODE is set to STEADY FLOW:
Check that the pipe is full of liquid and flowing at a steady rate.
Select SET ZERO-FLOW and click OK to set the new zero.
4. Select temperature sensor (energy models only):
In the SETUP > INPUTS/OUTPUT > RTD menu, select the temperature sensor type, range and order for positive and negative
energy calculations.
5. Select units:
In the SETUP > UNITS menu, select the units and format of flow rate, total and velocity, and for energy meters the energy
rate, energy total and temperature.
6. Set up the flow settings:
In the SETUP > METER > FLOW SETUP menu, select flow direction, low and maximum flow cutoff, and minimum and
maximum signal strength.
Menu Map
Page 21 October 2019 TTM-UM-02222-EN-04

 Loading...