56-101-01175 Revision H Page | 52
10. TEST SET LEAK TEST
Each Test Set is completely calibrated and tested before shipment. However, to ensure the
integrity of the sensitive tests to be made, the pretests included in this section should be
performed immediately before each use of the DPS1000.
A. Preliminary setup
1. Ensure hoses are connected to the PITOT (Pt) port and STATIC (Ps) port of the Test
Set. If the connectors on the aircraft end of the hoses are not quick disconnects or
self-sealing, then a tight sealing plug should be used to seal the hose assembly.
This is necessary to test the hose leakage as well as the tester. If a sealing plug is
not available, then leak test the DPS1000 without connecting the hoses.
2. Connect the Test Set power cord, the STATIC (blue) hose and PITOT (red) hose to
the Test Set if not already connected.
Note: The quick connect ports on the Test Set and mating hoses are color-coded
and keyed to help prevent the accidental crossing of Pitot and Static hoses.
3. Set the POWER switch to ON.
Allow the initialization to complete.
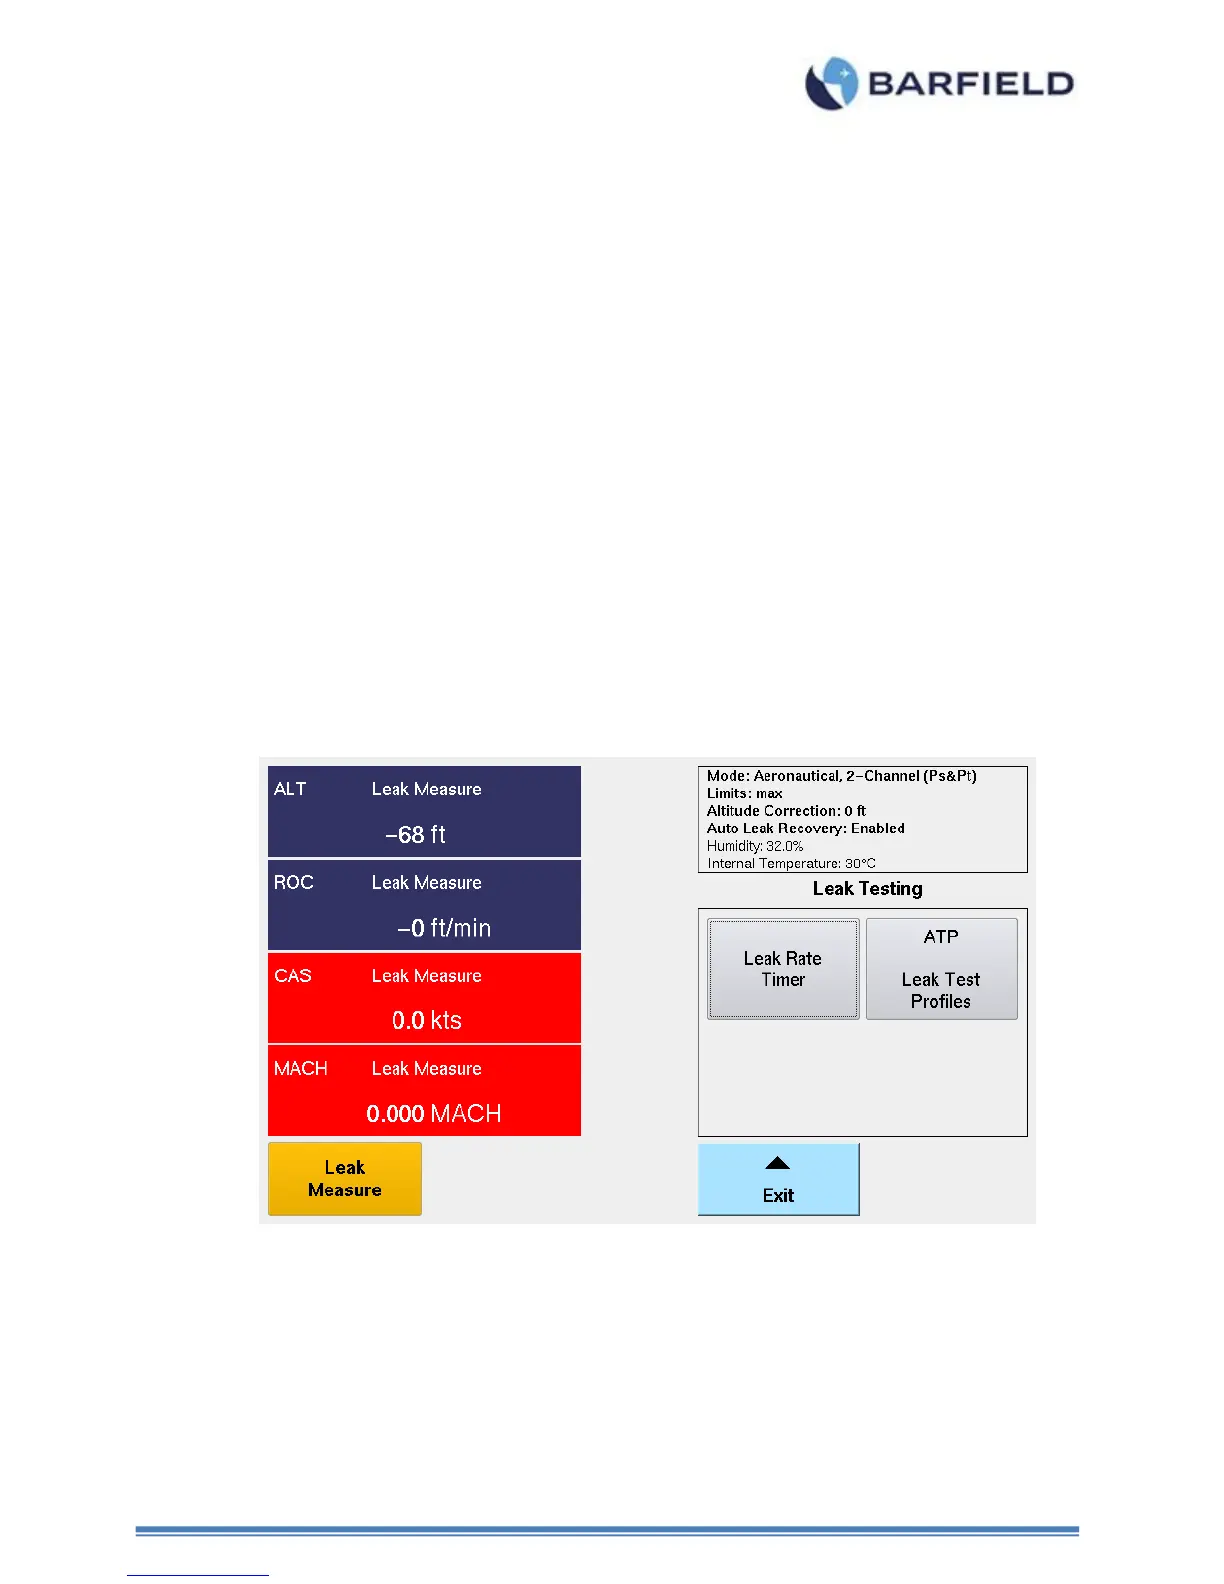
Select “Leak Testing”.
Figure 48 Leak Testing Menu(s)
4. Leak Testing: there are two methods available to perform Leak Testing using the
DPS1000:
a) Method-(1) Leak Rate Timer: this traditional method uses the Leak Rate Timer
where the user first establishes a given CAS and ALT and uses the Leak Rate
Timer to measure the Leak Rate.
b) Method-(2) ATP Leak Test: the DPS1000 has an automated feature called
ATP Leak Test which allows the user to setup a profile ahead of time with the
following parameters: (see Figure 49 and Figure 50) This is much more
efficient since the user can select or create the profile and select RUN to execute