Installing the IP Module
!
Before installing the IP module, make sure the con
-
trol panel is NOT connected to the power supply.
The IP module can be installed in the metal ABS-M box
and in the ABS-P plastic one, as shown respectively in
Figures 2 on page 16 and in Figure 3 on page 17 (part
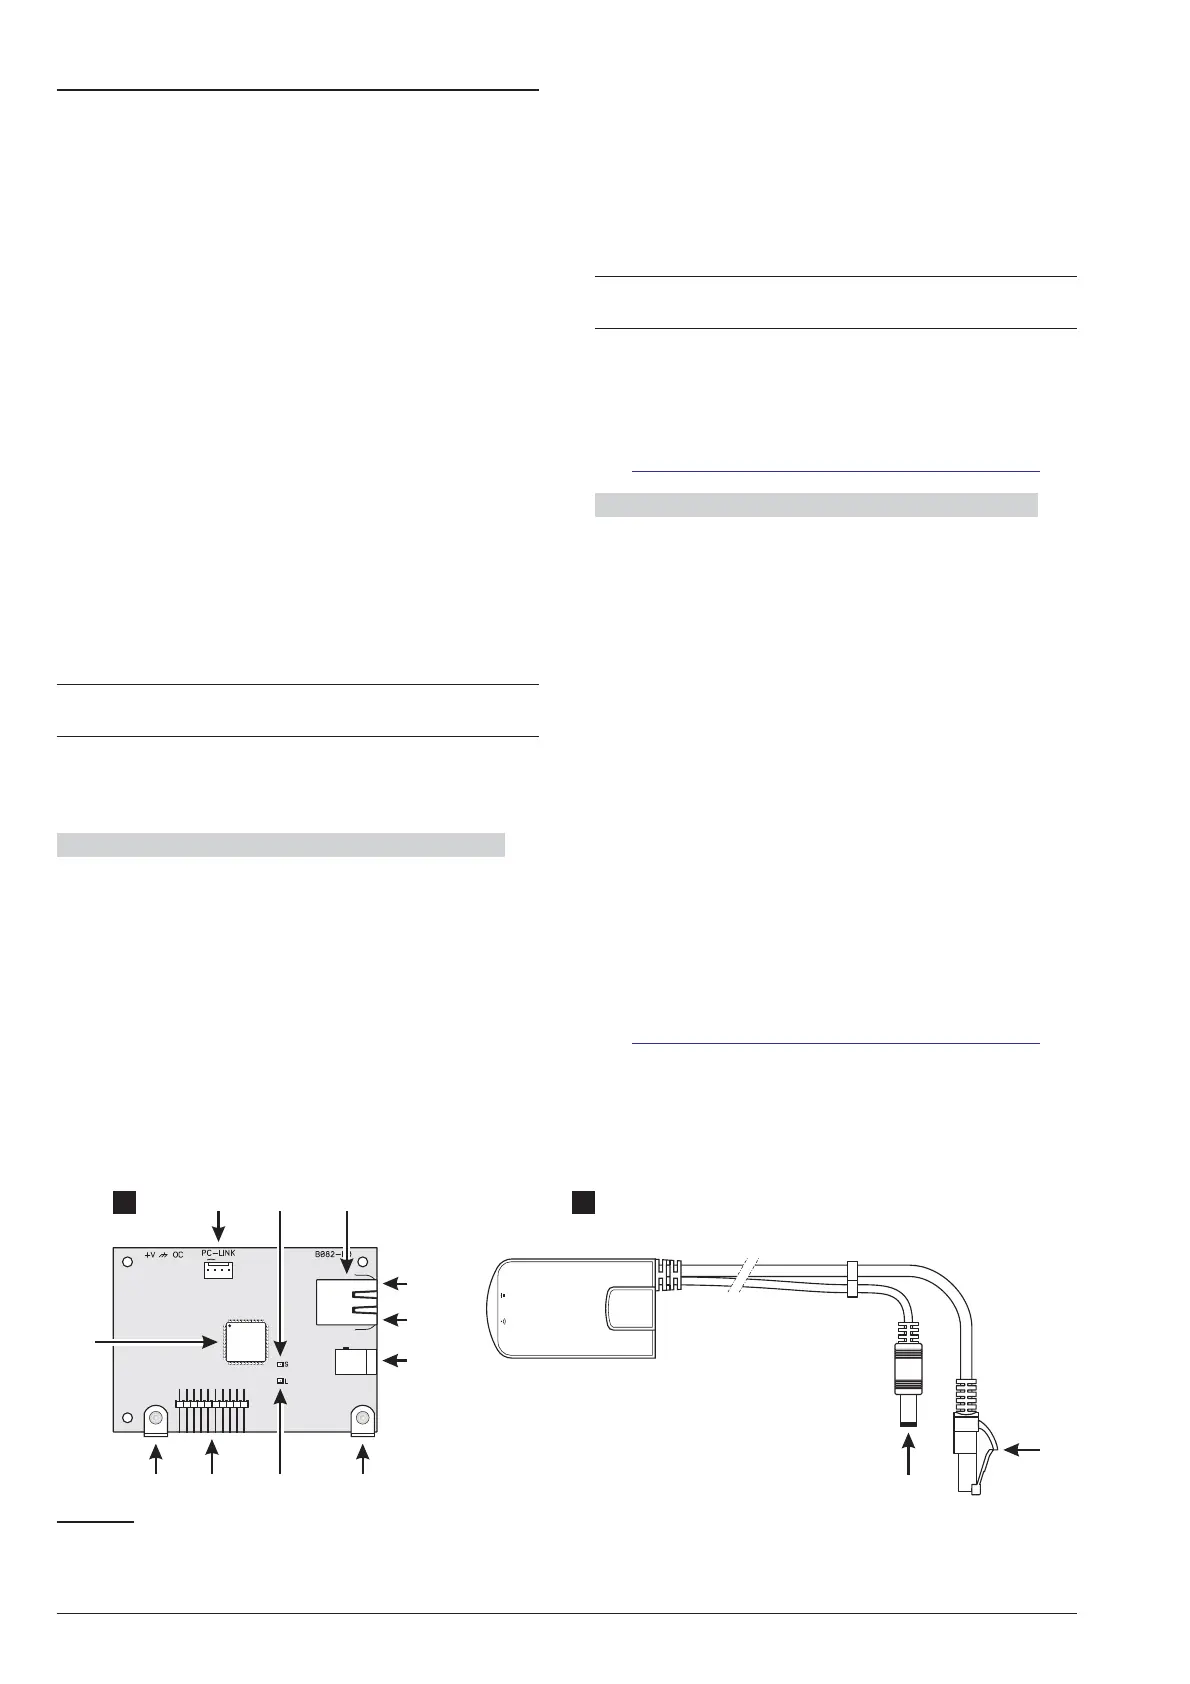
no. 24b) and described below (see Figure 1 on page 15
and Figure 7).
1. Insert the IP module to the connector 6 (TCP-IP),
making sure that the holes in the angular brackets
110 on the Module coincide with the holes 5 on the
motherboard.
!
The IP Module may be severely damaged if not
properly inserted.
2. Secure the IP module to the holes 5, using the
screws provided.
3. Connect connector 106 to the LAN via an Ethernet
cable, or refer to the next paragraph if you plan to
install the ABS-VAP11N WiFi bridge (not supplied).
+
Use a category 5 (or better) shielded Ethernet ca
-
ble (STP or FTP)
4. Program the options for the IP module: see
“PROGRAMMING FROM THE PC > IP”.
Installation of the ABS-VAP11N in the Metal Container To
install the ABS-VAP11N in the ABS-M metal box, pro-
ceed as described below (Figure 2 on page 16).
1. Pass connector 114 and connector 115 of
ABS-VAP11N through hole 43 in the bottom of the
control panel.
2. Connect connectors 114 and 115 of the
ABS-VAP11N connectors 106 and 109 of the IP
Module respectively.
!
DO NOT use the USB power supply adaptor
provided with the ABS-VAP11N to connect the
115 connector to the USB port on the Control
Panel (22).
3. Fix the ABS-VAP11N to top of the control panel
container using the double-sided adhesive, in the
position shown in Figure 2 on page 16.
+
DO NOT place the ABS-VAP11N inside the metal
container of the control panel.
4. Configure the ABS-VAP11N as indicated in the in
-
structions, which can be downloaded from the fol
-
lowing page:
http://vonets.com/ProductViews.asp?D_ID=24
Installation of the ABS-VAP11N in a Plastic Container
To install the ABS-VAP11N in the ABS-P plastic con
-
tainer, proceed as described below (Figure 3 on
page 17).
1. Connect connectors 114 and 115 of the
ABS-VAP11N to connectors 106 and 109 of the IP
Module respectively.
!
DO NOT use the USB power supply adaptor
provided with the ABS-VAP11N to connect the
115 connector to the USB port on the Control
Panel (22).
2. Run the ABS-VAP11N cables to the hooks 61 and
62, and fix using cable ties.
3. Configure the ABS-VAP11N as indicated in the in-
structions, which can be downloaded from the fol
-
lowing page:
http://vonets.com/ProductViews.asp?D_ID=24
ABSOLUTA MOUNTING THE COMPONENTS 23
110
104
113
112 111 110
109
107
114
115
a
b
105 106
108
Figure 7 Parts of the ABS-IP Module (a) and the ABS-VAP11N WiFi Bridge (b).



 To Next Page