Section 3 Installation
27
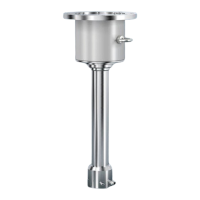
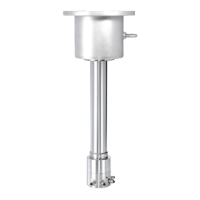
B) Mounting the Detector
Co or Cs measuring frames
□ Dismantle the mounting set enclosed with the instru-
ment.
□ Fix the detector to the holding plate using the clamps
and the hexagon head cap screws.
□ Fix holding plate using the two fastening bows in the
center of the top part of the measuring frame. The win-
dow of the detector head must face the source and be
located vertically above the source. The window is ad-
justed correctly if it is in the dead center of the measur-
ing frame.
Americium measuring frame
□ The detector is fixed to the Americium measuring frame
using the clamping device attached to the centerpiece.
□ The detector is installed properly if it extends about
75 mm beyond the frame measured from the lower edge
of the centerpiece.
□ Readjust the detector after you have connected and
turned on the evaluation unit and opened the radiation
exit channel: The highest count rate is displayed in the
correct position (see section Re-adjusting the Detector).
3.2.2 Measuring Frames on Screw Conveyors
The same instructions apply for the installation of measuring frame
and detector on a screw conveyor.
The measuring frame should be installed in a location where the
material in the screw conveyor flows smoothly. This means that
the conveyor material in the screw conveyor must not fall back be-
hind the screw shaft, as otherwise the material speed cannot be
measured accurately. The material flow can be optimized by in-
creasing the conveyor throughput speed.