9E-926 60 SmartControl™ Meter & TouchPoint™
Operation Instructions
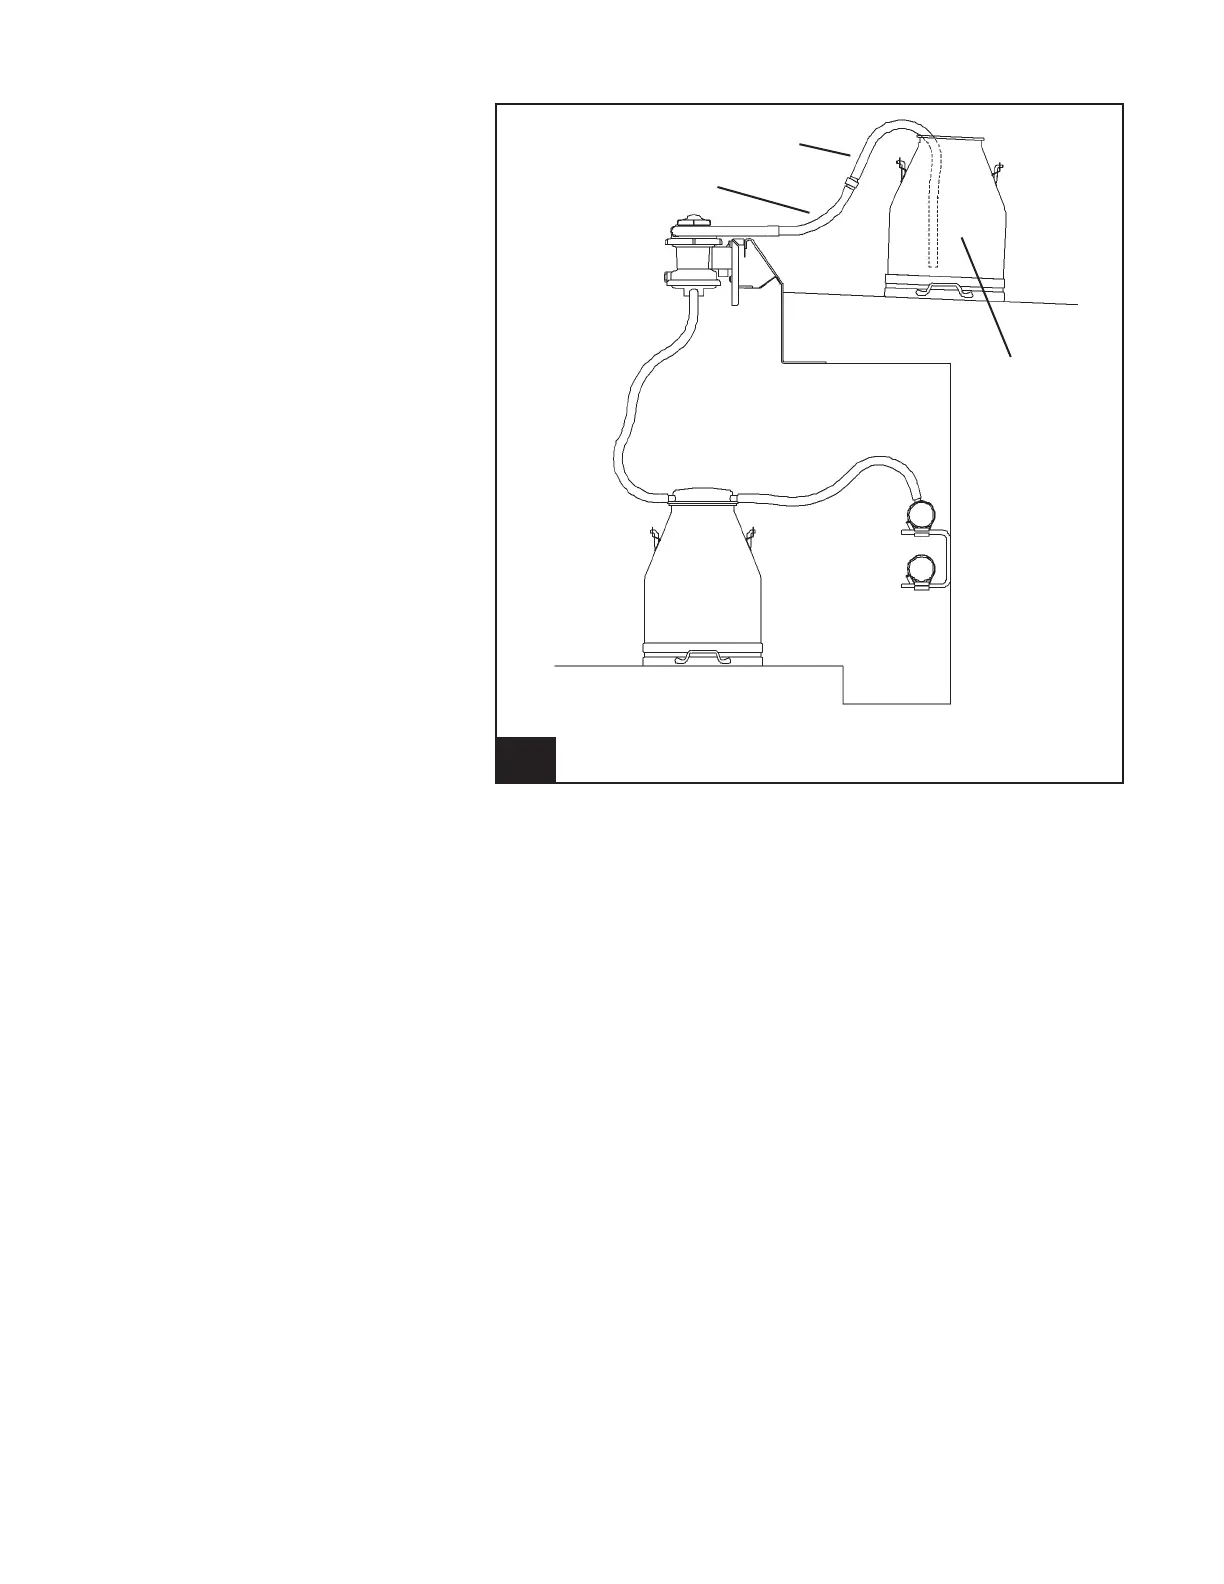
5. Position the bucket so that its bottom is not more than 12
inches above or below the meter inlet. (See the location in
Figure 31.)
6. Measure and pour 12 liters of 70°F ± 10°F (21°C ± 5°C)
water into the bucket using the four-liter ask.
7. Turn on the vacuum supply and ensure that it is set to 12.5
to 13.5" mercury (Hg) (42-46 kPa) of vacuum.
8. Reset the electronic control to display 0.0 lb. (0.0 kg) and
ensure that the control is set to Attach mode.
9. Place the loose end of the hanging hose in a 5-gallon buck-
et, and allow the water to be drawn into the meter.
10. When all water is drawn from the bucket (and the detacher
has detached) the control should display the value shown
in Table 9. For example, if the System Adjustment Factor
(SAF) was set at 0 %, the water test value is 26.5 ± 0.6 lb.
(12.0 ± .3 Kg). If the SAF is set at other values, the water
test results should match the values shown across from
that SAF value in the table. If the value is not within toler-
ance, rinse the meter and repeat the test until two read-
ings are within 0.2 lb. (0.1 Kg) of each other. The average
of these must be compatible with the above value. Replace
the plunger seal and repeat the test procedure if no proper
reading is attained.
—NOTICE———————
Water in the bucket must be main-
tained at the temperature noted in
step 6 throughout the entire test.
31. Accuracy test setup l926_3
Bucket/Pail
Milk Hose
Test Orrice